DCV Visualization Queue 🖥
Note: this has been turned into an AWS Blog! 🚀 Check it out: Elastic DCV Queues with NICE DCV
DCV Visualization Queue
When DCV is enabled, the default behaviour of AWS ParallelCluster is to run a single DCV session on the head node, this is a quick and easy way to visualize the results of your simulations or run a desktop application such as StarCCM+.
A common ask is to run DCV sessions on a compute queue instead of the head node. This has several advantages, namely:
- Run multiple sessions on the same instance (possibly with different users per-session)
- Run a smaller head node and only spin up more-expensive DCV instances when needed. We set a 12 hr timer below that automatically kills sessions after we leave.
Setup
- Create a security group that allows you to connect to the compute nodes on port
8443. We’ll use this below in the AdditionalSecurityGroups section for that queue.
- Go to EC2 Security Group Create
- Name: DCV
- Add an Ingress rule,
Custom TCP,Port 8443,0.0.0.0/0

- Create a cluster with a queue
dcvwith instance typeg4dn.xlarge.
The g4dn.xlarge is ideal for our remote desktop use case, it has 1 Nvidia T4, 4 vcpus, and 16 GB memory. Given the number of vcpus, we can start up to 4 sessions on it.
Region: us-east-1
Image:
  Os: alinux2
HeadNode:
  InstanceType: t2.micro
  Networking:
    SubnetId: subnet-123456789
  Ssh:
    KeyName: blah
  Iam:
    AdditionalIamPolicies:
      - Policy: arn:aws:iam::aws:policy/AmazonSSMManagedInstanceCore
Scheduling:
  Scheduler: slurm
  SlurmQueues:
    - Name: dcv
      ComputeResources:
        - Name: dcv-g4dnxlarge
          InstanceType: g4dn.xlarge
          MinCount: 0
          MaxCount: 4
      Networking:
        SubnetIds:
          - subnet-123456789
        AdditionalSecurityGroups:
          - sg-031b9cd973e8f62b0 # security group you created above
      Iam:
        AdditionalIamPolicies:
          - Policy: arn:aws:iam::aws:policy/AmazonSSMManagedInstanceCore
        S3Access:
          - BucketName: dcv-license.us-east-2 # needed for license access
- Create a file called
desktop.sbatchwith the following contents:
#!/bin/bash
#SBATCH -p dcv
#SBATCH -t 12:00:00
#SBATCH -J desktop
#SBATCH -o "%x-%j.out"

# magic command to disable lock screen
dbus-launch gsettings set org.gnome.desktop.session idle-delay 0 > /dev/null
# Set a password
password=$(openssl rand -base64 32)
echo $password | sudo passwd $USER --stdin > /dev/null
# start DCV server and create session
sudo systemctl start dcvserver
dcv create-session $SLURM_JOBID

# get instance ip address
token=$(curl -X PUT "http://169.254.169.254/latest/api/token" -H "X-aws-ec2-metadata-token-ttl-seconds: 21600")
ip=$(curl -H "X-aws-ec2-metadata-token: $token" -vhttp://169.254.169.254/latest/meta-data/public-ipv4)

printf "\e[32mClick the following URL to connect:\e[0m"
printf "\n=> \e[34mhttps://$ip:8443?username=$USER&password=$password&session-id=$SLURM_JOB_ID\e[0m\n"

while true; do
   sleep 1
done;
- Submit a job:
sbatch desktop.sbatch # note the job id
- Once the job starts running, check the file
cat desktop-[job-id].outfor connection details:

No-Ingress DCV
An alternative to the above approach where we opened up the Security Group to allow traffic from port 8443 is to create a Port Forwarding Session with AWS SSM. This allows us to lock down the Security Group and have no ingress.
-
Install Session Manager Plugin
-
Submit a job using the following submit script:
#!/bin/bash
#SBATCH -p desktop
#SBATCH -t 12:00:00
#SBATCH -J desktop
#SBATCH -o "%x-%j.out"

# magic command to disable lock screen
dbus-launch gsettings set org.gnome.desktop.session idle-delay 0 > /dev/null
# Set a password
password=$(openssl rand -base64 32)
echo $password | sudo passwd $USER --stdin > /dev/null
# start DCV server and create session
sudo systemctl start dcvserver
dcv create-session $SLURM_JOBID


# get instance id
token=$(curl -X PUT "http://169.254.169.254/latest/api/token" -H "X-aws-ec2-metadata-token-ttl-seconds: 21600")
ip=$(curl -H "X-aws-ec2-metadata-token: $token" -vhttp://169.254.169.254/latest/meta-data/instance-id)

printf "\e[32mFor a no-ingress cluster, you'll need to run the following command (on your local machine):\e[0m"
printf "\n=> \e[37m\taws ssm start-session --target $instance_id --document-name AWS-StartPortForwardingSession --parameters '{\"portNumber\":[\"8443\"],\"localPortNumber\":[\"8443\"]}'\e[0m\n"

printf "\n\n\e[32mThen click the following URL to connect:\e[0m"
printf "\n=> \e[34mhttps://localhost:8443?username=$USER&password=$password&session-id=$SLURM_JOB_ID\e[0m\n"

while true; do
   sleep 1
done;
- Run the output port forwarding command locally:

- Connect to the URL!
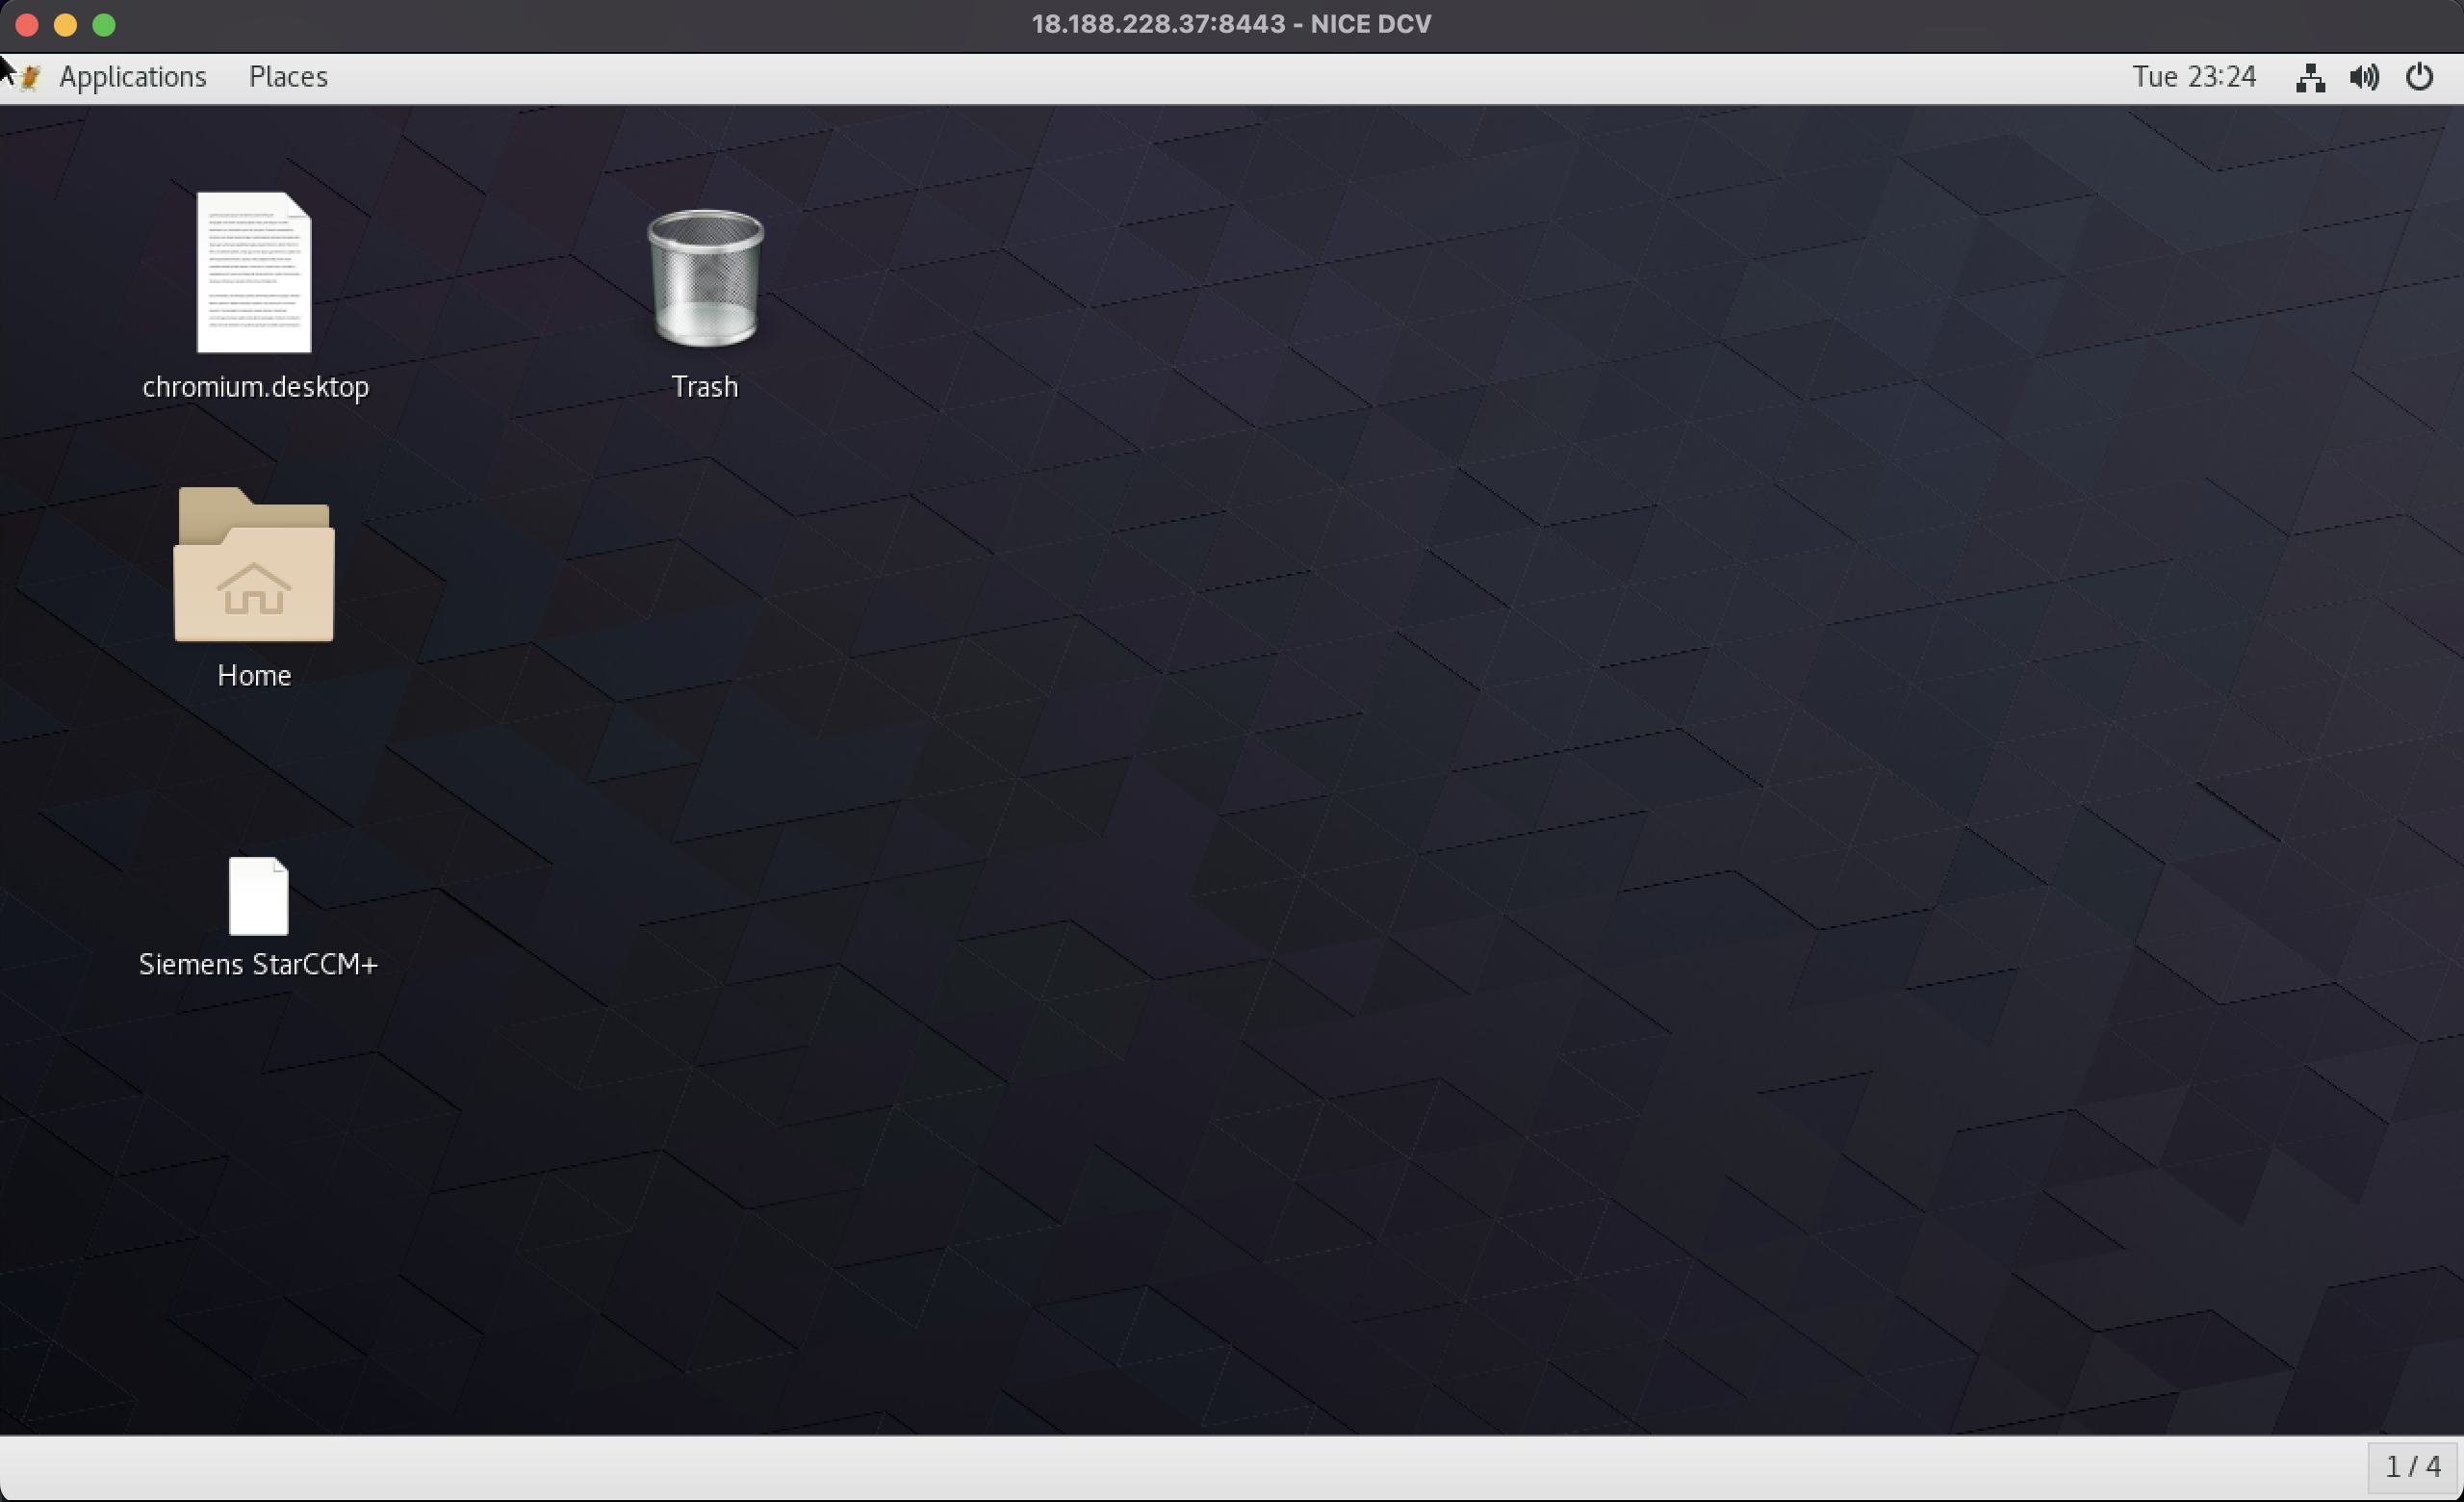
DCV Client
DCV provides a native client for MacOS, Windows and Linux. The client provides a better experience than the web client as it’s allowed to use more of the hardware without the browser limiting it.
- Download the client here.
- You’ll need two additional iam policies set in your DCV queue.
AWSCloudFormationReadOnlyAccessis used to descibe the bucket created with the cluster, andAmazonS3FullAccessis used to upload the connect file to that bucket. Simply modify the IAM section of your cluster with the following:
      Iam:
        AdditionalIamPolicies:
          - Policy: arn:aws:iam::aws:policy/AWSCloudFormationReadOnlyAccess
          - Policy: arn:aws:iam::aws:policy/AmazonS3FullAccess
- Run an update for those policies to take effect.
- Next create a file a file
desktop.sbatchwith the following content.
#!/bin/bash
#SBATCH -p dcv
#SBATCH -t 12:00:00
#SBATCH -J desktop
#SBATCH -o "%x-%j.out"

# magic command to disable lock screen
dbus-launch gsettings set org.gnome.desktop.session idle-delay 0 > /dev/null
# Set a password
password=$(openssl rand -base64 32)
echo $password | sudo passwd $USER --stdin > /dev/null
# start DCV server and create session
sudo systemctl start dcvserver
dcv create-session $SLURM_JOBID

# params
source /etc/parallelcluster/cfnconfig
# get instance ip address
token=$(curl -X PUT "http://169.254.169.254/latest/api/token" -H "X-aws-ec2-metadata-token-ttl-seconds: 21600")
ip=$(curl -H "X-aws-ec2-metadata-token: $token" -vhttp://169.254.169.254/latest/meta-data/public-ipv4)
port=8443
bucket=$(aws cloudformation describe-stacks --region $cfn_region --stack-name $stack_name --query "Stacks[0].Parameters[?ParameterKey=='ResourcesS3Bucket'].ParameterValue" --output text)

cat <<EOT > connect-$SLURM_JOB_ID.dcv
[version]
format=1.0

[connect]
host=$ip
port=$port
user=$USER
password=$password
sessionid=$SLURM_JOB_ID
EOT

aws s3 cp --region $cfn_region connect-$SLURM_JOB_ID.dcv s3://$bucket/
url=$(aws s3 presign --region $cfn_region s3://$bucket/connect-$SLURM_JOB_ID.dcv)
echo "$url"

printf "Connect using the DCV Client with the following file:\n"
printf "\e[34m=> %s \e[0m\n" "$url"

while true; do
   sleep 1
done;
- Once this runs you’ll see output like:

- Copy and paste the long url into the browser and you’ll download a session file. Double click on the session file to connect via the client.
Multiple Sessions Per-Instance
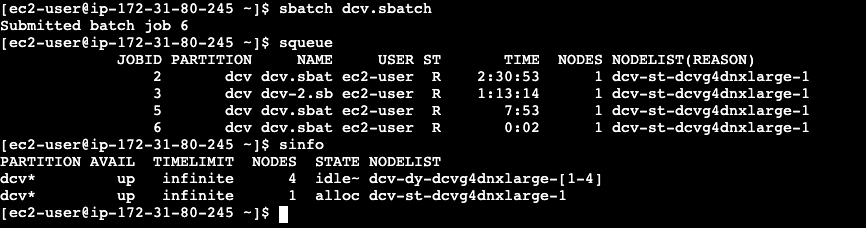
By default Slurm will schedule each session on 1 vcpu. This means that our g4dn.xlarge instance type can fit 4 sessions: