Setup FSx Lustre PERSISTENT_2 with AWS ParallelCluster 🗂️
tl;dr:
fast filesystem for hpc clusters
Overview
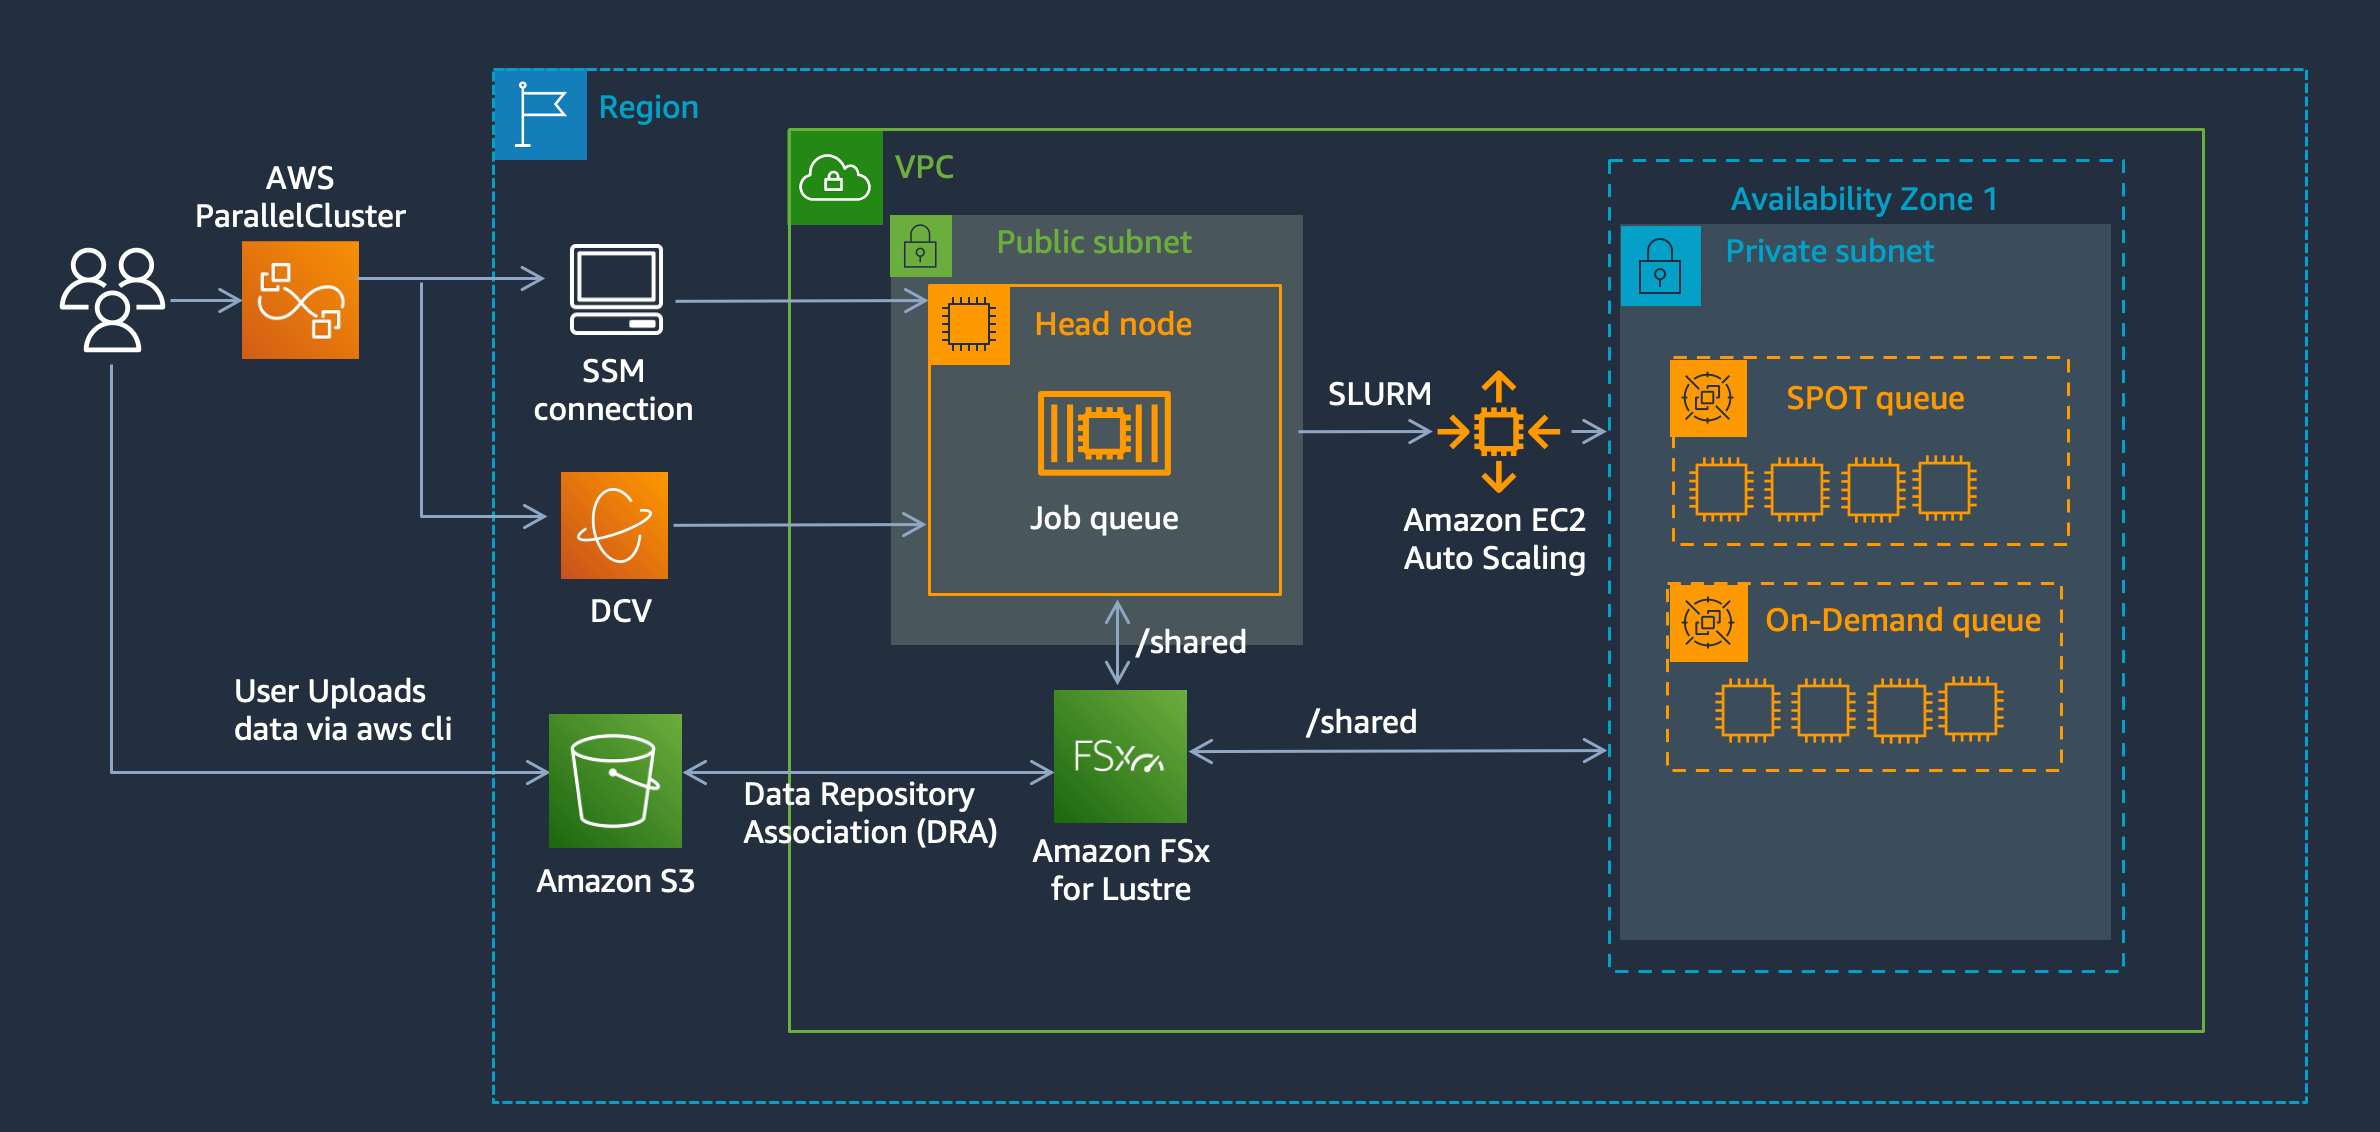
AWS ParallelCluster only supports PERSISTENT_1, SCRATCH_1 and SCRATCH_2 as filesystems created by the cluster, however to launch filesystems with PERSISTENT_2 (announced at re:Invent 2021), you can create the filesystem outside of pcluster and then mount in the config.
Why use PERSISTENT_2?
- 40% cheaper for the same throughput. See AWS FSx Lustre Pricing
- Link multiple S3 Buckets with the same Filesystem
- Link and de-link buckets after filesystem creation
Setup
From the AWS ParallelCluster docs we learn:
If using an existing file system, it must be associated to a security group that allows inbound TCP traffic to port 988.
So we’ll need to:
- Create the Security Group
- Create the filesystem & associate the security group
- Create a cluster that mounts the filesystem
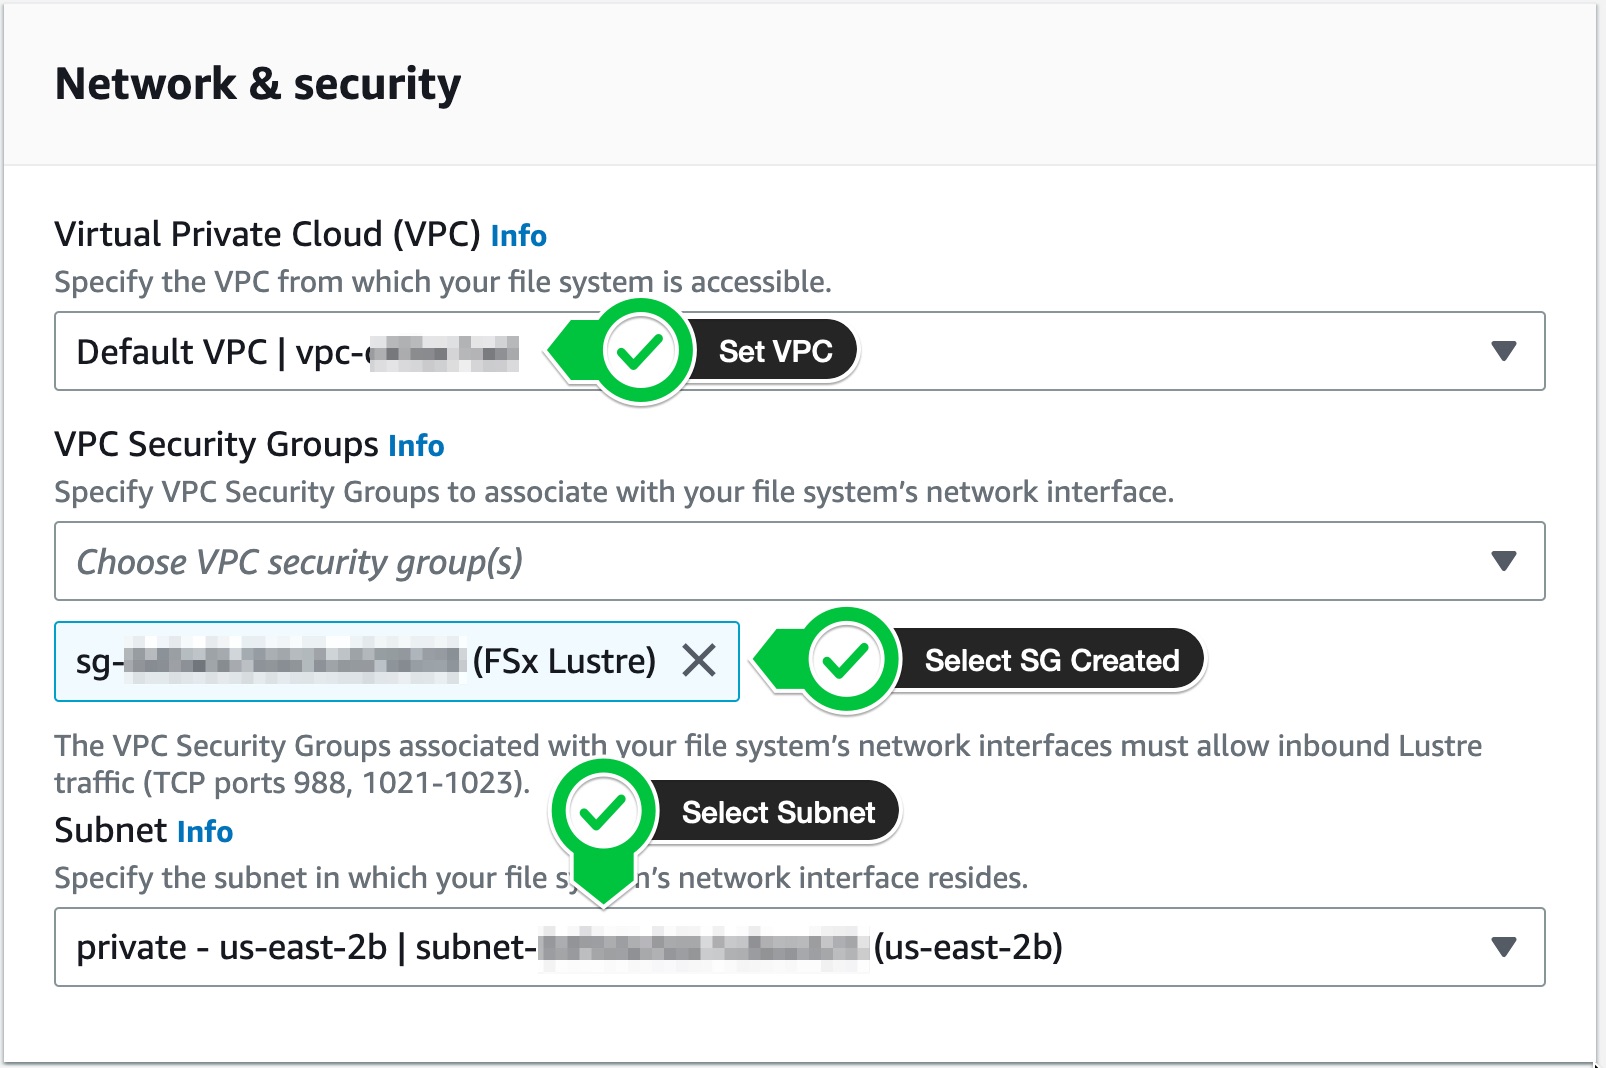
1. Create Security Group
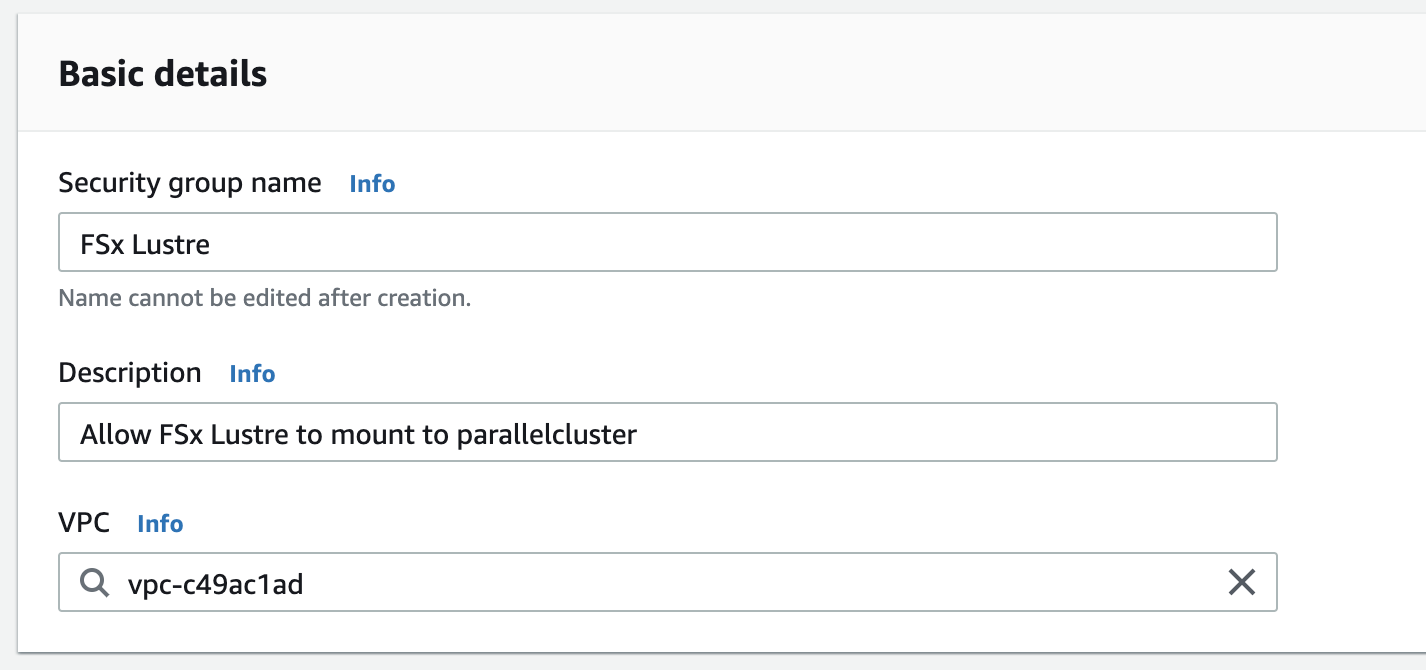
- Create a new Security Group by going to Security Groups > Create Security Group:
- Name
FSx Lustre - Description
Allow FSx Lustre to mount to ParallelCluster - VPC
Same as pcluster vpc
- Create a new Inbound Rule
- Custom TCP
- Port
988 - Same CIDR as the VPC
172.31.0.0/16
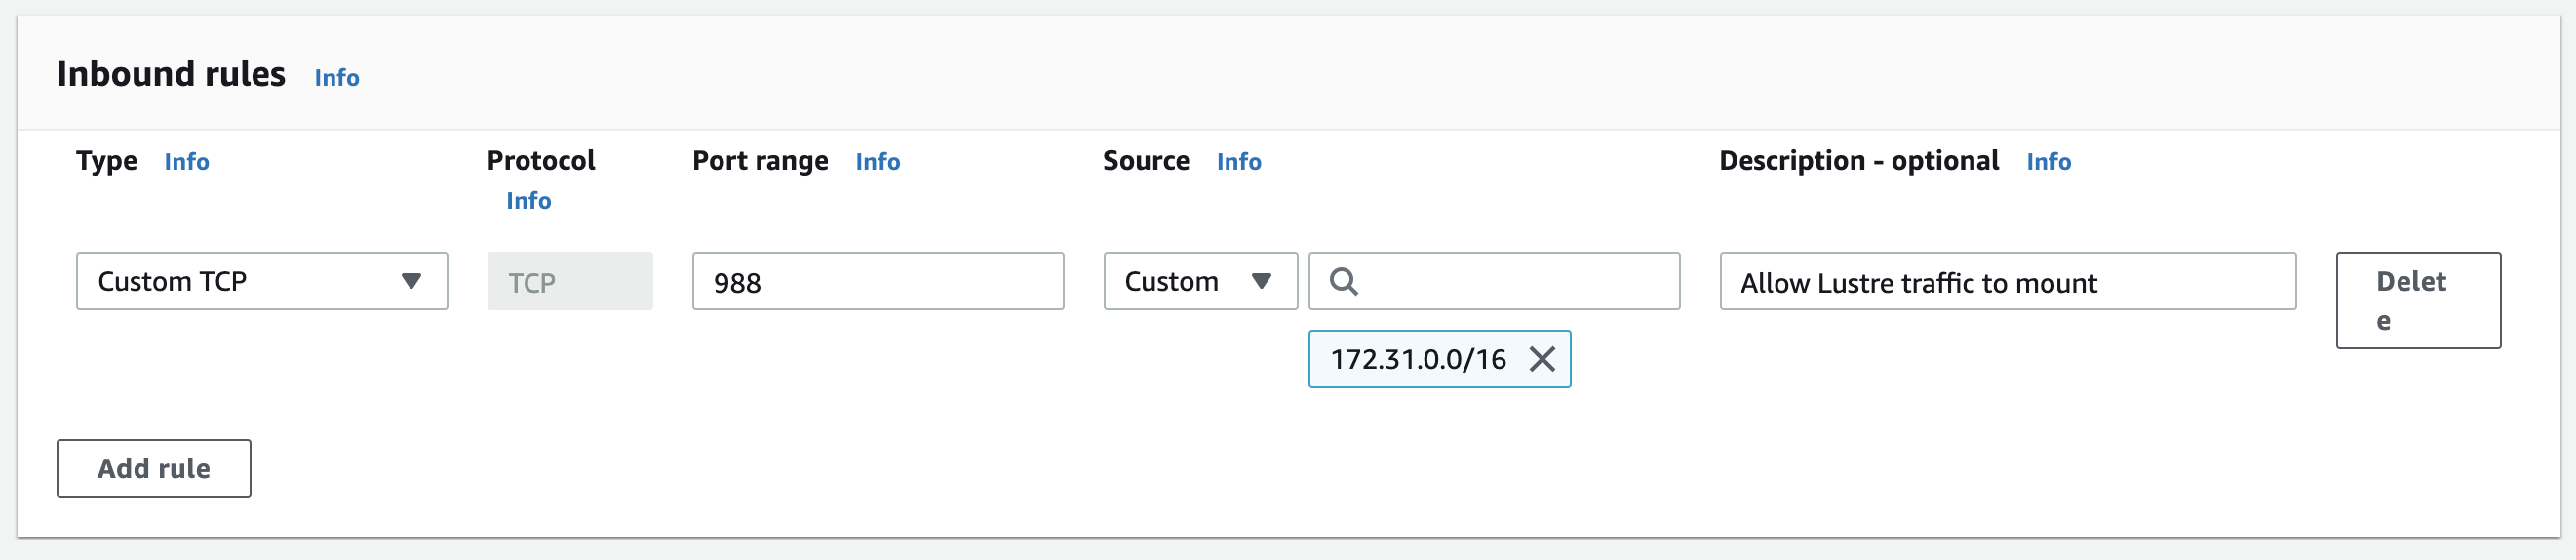
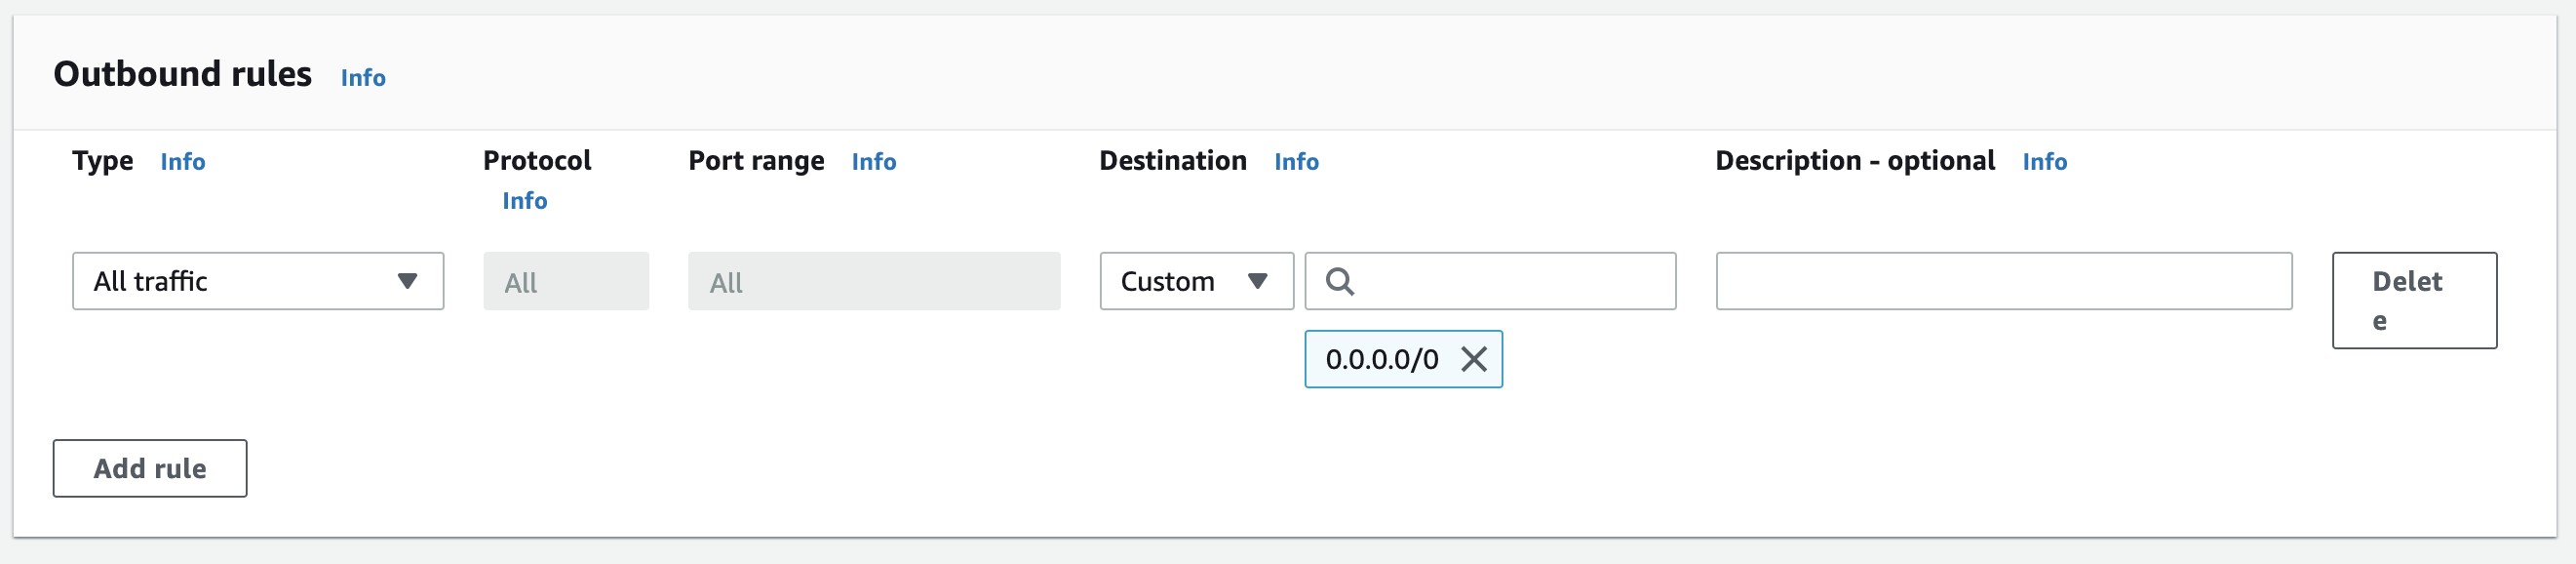
- Leave Outbound Rules as the default:
2. Create FSx Filesystem
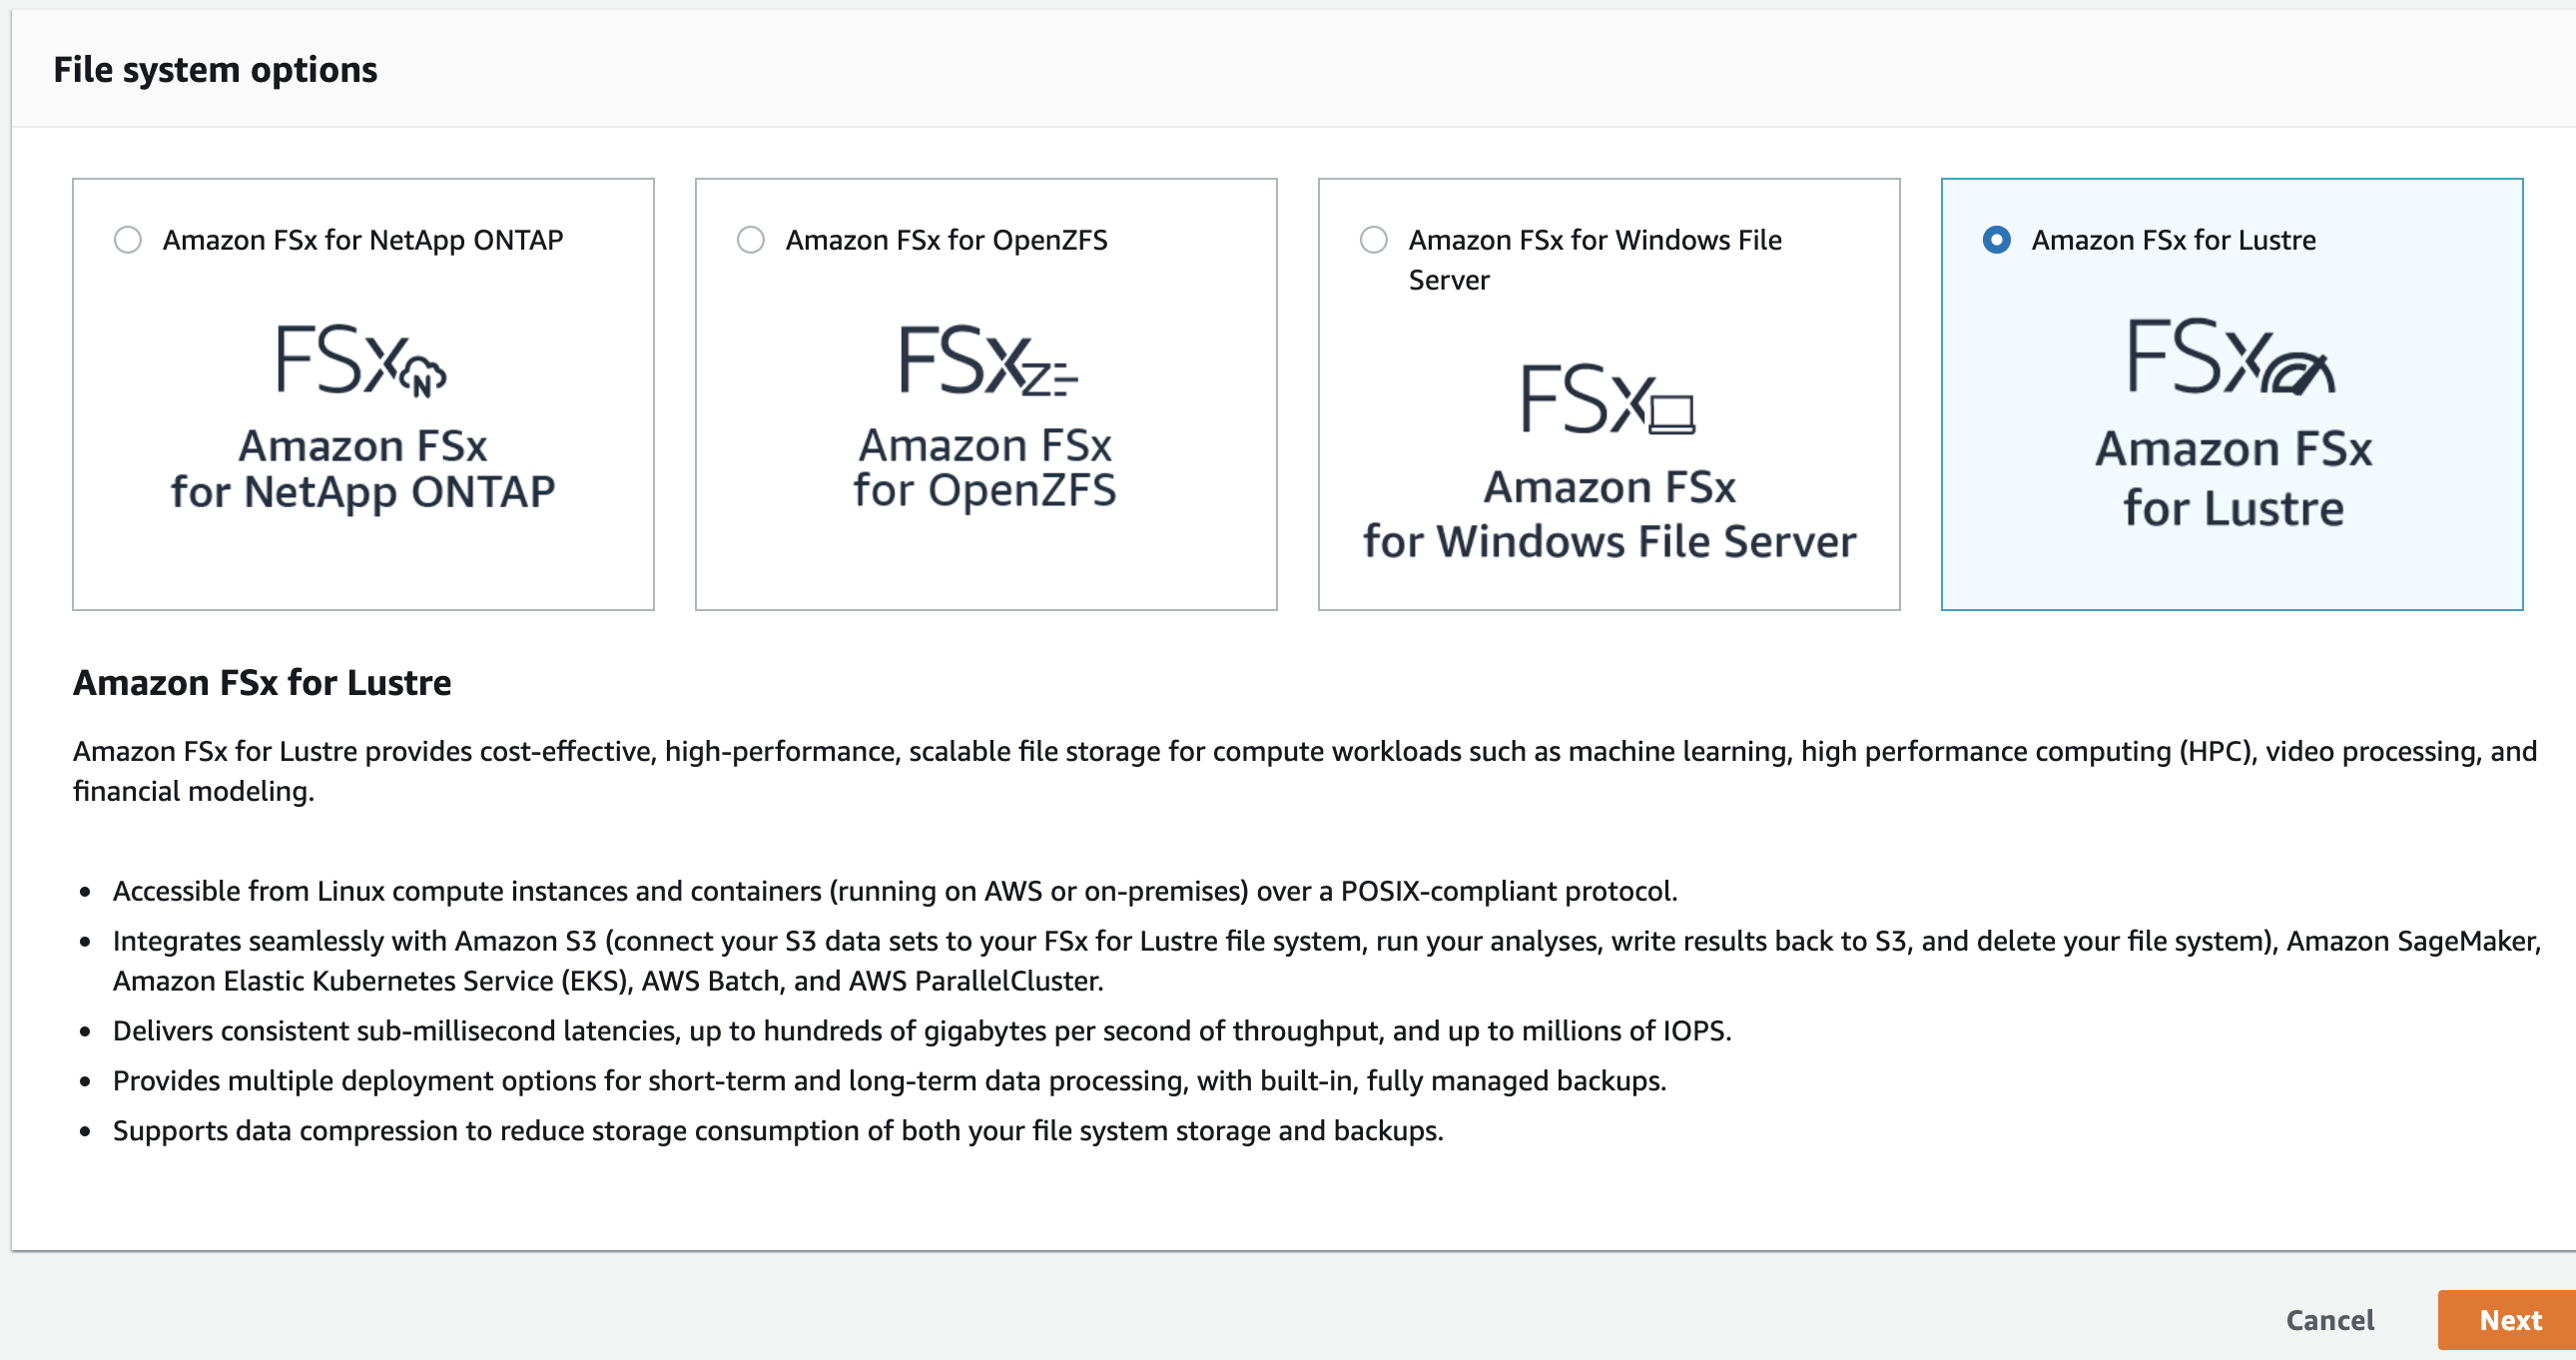
- Go to the FSx Lustre Console and click Create Filesystem.
- On the next screen, select FSx Lustre:
- On the next page, you’ll see an option for Persistent. This the new
PERSISTENT_2type, it’s simply called Persistent on the AWS console,PERSISTENT_2in the API to maintain backwards compatibility.
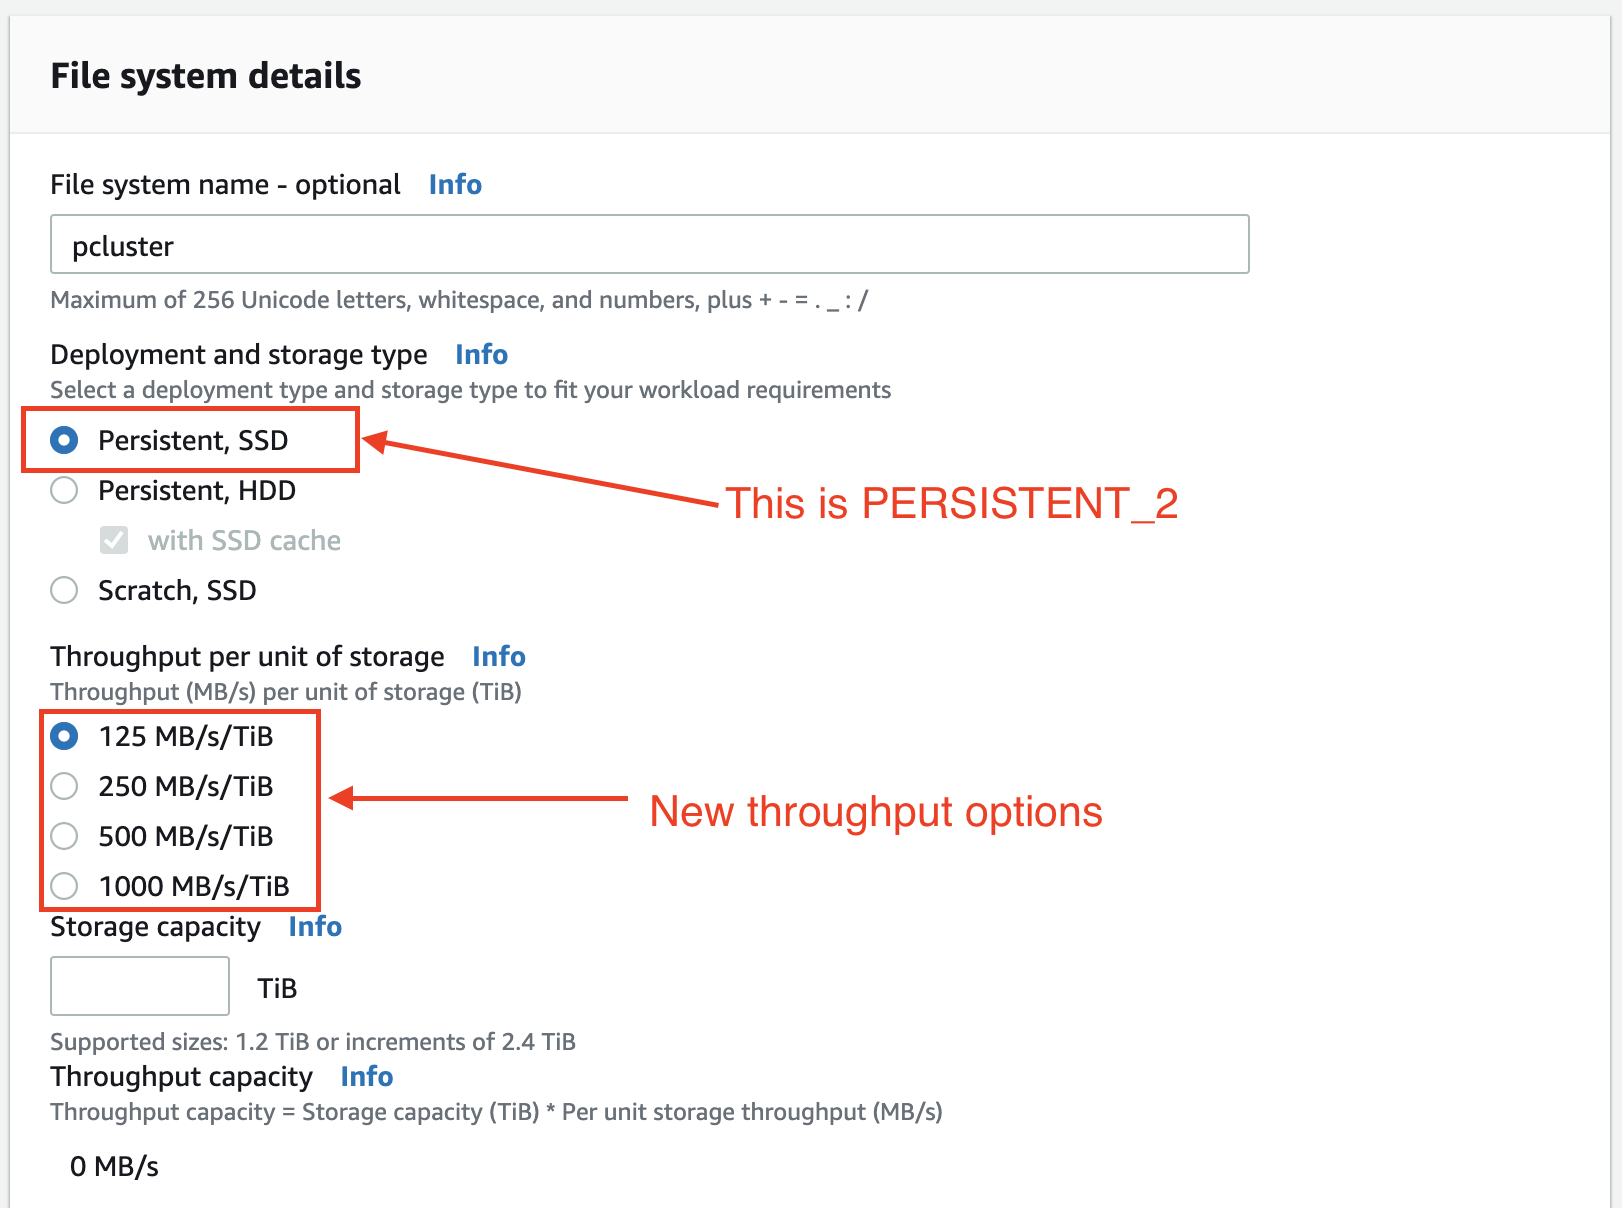
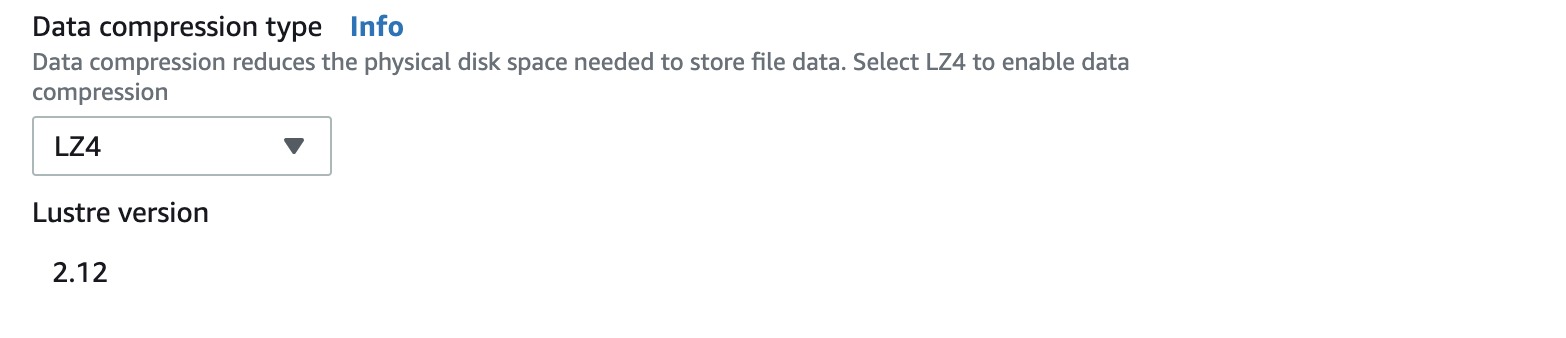
- Make sure to enabled LZ4 Compression, this both decreases filesystem size and improves performance.
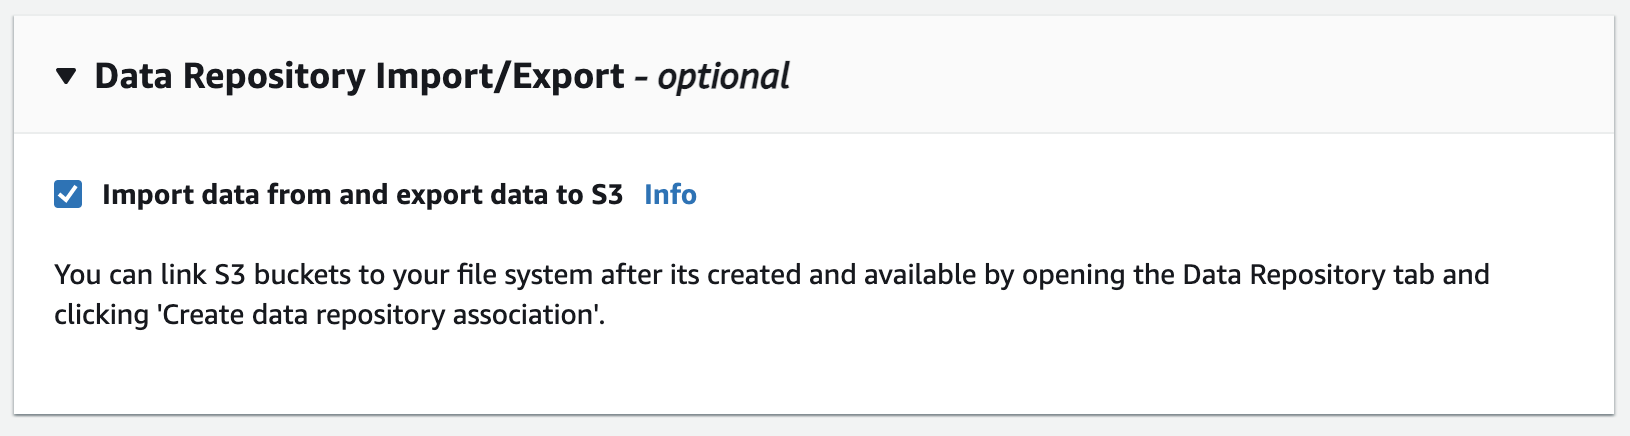
- Make sure to check the box under Data Repository Import/Export, this enables future linking to S3.
- Create the filesystem in the same subnet as AWS ParallelCluster.
3. Attach Filesystem to AWS ParallelCluster
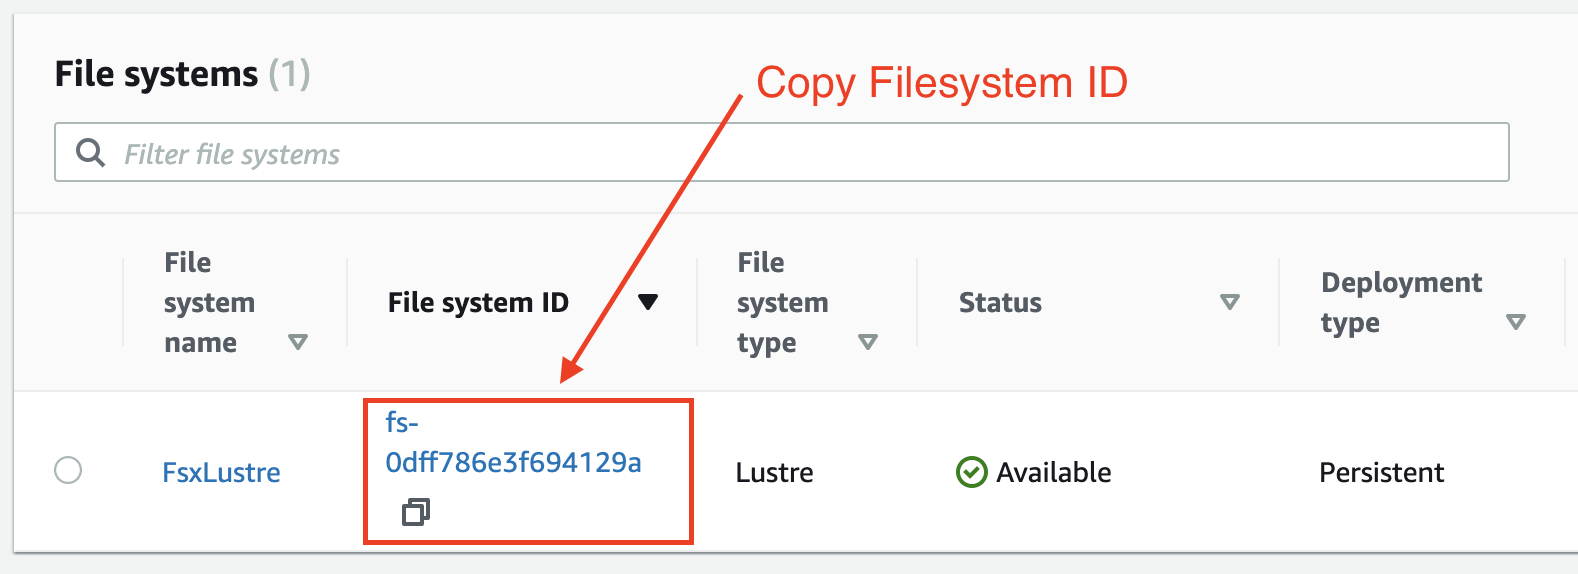
- After the filesystem has finished creating, grab the filesystem ID from the FSx console:
- Update the config file to include that filesystem id:
SharedStorage:
  - Name: FsxLustre
    StorageType: FsxLustre
    MountDir: /shared
    FsxLustreSettings:
      FileSystemId: fs-12345678910 # <- fs id from the fsx console
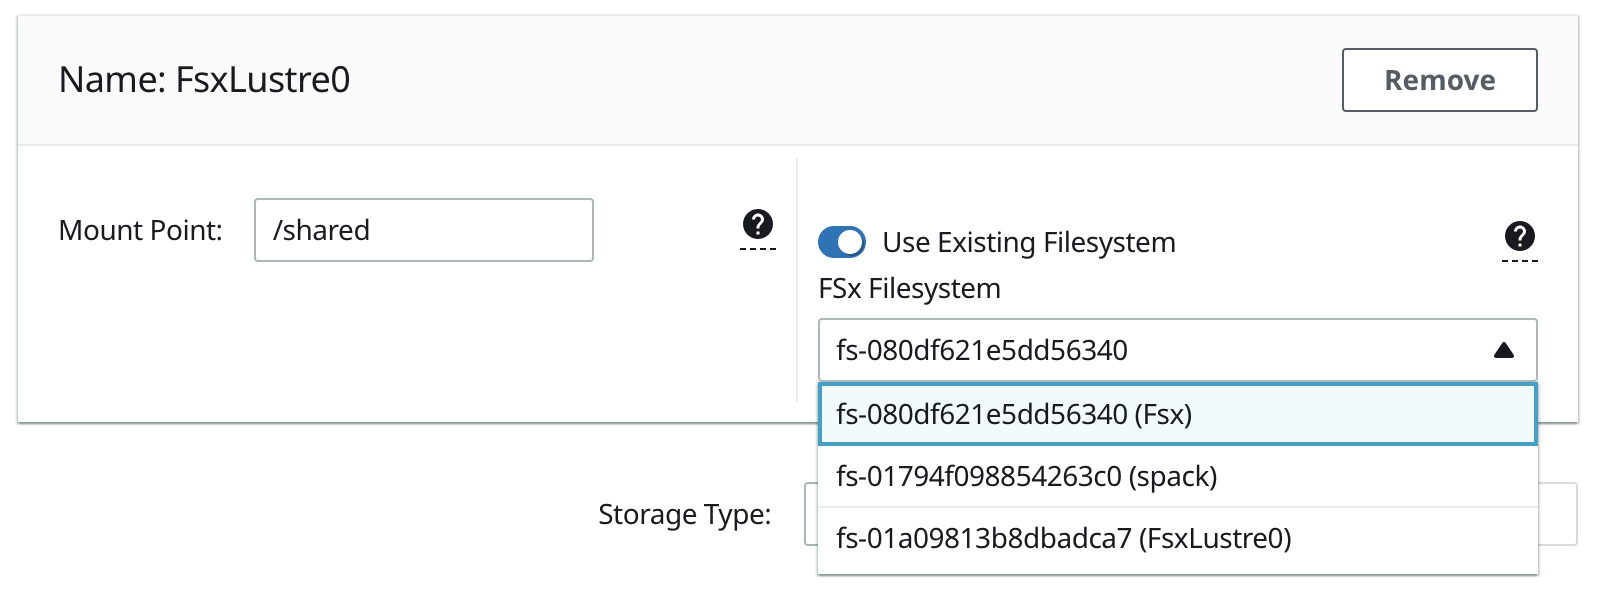
- If you’re using pcluster-manager, simply check the box next to Use Existing Filesystem and select the filesystem you just created:
4. Link Filesystem to S3
Once the filesystem has been created, you can now link it to an S3 Bucket. This allows you to sync data back and forth between the filesystem and S3. It also allows you to delete the filesystem and preserve it’s content on S3.
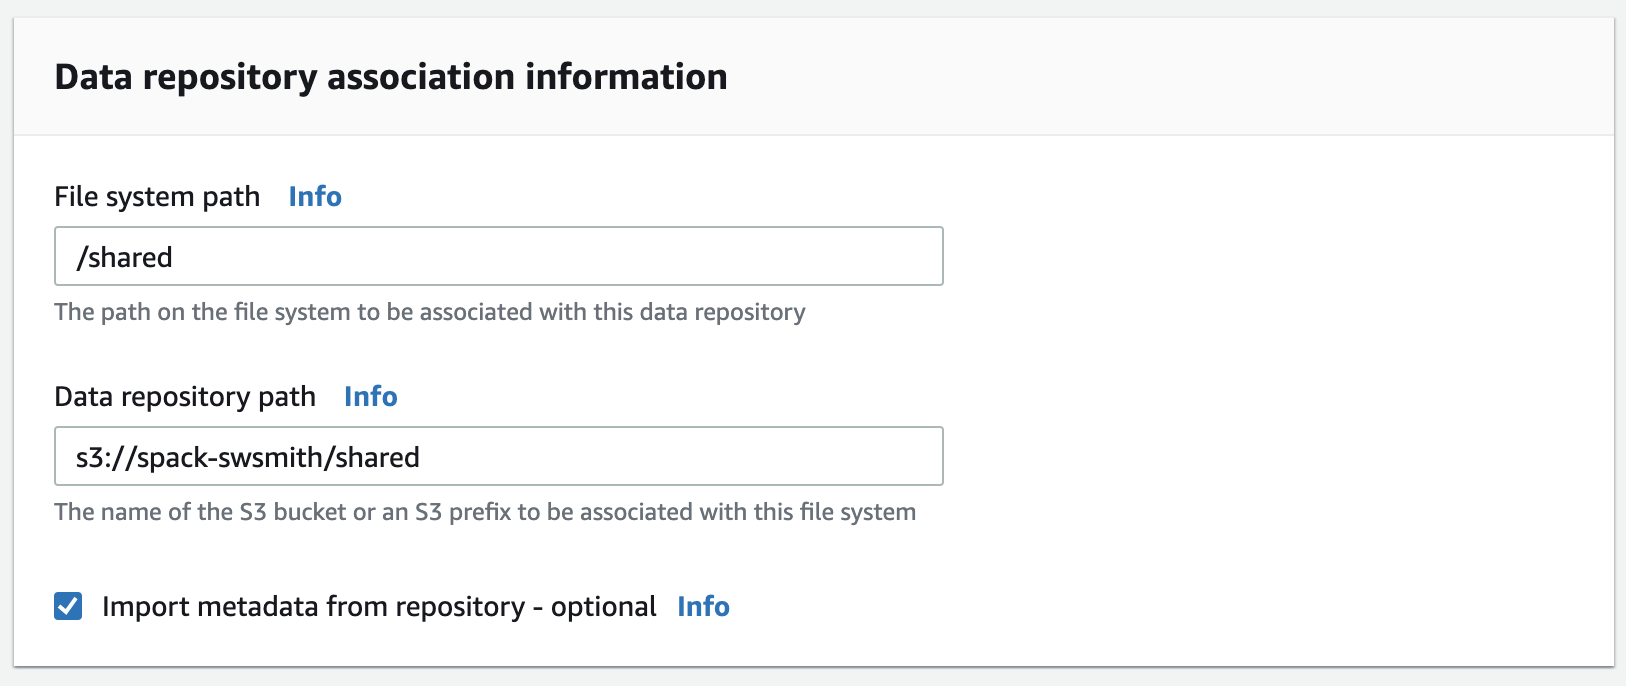
- Navigate to the FSx Console > Filesystem > Data repositories > Click Create data repository association.
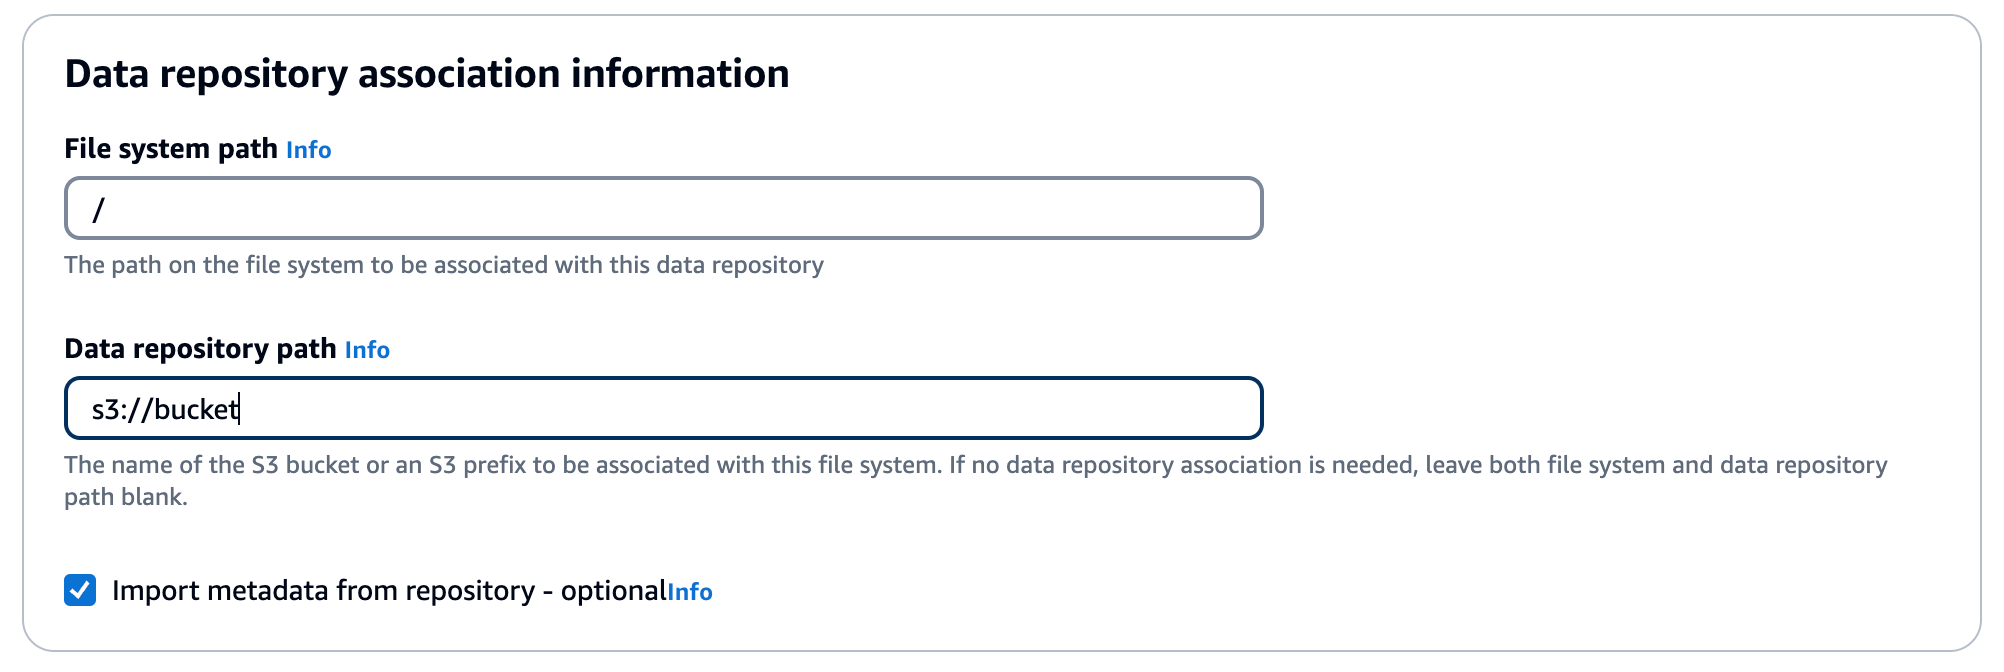
- Link to an S3 bucket in the same region:
| Field | Description |
|---|---|
| Filesystem Path | Path of the FSx Filesystem to sync back to S3 after the mountpoint. Make this / to sync the entire thing. |
| Data Repository Path | Path on S3 to store synced content i.e. s3://bucket/ will replicate to the root of the bucket. |
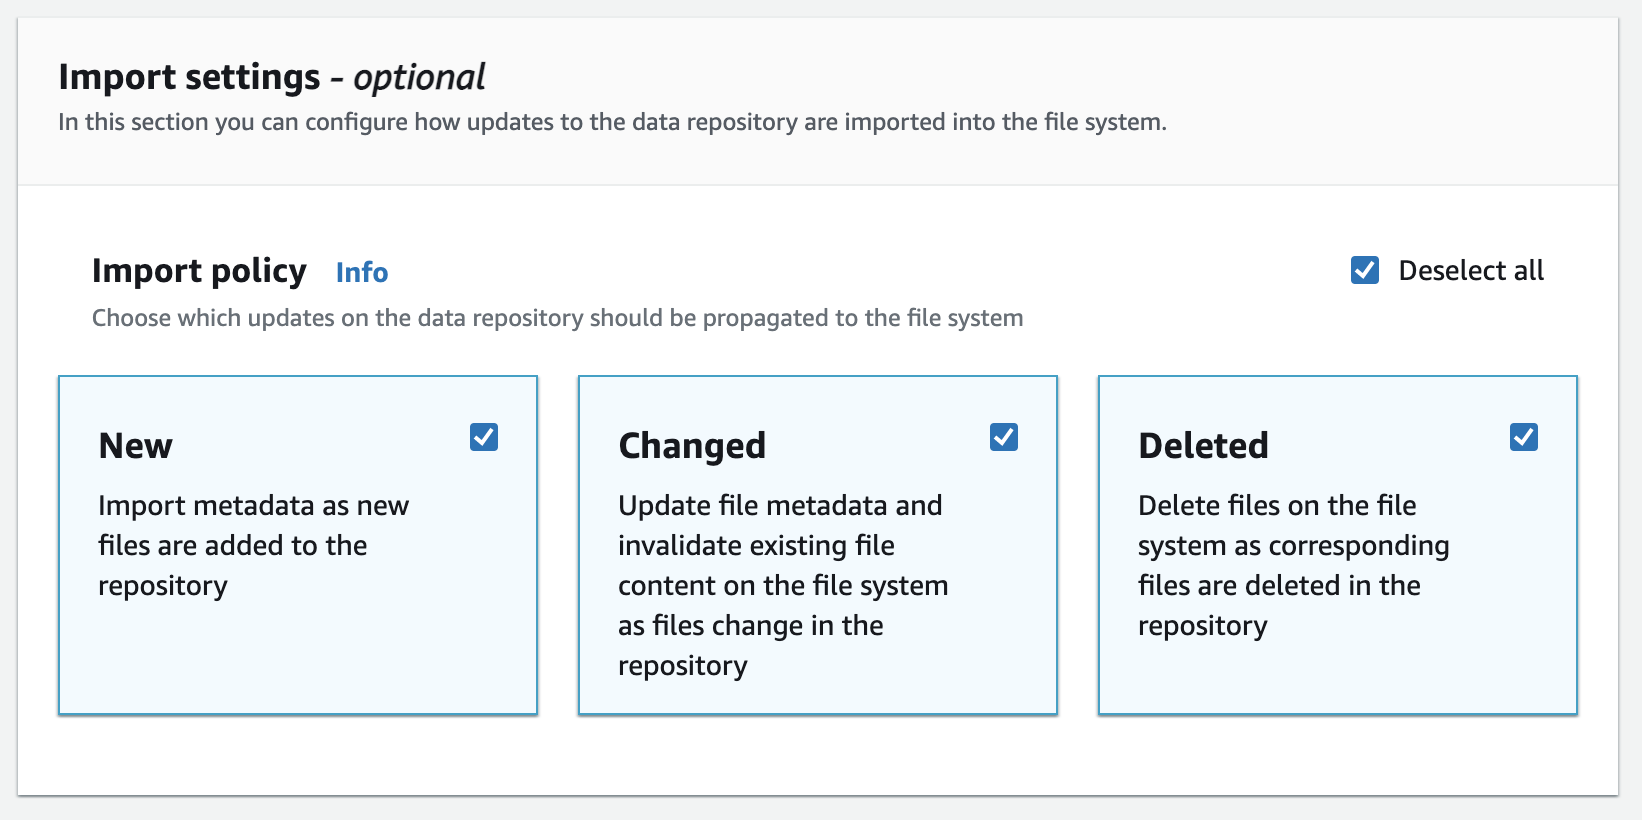
- Now you can select your import & export settings: