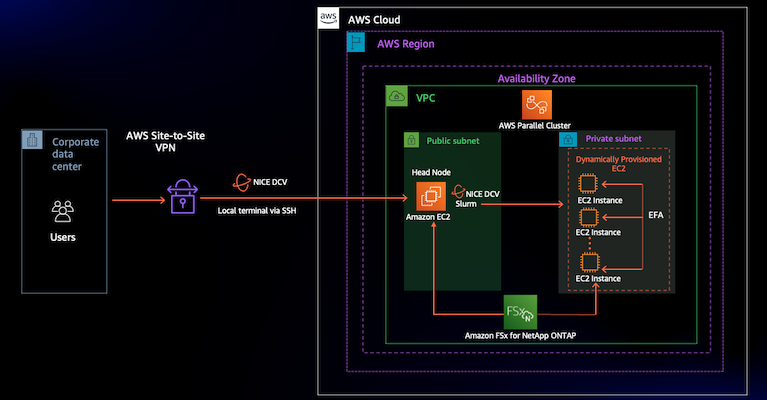
Mount FSx Netapp ONTAP with AWS ParallelCluster 🗂️
FSx Netapp ONTAP is a multi-protocol filesystem. It mounts on Windows as SMB, Linux as NFS and Mac. This allows cluster users to bridge their Windows and Linux machines with the same filesystem, potentially running both windows and linux machines for a post-processing workflow.
Since 3.2.0, FSx Netapp is a supported filesystem type in AWS ParallelCluster, this means you can mount the filesystem directly through the config without having to specify a post-install script. For older versions and more flexibility i.e. custom the mount options, I’ve included the post-install script method as well.
Pros
- Multi-Protocol
- Hybrid support
- Multi-AZ (for High Availability)
Cons
- Not as fast as FSx Lustre
- Harder to Setup with AWS ParallelCluster
In this guide we walk through how to create a FSx Netapp filesystem and how to mount it to parallelcluster. We will cover the steps needed to bridge this filesystem to on-prem in another doc.
1. Create Filesystem
-
Go to the FSx Console > Create Filesystem > Select FSx Netapp
-
Now set the filesystem name, select the same VPC as the cluster, and set the storage size:
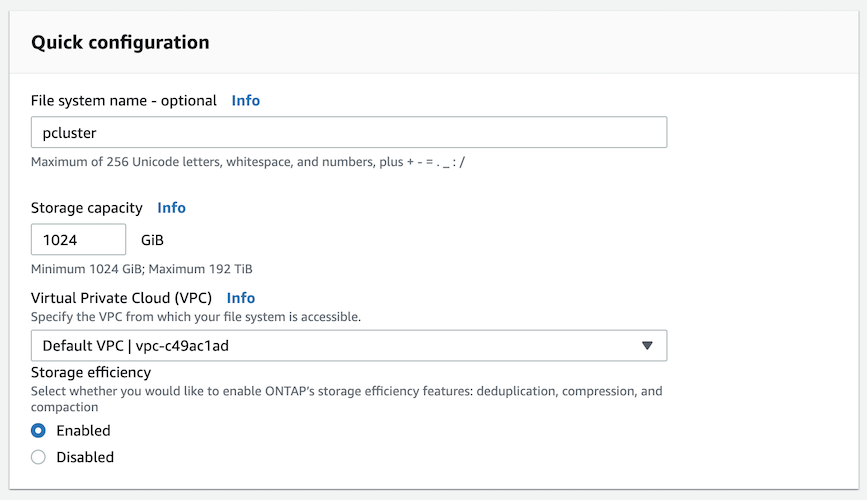
Wait ~15 minutes for the filesystem to create.
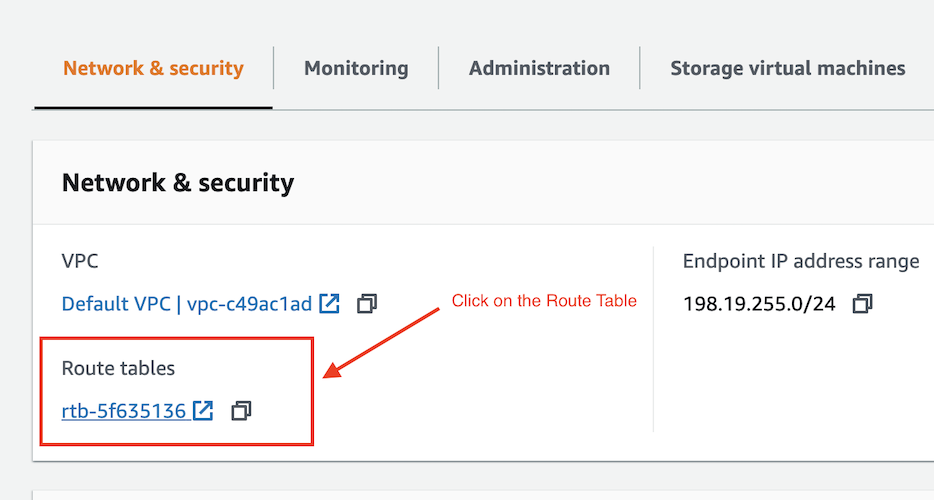
2. Modify Route Table
-
Go to the FSx Console > Select the filesystem
-
Under the Network & Security > Click on the Route Table:
-
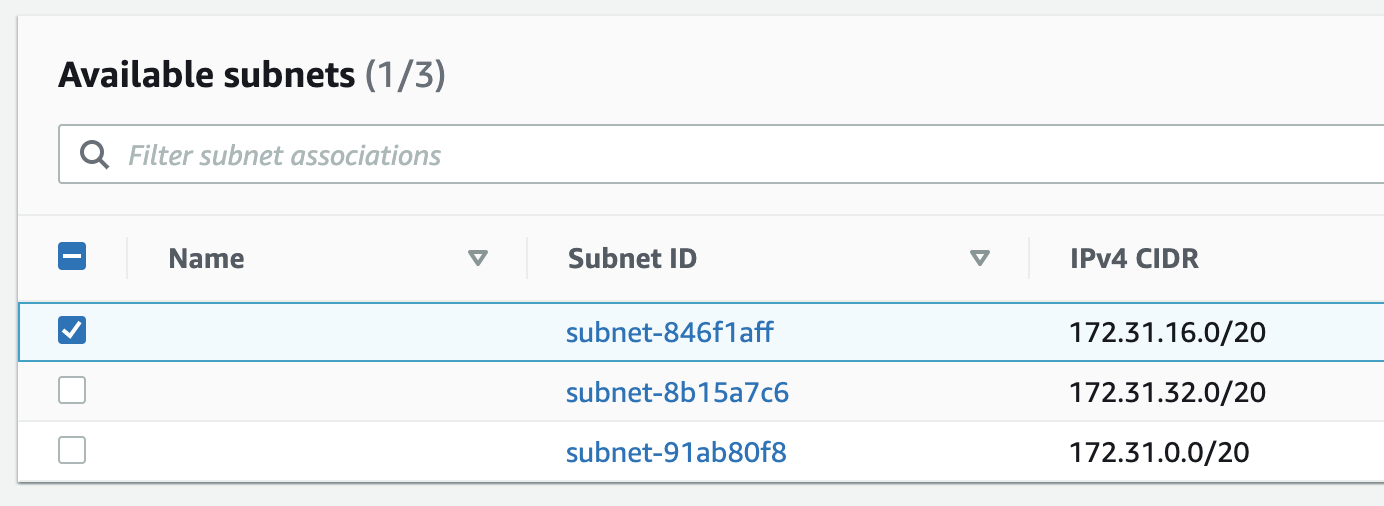
Modify the Subnet association for the Route Table
-
Add the subnet that the cluster was launched in
3. Modify Security Group
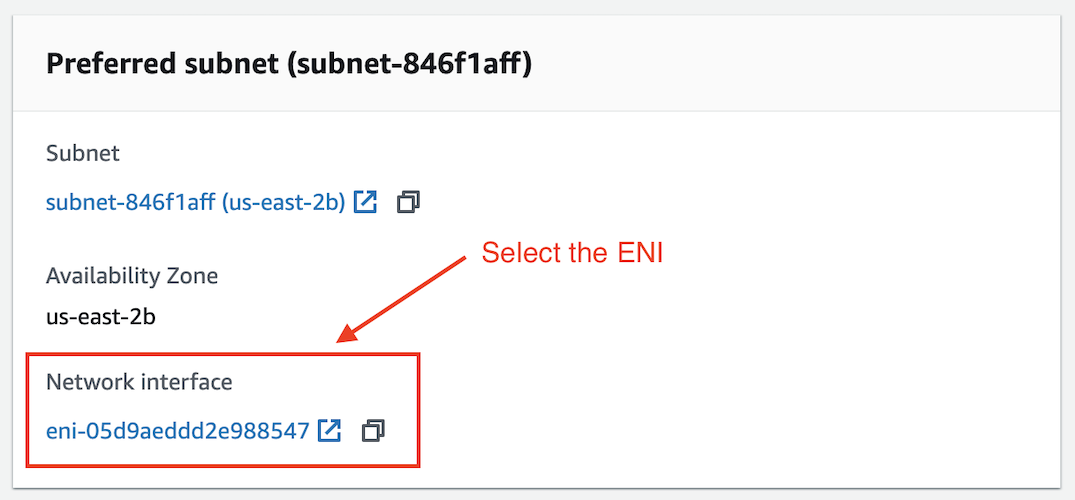
Next we’re going to add a new rule to FSxN’s Security Group. To find the security group we need to scroll down the ENI.
-
Go to the FSx Console > Select the filesystem
-
Then scroll down to the Preferred subnet > Click on the Elastic Network Interface (ENI):
-
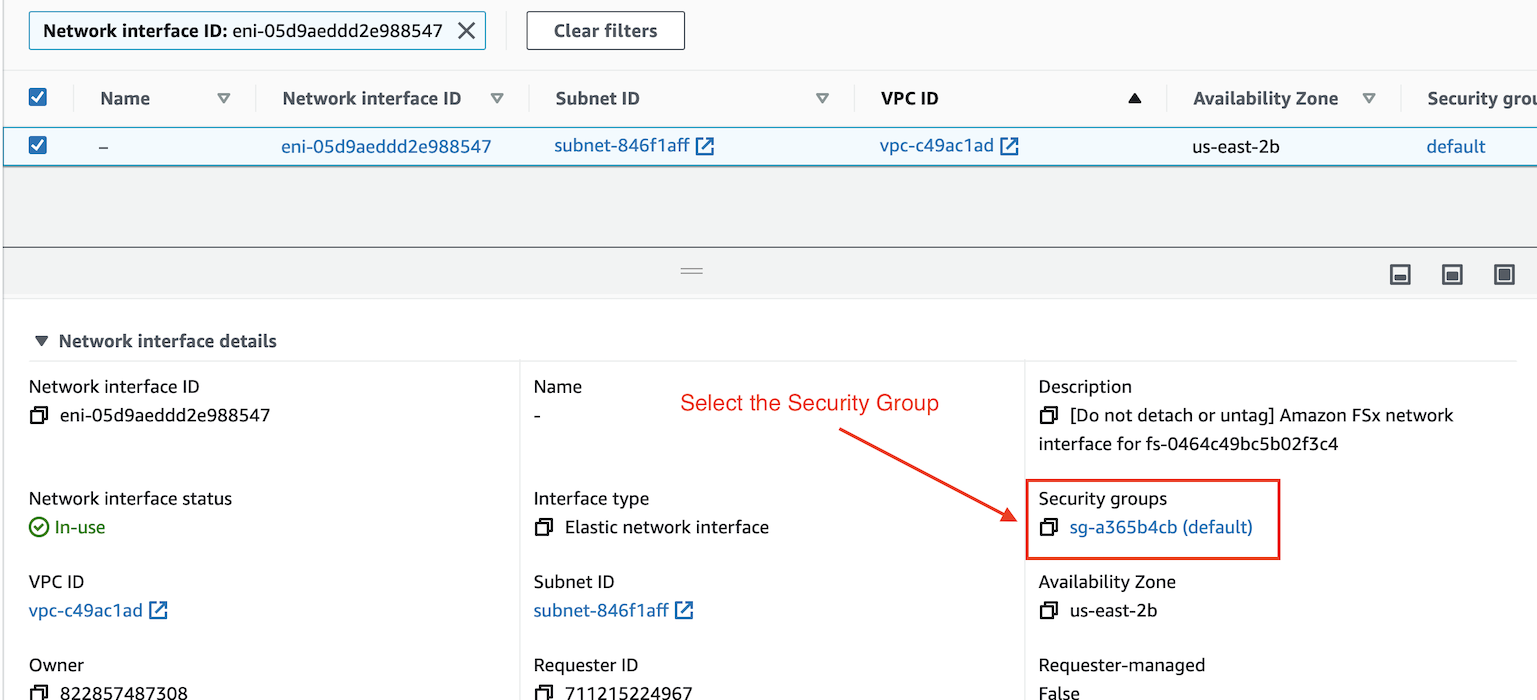
Now check the box next to the ENI and scroll down to find the associated Security Group:
-
On that Security Group, Add a Ingress rule that allows all traffic from the VPC’s CIDR range. If you’d like to be more specific, you can only allow the ports specificied in the FSxN docs.
Rule CIDR Range Description All Traffic 172.31.0.0/16 FSx Netapp Ingress 
4. Mount to Cluster (≥3.2.0)
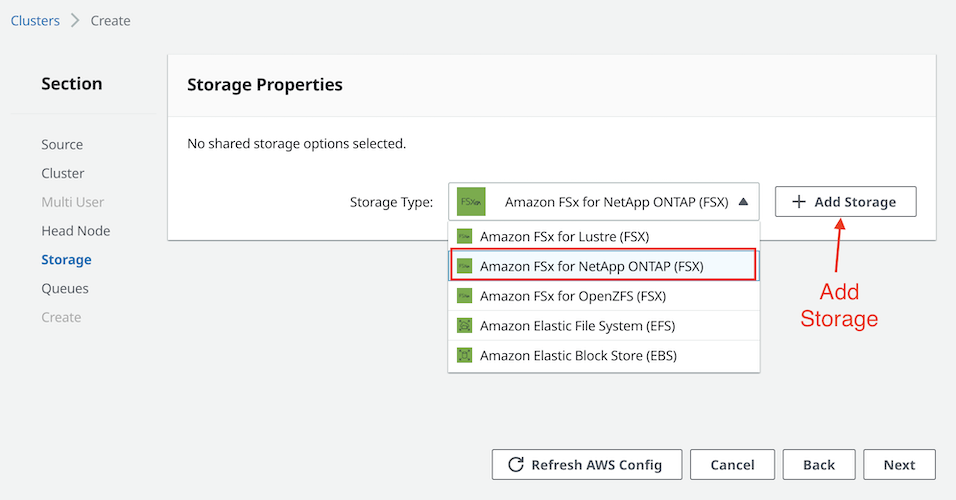
In AWS ParallelCluster 3.2.0, simply select FSx Netapp Ontap from the filesystem types and select the filesystem id of the filesystem you created above:
If you’re using the CLI, you’ll specify a new Shared Filesystem in your SharedStorage section:
- MountDir: /shared
  Name: FSxNetapOntap
  StorageType: FsxOntap
  FsxOntapSettings:
    VolumeId: fs-123456789
5. Mount to Cluster (<3.2.0)
If you’re using a cluster with version < 3.2.0, or simply want more flexibility in the mount command, you can follow the next few steps to attach the filesystem to the cluster using a Slurm Prolog script. Note, the following script only needs to be run on the HeadNode and can be done via a CustomAction, aka post-install script, or simply run on the HeadNode with no modification to the parallelcluster config.
-
First create a script called
mount-fsxn.shwith the following content:#!/bin/bash # usage: mount-fsxn.sh svm-0b28f18aab8cea77a.fs-0464c49bc5b02f3c4.fsx.us-east-2.amazonaws.com /fsx FSX_DNS=$1 MOUNT_DIR=$2 . /etc/parallelcluster/cfnconfig test "$cfn_node_type" != "HeadNode" && exit # create a directory mkdir -p ${MOUNT_DIR} # mount on head node sudo mount -t nfs $FSX_DNS:/vol1 $MOUNT_DIR cat << EOF > /opt/slurm/etc/prolog.sh #!/bin/sh if mount | /bin/grep -q ${MOUNT_DIR} ; then exit 0 else # create a directory mkdir -p ${MOUNT_DIR} # mount on compute node mount -t nfs $FSX_DNS:/vol1 $MOUNT_DIR fi EOF chmod 744 /opt/slurm/etc/prolog.sh echo "Prolog=/opt/slurm/etc/prolog.sh" >> /opt/slurm/etc/slurm.conf systemctl restart slurmctld -
Upload
mount-fsxn.shto a S3 bucket:aws s3 cp mount.sh s3://bucket/mount-fsxn.sh -
Include the following in your cluster’s config in the HeadNode/CustomActions section:
OnNodeConfigured:
  Script: s3://bucket/mount-fsxn.sh
  Args:
    - svm-0b28f18aab8cea77a.fs-0464c49bc5b02f3c4.fsx.us-east-2.amazonaws.com
    - /fsx
Iam:
  S3Access:
    - BucketName: bucket