Slurm Login Node with AWS ParallelCluster 🖥
Update: This has been written up on the ParallelCluster Wiki: ParallelCluster: Launching a Login Node

Some reasons why you may want to use a Login Node:
- Separation of scheduler
slurmctldprocess from users. This helps prevent a case where a user consumes all the system resources and Slurm can no longer function. - Ability to set different IAM permissions for Login versus Head Node.
I’ve divided the setup into two parts:
I highly advise starting the manual approach before moving to the more automated packer setup.
Setup
-
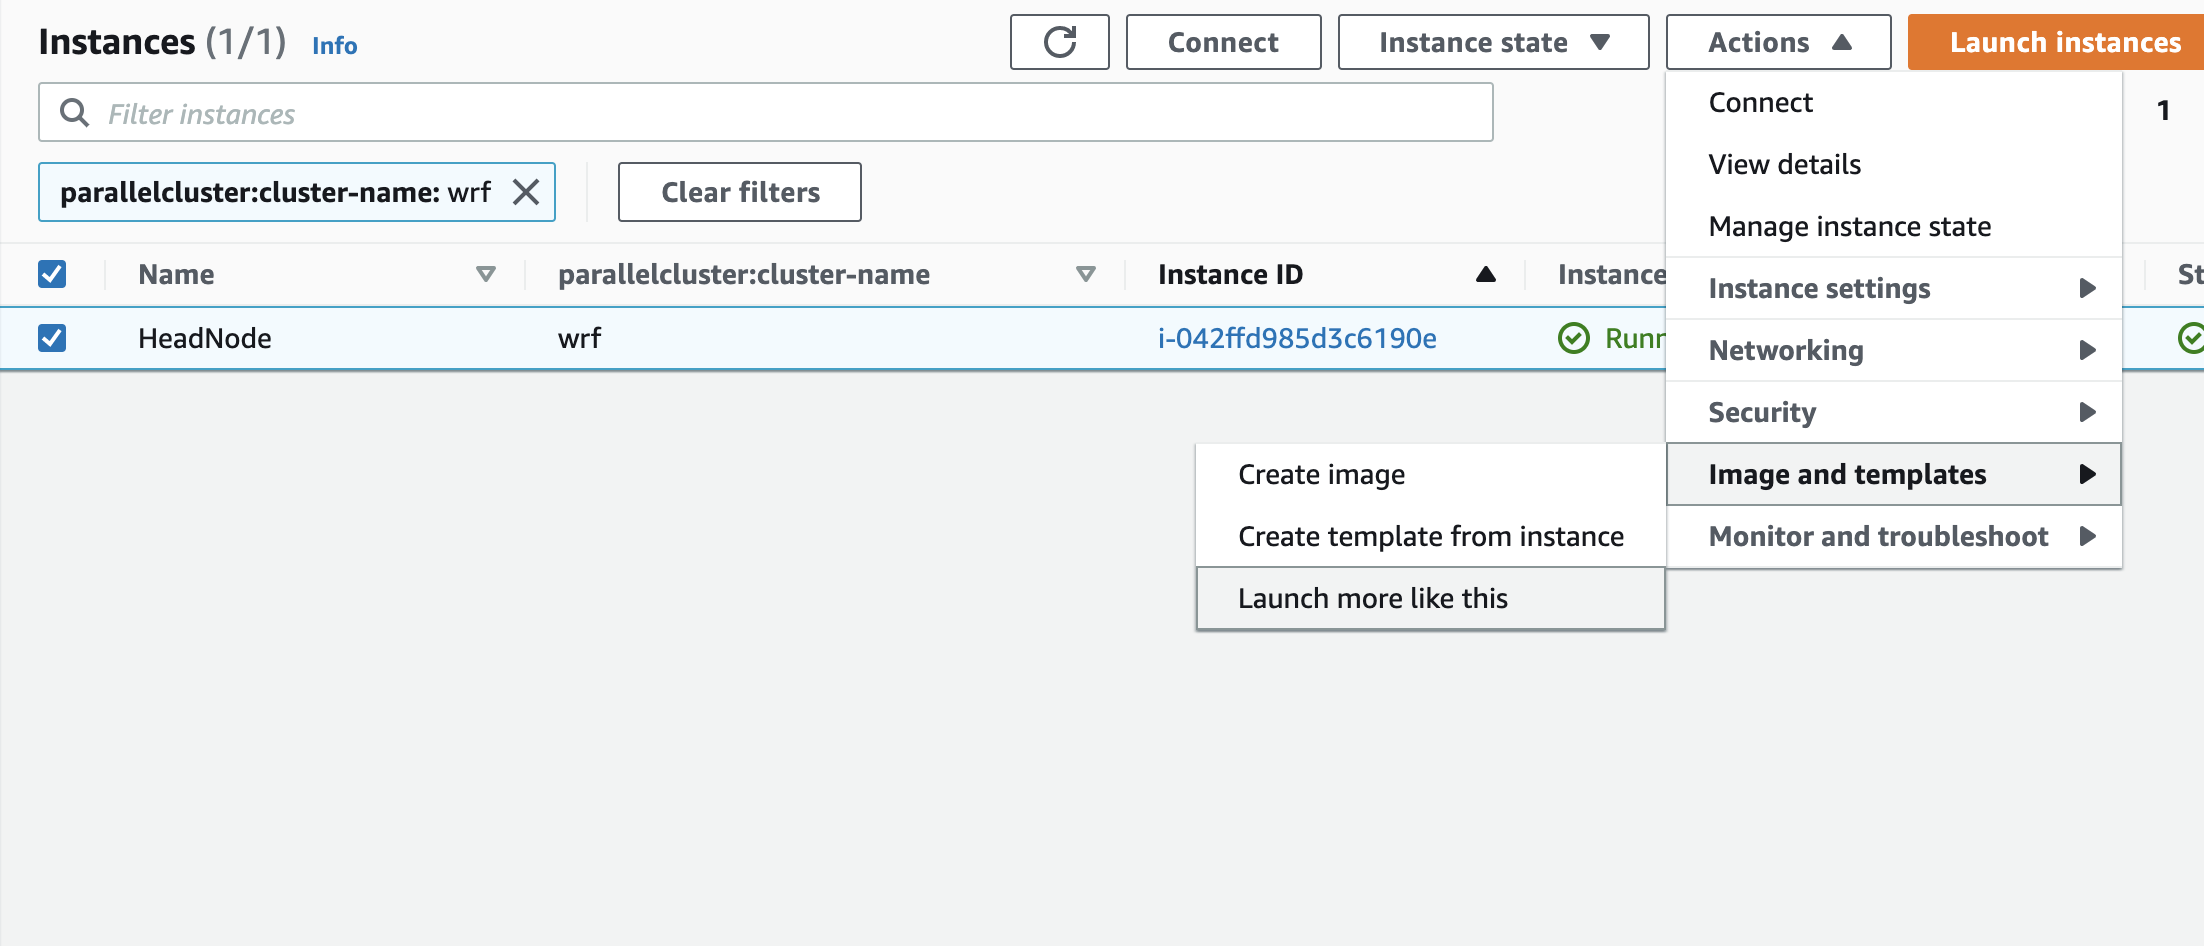
Launch a new EC2 Instance based on the AWS ParallelCluster AMI, an easy way to do this is to go to the EC2 Console, select the head node and click Actions > Image and Templates > “Launch more like this”:
-
Now edit the Security Group of the old HeadNode to allow ingress traffic from the Login Node. Add a route for all traffic with the source
[cluster_name]-HeadNodeSecurityGroup.Type Source Description All Traffic [cluster-name]-HeadNodeSecurityGroupAllow traffic to HeadNode -
SSH into this instance and Mount NFS from the HeadNode private ip (where
172.31.19.195is the HeadNode ip). Note this must be the private ip, if you use the public ip this will time out.mkdir -p /opt/slurm sudo mount -t nfs 172.31.19.195:/opt/slurm /opt/slurm sudo mount -t nfs 172.31.19.195:/home /home -
Setup Munge Key to authenticate with the head node:
sudo su # Copy munge key from shared dir cp /home/ec2-user/.munge/.munge.key /etc/munge/munge.key # Set ownership on the key chown munge:munge /etc/munge/munge.key # Enforce correct permission on the key chmod 0600 /etc/munge/munge.key systemctl enable munge systemctl start munge -
Add
/opt/slurm/binto yourPATH:sudo su cat > /etc/profile.d/slurm.sh << EOF PATH=\$PATH:/opt/slurm/bin MANPATH=\$MANPATH:/opt/slurm/share/man EOF exit source /etc/profile.d/slurm.sh -
Now you can run Slurm commands such as
sinfo:$ sinfo PARTITION AVAIL TIMELIMIT NODES STATE NODELIST hpc6a* up infinite 64 idle~ hpc6a-dy-hpc6a-hpc6a48xlarge-[1-64] c6i up infinite 6 idle~ c6i-dy-c6i-c6i32xlarge-[1-6] hpc6id up infinite 64 idle~ hpc6id-dy-hpc6id-hpc6id32xlarge-[1-64]
Now we can submit jobs and see the partitions!
Packer 📦
I’ve also put together a script to automate these steps with packer.
-
First edit the Security Group of the HeadNode to allow ingress traffic from the Login Node. Add a route for all traffic with the source
[cluster_name]-HeadNodeSecurityGroup. This is essentially a circular route, since both are going to share the same Security Group traffic can flow between them.Type Source Description All Traffic [cluster-name]-HeadNodeSecurityGroupAllow traffic to HeadNode -
First install packer, on mac / linux you can use
brew:brew install packer -
Download the files configure.sh, packer.json and launch.sh:
wget https://swsmith.cc/scripts/login-node/configure.sh wget https://swsmith.cc/scripts/login-node/packer.json wget https://swsmith.cc/scripts/login-node/launch.sh -
Run the bash script
configure.shand input your cluster’s name when prompted. This will generate a filevariables.jsonwith all the relevant cluster information:bash configure.sh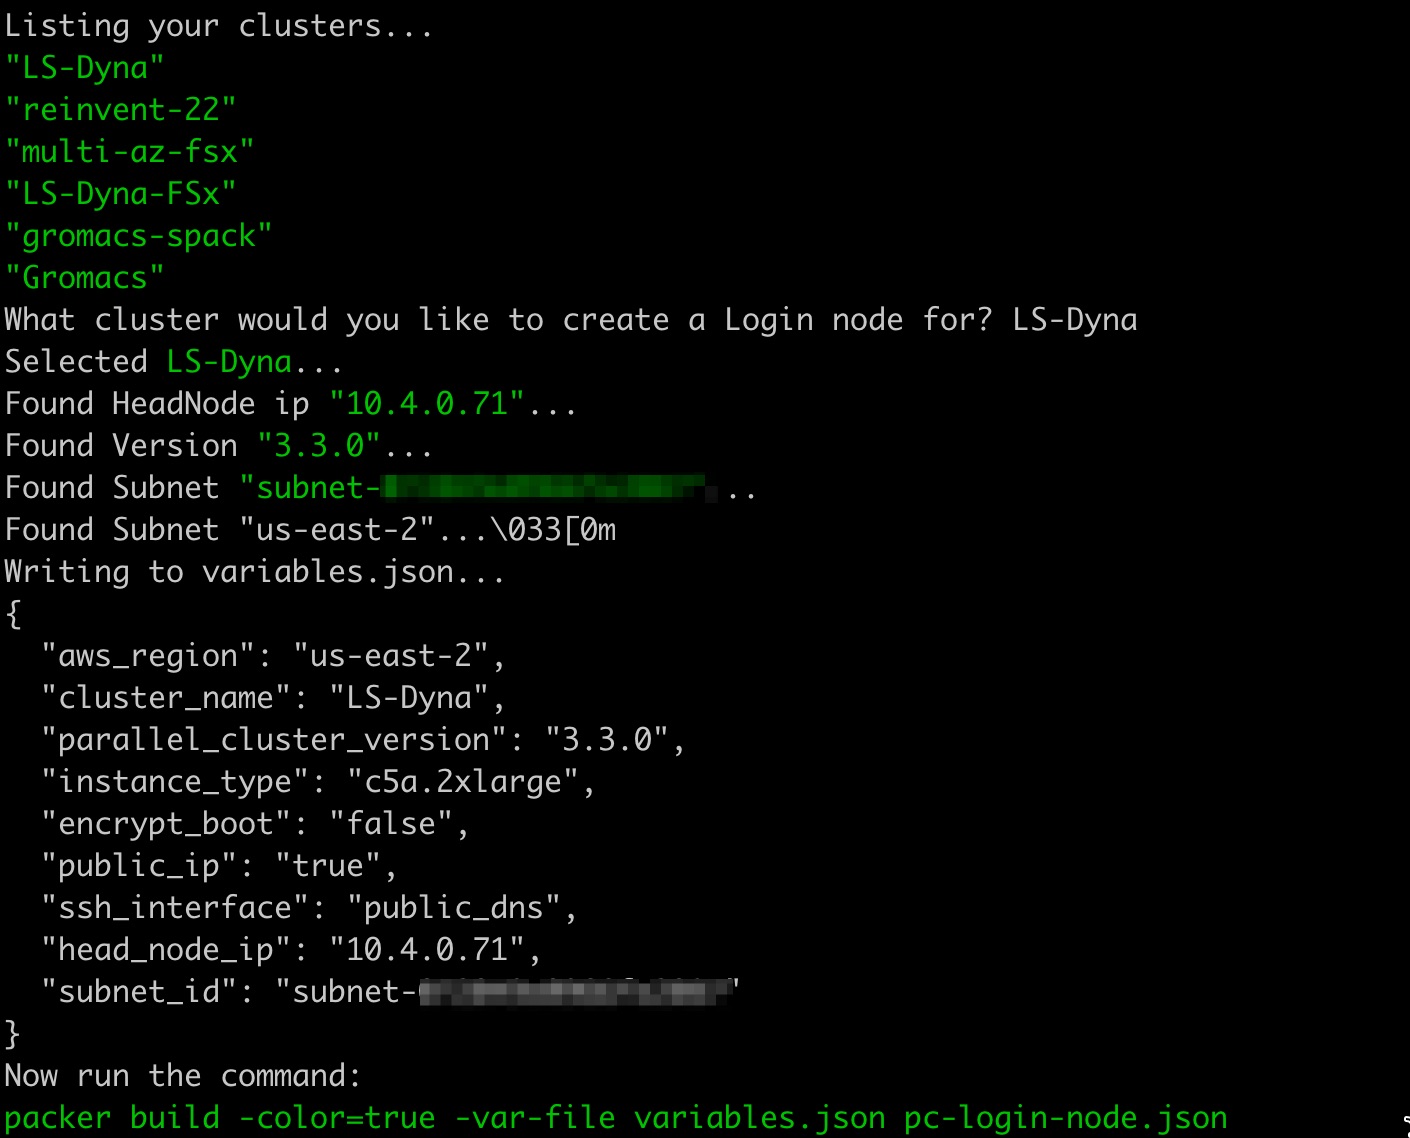
-
Run Packer:
packer build -color=true -var-file variables.json packer.json -
That’ll produce an AMI that we can launch using the
launch.shscript:bash launch.shNow you’ll see a new node under the [Cluster Name] > Instances tab in ParallelCluster:

You can ssh in using the Public IP address.