StarCCM+ with AWS ParallelCluster 🛩
Siemens StarCCM+ is a multiphysics computational fluid dynamics (CFD) software for the simulation of products operating under real-world conditions. Simcenter STAR-CCM+ uniquely brings automated design exploration and optimization to the CFD simulation toolkit of every engineer.
In this blogpost we’ll show you how to setup StarCCM+ using AWS ParallelCluster, which will allow you to scale out your CFD simulations to thousands of cores.
Step 1: Setup a Cluster
-
I’ll also assume you have AWS ParallelCluster Manager setup, if you don’t follow the instructions on hpcworkshops.com to get started.
-
Setup cluster with the following config starccm.yaml. Some of the important options include:
| Parameter | Description |
|---|---|
| Shared Storage | This sets up a 1.2 TB lustre drive and mounts it at /shared. StarCCM+ is installed on this directory and so are the sim files. |
| HeadNode | This sets up a c6a.2xlarge instance as the head node. It has 8 hyper-threaded cpus and 16 gigs of memory. This is ideal for small computational tasks such as pre/post-processing and installing software. |
| ComputeNodes | This sets up a queue of hpc6a.48xlarge instances. These instances have 96 physical cores and 384 GB of memory. These instances are ideal for tightly coupled compute. Note these instances don’t start running until we submit a job. |
Step 2: Install StarCCM+
-
Now we’re going to install StarCCM+ in the
/shareddirectory. Please ask Siemens for the credentials to the download site, you’ll need the installer image before proceeding. -
Download the installer zip to
/sharedby running the following. You’ll be prompted to accept the terms and conditions and select the install location. Select/sharedas the install directory.
cd /shared
aws s3 cp s3://awscaesoftware/STAR-CCM+17.06.007_01_linux-x86_64.tar.gz .
tar -xzf STAR-CCM+17.06.007_01_linux-x86_64.tar.gz
cd STAR-CCM+17.06.007_01_linux-x86_64/
./STAR-CCM+17.06.007_01_linux-x86_64-2.17_gnu9.2.sh
- Now let’s setup an alias so we can easily run starccm from the CLI:
alias starccm='/shared/STAR-CCM+/17.06.007/STAR-CCM+17.06.007/star/bin/starccm+'
- We’ll also setup a Desktop Icon to make it easier to launch:
mkdir -p ~/Desktop && cd "$_"
wget https://swsmith.cc/img/starccm/starccm-logo.png
cat << EOF > starccm.desktop
#!/usr/bin/env xdg-open
[Desktop Entry]
Version=1.0
Type=Application
Terminal=true
Exec=/shared/StarCCM+/17.06.007/STAR-CCM+17.06.007/star/bin/starccm+
Name=Siemens StarCCM+
Comment=
Icon=/home/ec2-user/Desktop/starccm-logo.png
Comment[en_US.utf8]=
Name[en_US]=Siemens StarCCM+
EOF
Step 3: Open StarCCM+ GUI
StarCCM+ has several different licensing methods, for this example we’ll assume you’re using the Power On-Demand licensing type.
This is an ideal licensing type for the cloud as it isn’t fixed to a specific number of cores, it’s purely hourly based. This means you can burst out to large number of instances and drive the computation time down, thereby saving on licensing costs.
-
Open up a DCV connection
-
Open StarCCM+ by double clicking on the desktop icon.
-
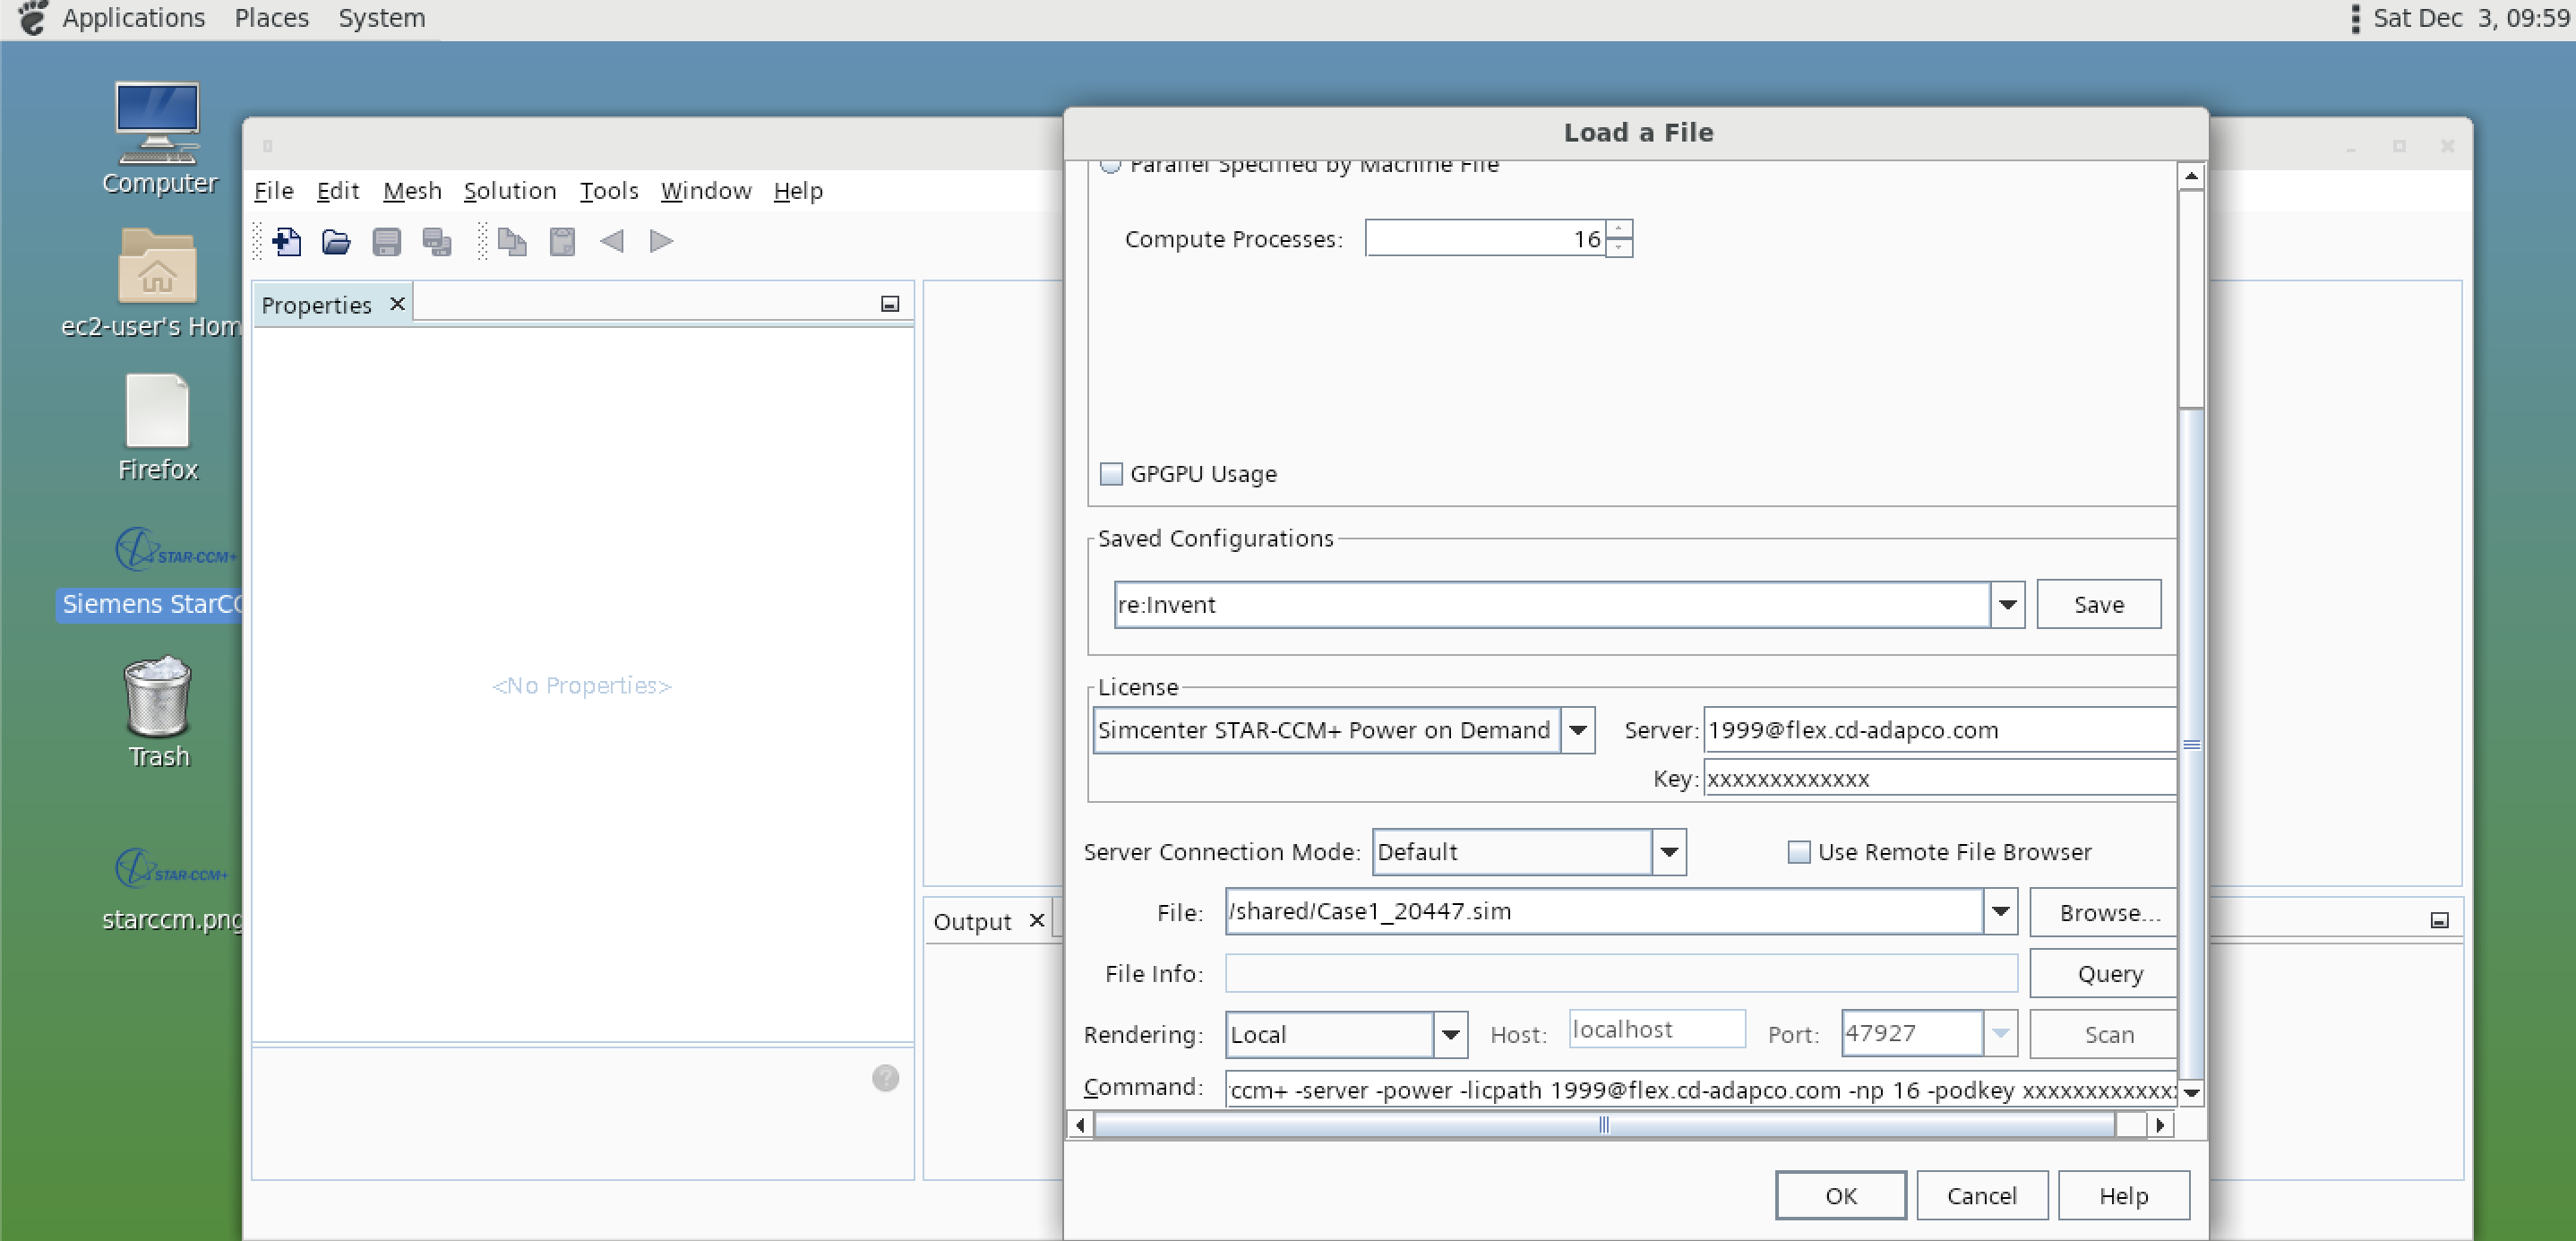
You’ll see the StarCCM+ GUI. Click File > Load
-
Select the following options:
- Parallel on Local Host and Compute Processes to
16 - Set License Type to
Simcenter STARCCM+ Power on demand - Paste in your Pod key
- Browse for your SIM file and click “Ok”
- Parallel on Local Host and Compute Processes to
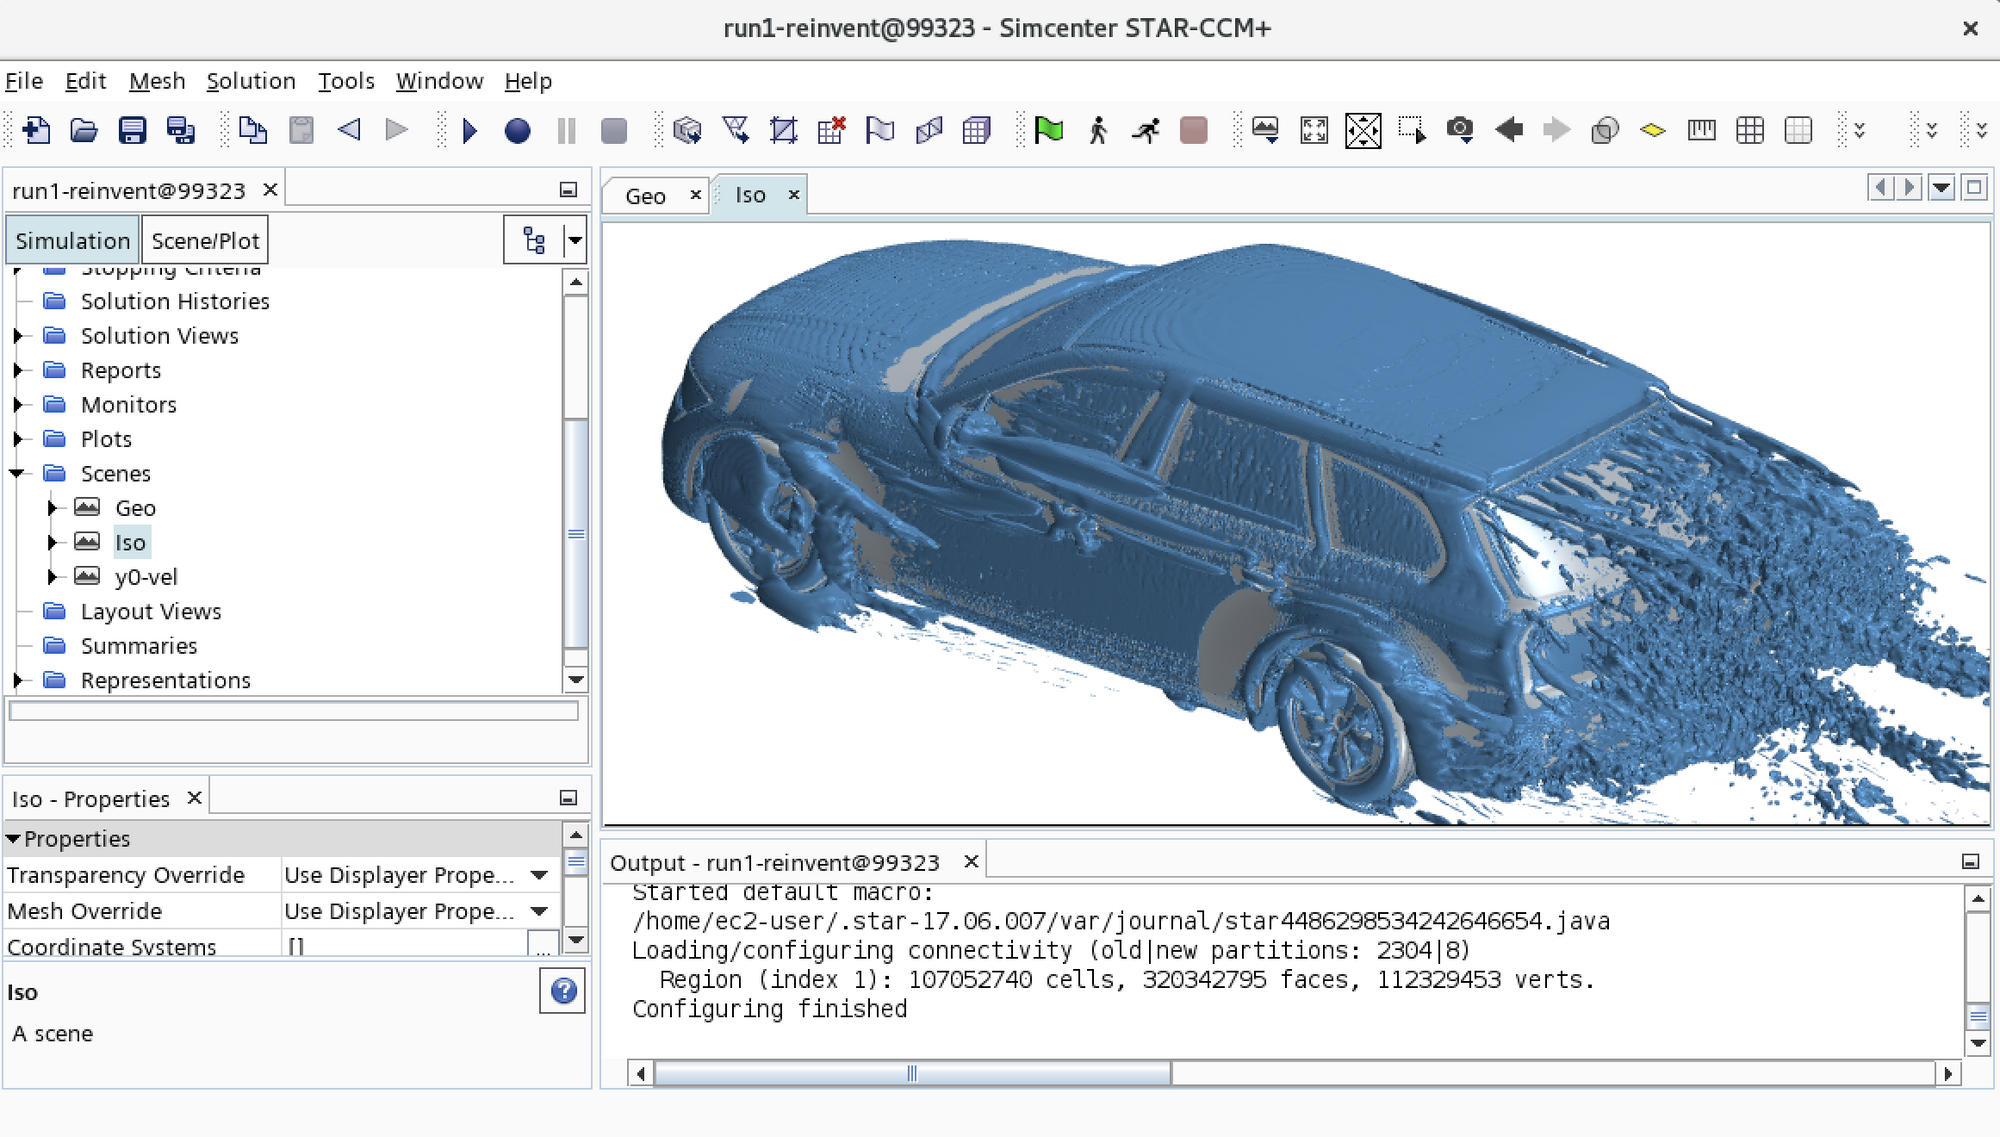
Voila! The sim file should open locally in the GUI with no errors.
Step 4: Setup Slurm Submit File
- Create a file, we’ll call it
submit.shthat’ll be used for submitting jobs to Slurm
#!/bin/bash
#SBATCH --job-name=starccm
#SBATCH --ntasks=576
#SBATCH --output=%x_%j.out
#SBATCH --partition=compute

export I_MPI_FABRICS=shm:ofi
export I_MPI_OFI_PROVIDER=efa
export I_MPI_HYDRA_BRANCH_COUNT=0
ulimit -s unlimited
export FI_EFA_FORK_SAFE=1

# run starccm+
/shared/StarCCM+/17.06.007/STAR-CCM+17.06.007/star/bin/starccm+ -pio \
        -bs slurm \
        -power \
        -batch  \
        -podkey [Your POD Key] \
        -licpath 1999@flex.cd-adapco.com \
        -mpi intel \
        run1-reinvent@99323.sim
You’ll notice some lines, prefixed by #SBATCH , at the top. These are Slurm flags, described below:
| Slurm Flag | Description |
|---|---|
--ntasks=576 |
Run on 576 cores, or 6 x 96 core hpc6a instances. |
--partition=compute |
Run on the hpc6a (compute) queue. |
In addition there’s a number of StarCCM+ flags:
| StarCCM+ Flag | Description |
|---|---|
-pio |
Use parallel I/O to load simulation file. |
-bs slurm |
This tells StarCCM+ it’s running on Slurm. |
-power |
Use Power Session license option. |
-batch |
Run in batch mode, switch this to -server to run interactively. |
-podkey |
License Key if using Power On-demand Licensing. |
-mpi intel |
Use Intel MPI built into StarCCM+ |
-licpath 1999@flex.cd-adapco.com |
Set this if using Power On-Demand Licensing. |
run1-reinvent.sim |
Simulation file. |
Step 5: Running StarCCM+
Next we’ll submit the script with sbatch submit.sh:
$ sbatch submit.sh
Submitted batch job 1
You’ll then see the job go into CF state for 2 minutes, before going into running R state:
$ squeue
             JOBID PARTITION     NAME     USER ST       TIME  NODES NODELIST(REASON)
                 1    compute submit.s ec2-user CF       0:01      4 compute-dy-compute-hpc6a48xlarge-[1-4]
$ watch squeue
Once the job is running we can ssh into one of the compute nodes like so:
ssh compute-dy-compute-hpc6a48xlarge-1
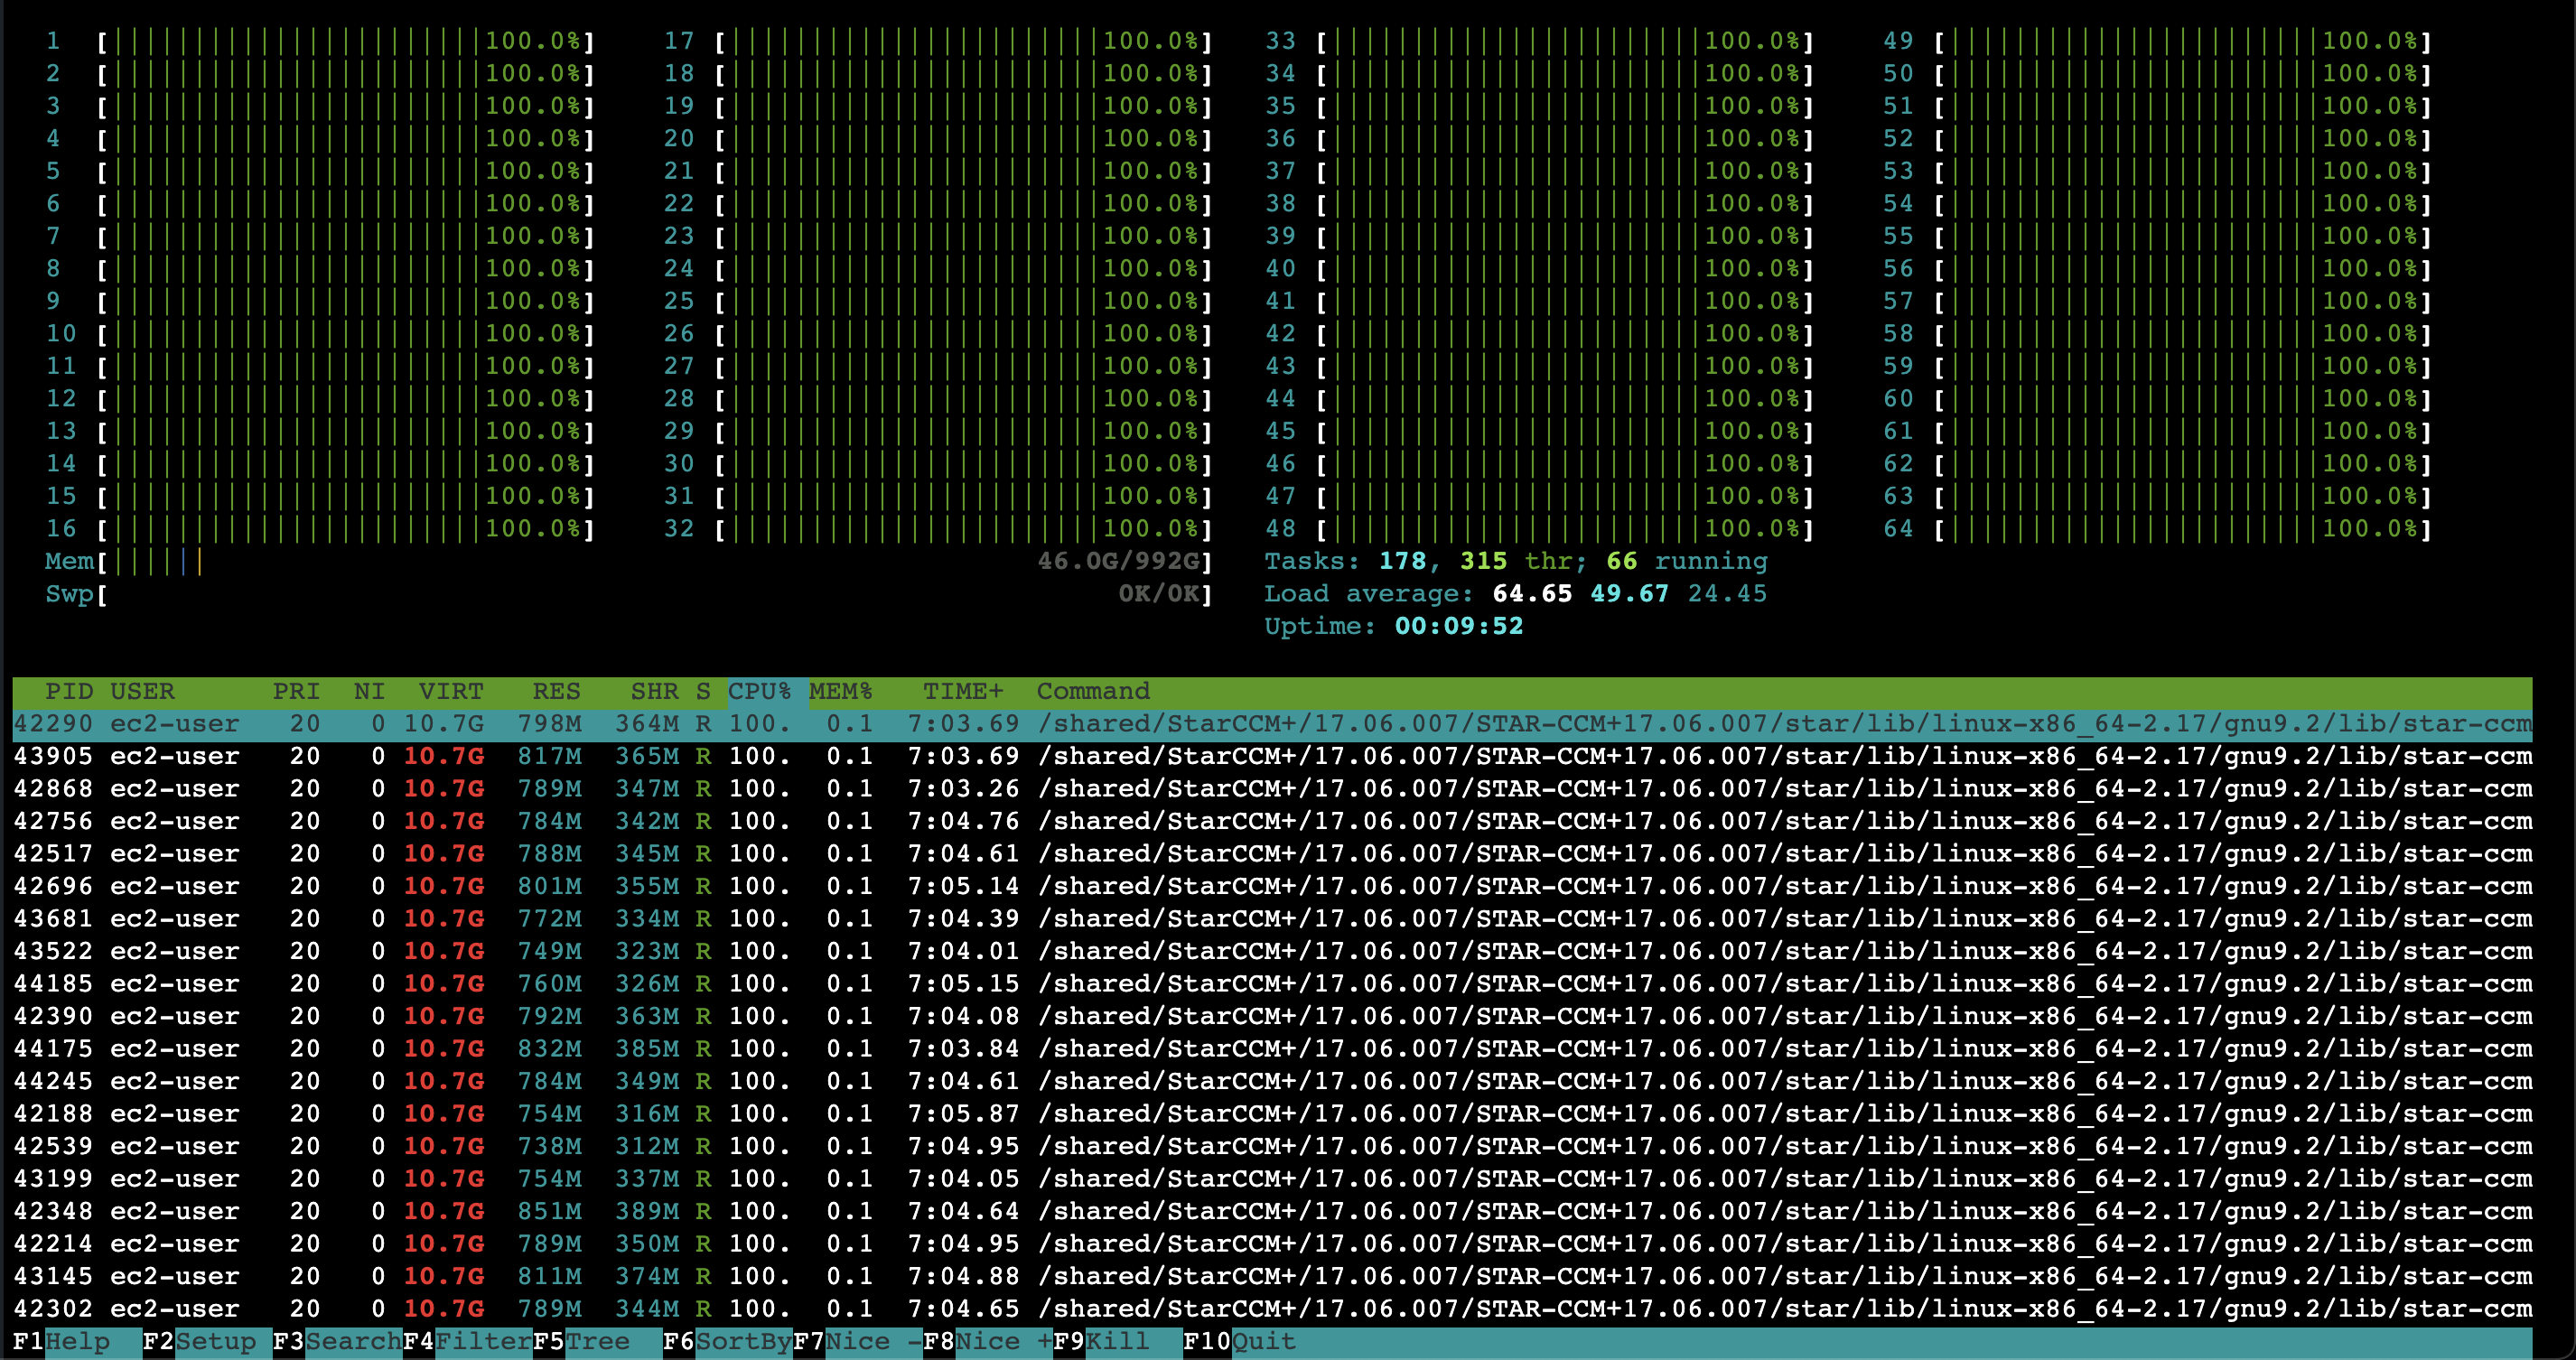
Once there, install and run htop to monitor CPU and memory utilization:
sudo yum install -y htop && htop
Step 6: Runtime
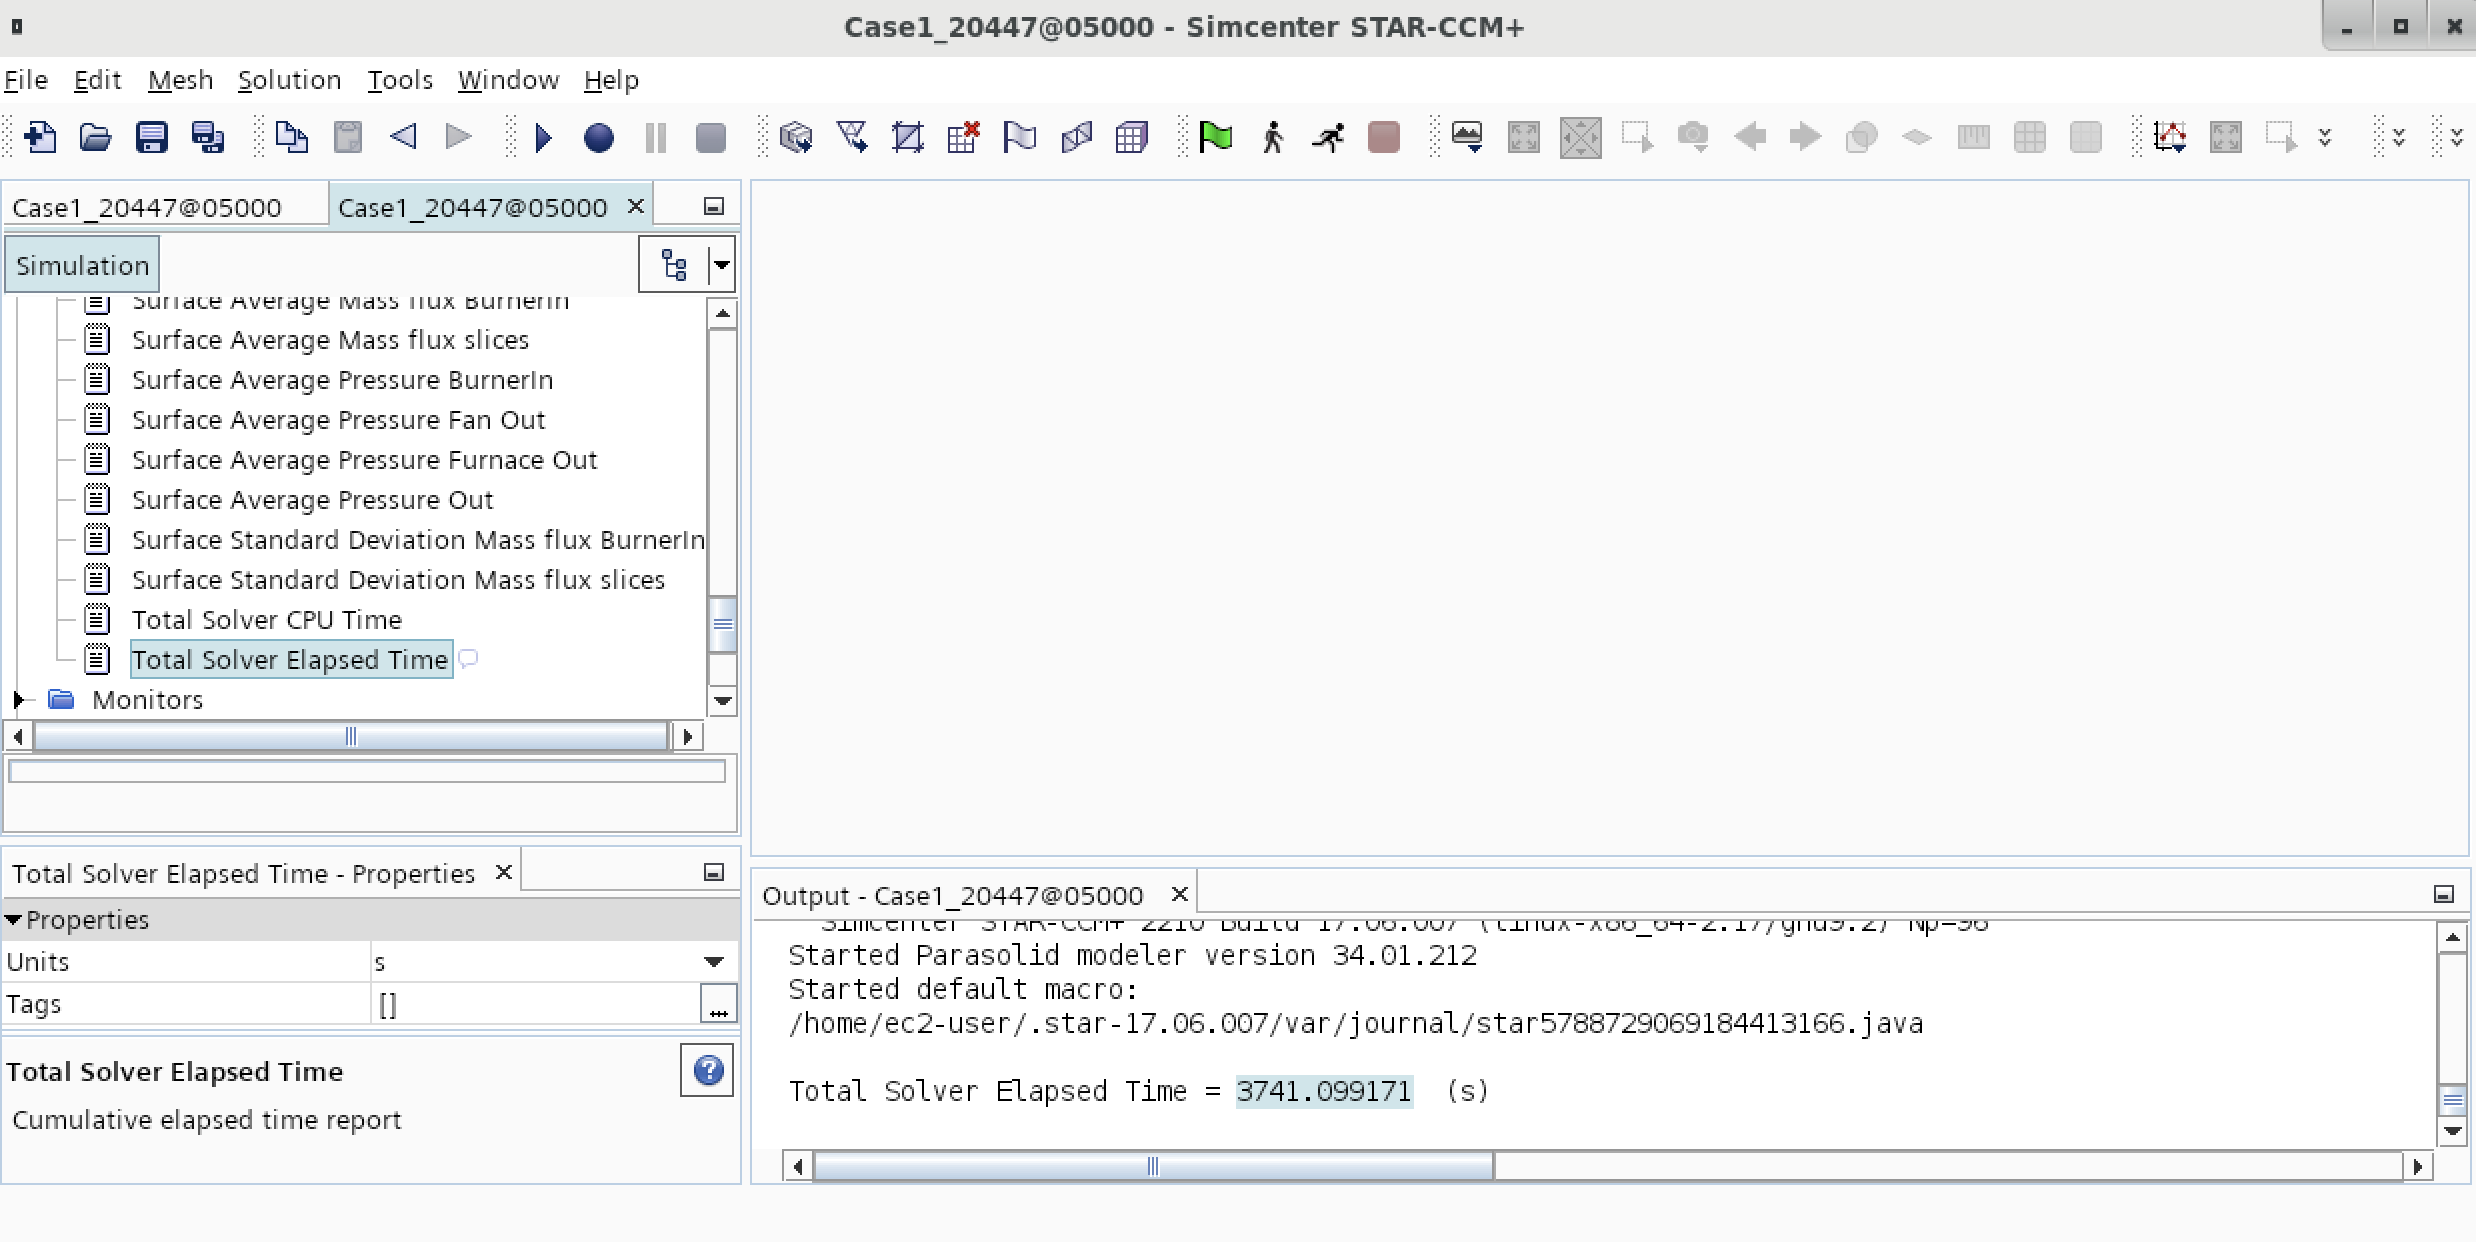
To determine the runtime, open the SIM file in the StarCCM+ GUI, a shown above.
On the left hand side, expand the “reports” directory and click on “Total Solver Elapsed Time”. You’ll see the total solve time in seconds:
Appendix
StarCCM+ Versions
StarCCM has two different versions, a “build version” and a version. Here’s the mapping between them:
| Build | Version |
|---|---|
| 14.02.010 | 2019.1 |
| 15.02.007 | 2020.1 |
| 15.04.007 | 2020.2 |
| 17.06.007 | 2210 |
| 18.04.001 | 2306 |
Note R8 just stands for “double precision” so if you see the version 17.06.007-R8 that’s the double precision version of 17.06.007.
To see the version you have installed:
$ starccm+ -version
Simcenter STAR-CCM+ 2020.1 Build 15.02.007 (linux-x86_64-2.12/gnu7.1-r8 Double Precision)
In order to see what version your sim file was created with run:
$ starccm+ -info simfile.sim

STAR-CCM+ 15.02.009 (linux-x86_64-2.12/gnu7.1) Serial 781.99 MB
AWS ParallelCluster Config file
HeadNode:
  InstanceType: c6a.2xlarge
  Ssh:
    KeyName: keypair
  Networking:
    SubnetId: subnet-12345678
  LocalStorage:
    RootVolume:
      VolumeType: gp3
  Iam:
    AdditionalIamPolicies:
      - Policy: arn:aws:iam::aws:policy/AmazonSSMManagedInstanceCore
  Dcv:
    Enabled: true
Scheduling:
  Scheduler: slurm
  SlurmQueues:
    - Name: compute
      ComputeResources:
        - Name: compute-hpc6a48xlarge
          MinCount: 0
          MaxCount: 64
          InstanceType: hpc6a.48xlarge
          Efa:
            Enabled: true
      Networking:
        SubnetIds:
          - subnet-12345678
        PlacementGroup:
          Enabled: true
      ComputeSettings:
        LocalStorage:
          RootVolume:
            VolumeType: gp3
  SlurmSettings:
    EnableMemoryBasedScheduling: true
Region: us-east-2
Image:
  Os: alinux2
SharedStorage:
  - Name: FsxLustre0
    StorageType: FsxLustre
    MountDir: /shared
    FsxLustreSettings:
      StorageCapacity: 1200
      DeploymentType: PERSISTENT_2
      DataCompressionType: LZ4
      PerUnitStorageThroughput: 250