FSx Lustre as a Cache for S3 🗃️
Overview
FSx Lustre is a powerful filesystem for workloads that require low-latency, parallel access, however this comes at a cost, sometimes 5 x greater than S3. To avoid paying to keep all your data in Lustre, you can setup a link between S3 and FSx Lustre. When data is requested it’s pulled from S3 and “cached” in Lustre and when it’s no longer needed it’s evicted from Lustre and the only copy sits in S3. An example of how this saves money is as follows:

In this example, a cost savings of 60% is achieved by reducing the size of FSx Lustre from 20 TB to 5 TB. In your case the size of the fast scratch could be even less. I suggest using a rough rule of thumb that 10% of total data needs to be in lustre. You can always increase this amount if you see lots of cache misses.
To achieve even greater cost savings you can combine this with Intelligent Tiering (IA) from S3. This moves data that’s not frequently accessed to less expensive S3 storage tiers. The data can still be moved back from these storage tiers into Lustre when needed.
Setup
-
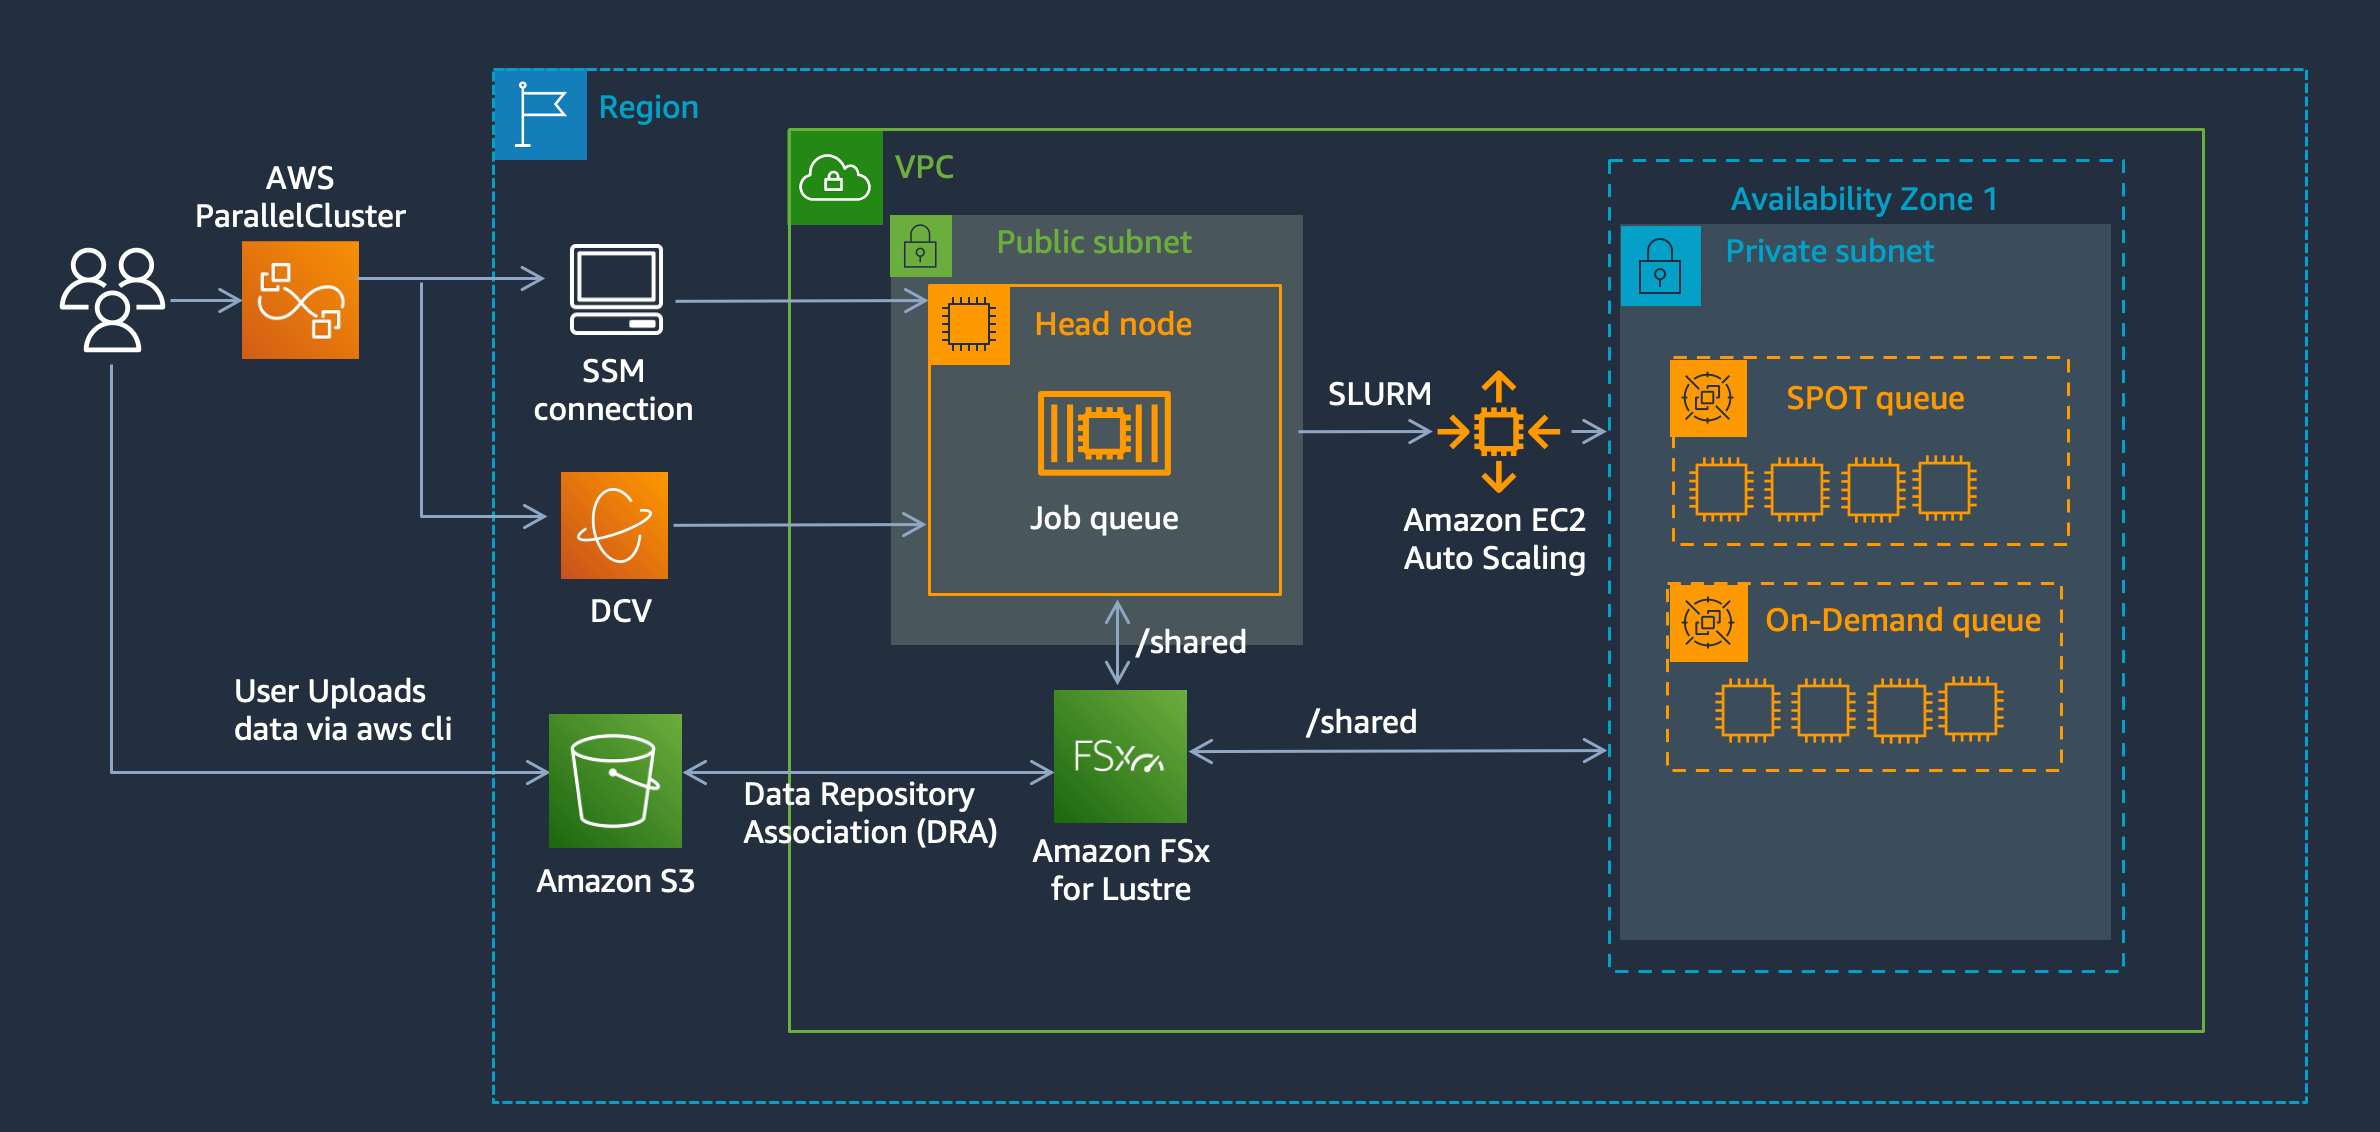
Setup a cluster with a FSx Lustre PERSISTENT_2 filesystem and link it to S3 following my previous blogpost.
-
Next update the HeadNode to allow the S3 access by adding the policy
arn:aws:iam::aws:policy/AmazonS3ReadOnlyAccess:ParallelCluster UI:

or via the CLI:
Iam: AdditionalIamPolicies: - Policy: arn:aws:iam::aws:policy/AmazonS3ReadOnlyAccess ... -
Next download the script cache-eviction.sh to remove files from lustre when the filesystem reaches a certain threshold:
cd /opt/parallelcluster/shared wget https://swsmith.cc/scripts/cache-eviction.sh chmod +x cache-eviction.sh -
Install
boto3and run the script to validate it works:pip3 install boto3 ./cache-eviction.sh -mountpath /shared -minage 30 -minsize 2000 -bucket spack-swsmith -mountpoint /sharedParameter Description -mountpath Path to where the filesystem is mounted. -mountpoint Path to where the Data Repository (DRA) is linked. -minage Age in days of files to consider for eviction. -minsize Age in Bytes of files to consider for eviction. -bucket Bucket that’s linked to the filesystem. -
Next setup a crontab on the HeadNode to automatically evict filesystem content when you hit a certain threshold. This script runs every hour on the 00:05 and evicts files that haven’t been accessed in the last 30 days (atime) and are > 2 MB in size. Feel free to customize the parameters to suit your needs.
5 * * * * /opt/parallelcluster/shared/cache-eviction.sh -mountpath /shared -mountpoint /shared -minage 30 -minsize 2000 -bucket bucketAs a reminder, there’s three different timestamps associated with a file, in the script we use atime:
Time Description ctime The last time the file’s inode was changed (e.g. permissions changed, file renamed, etc..) mtime Last time the file’s CONTENTS were changed. atime Last time the file was accessed.
Monitoring
The script creates a file /tmp/FSx-Cache-Eviction-log-[date].txt, you can tail that file to see if it’s evicting data from the filesystem:
tail -f /tmp/FSx-Cache-Eviction-log-[date].txt
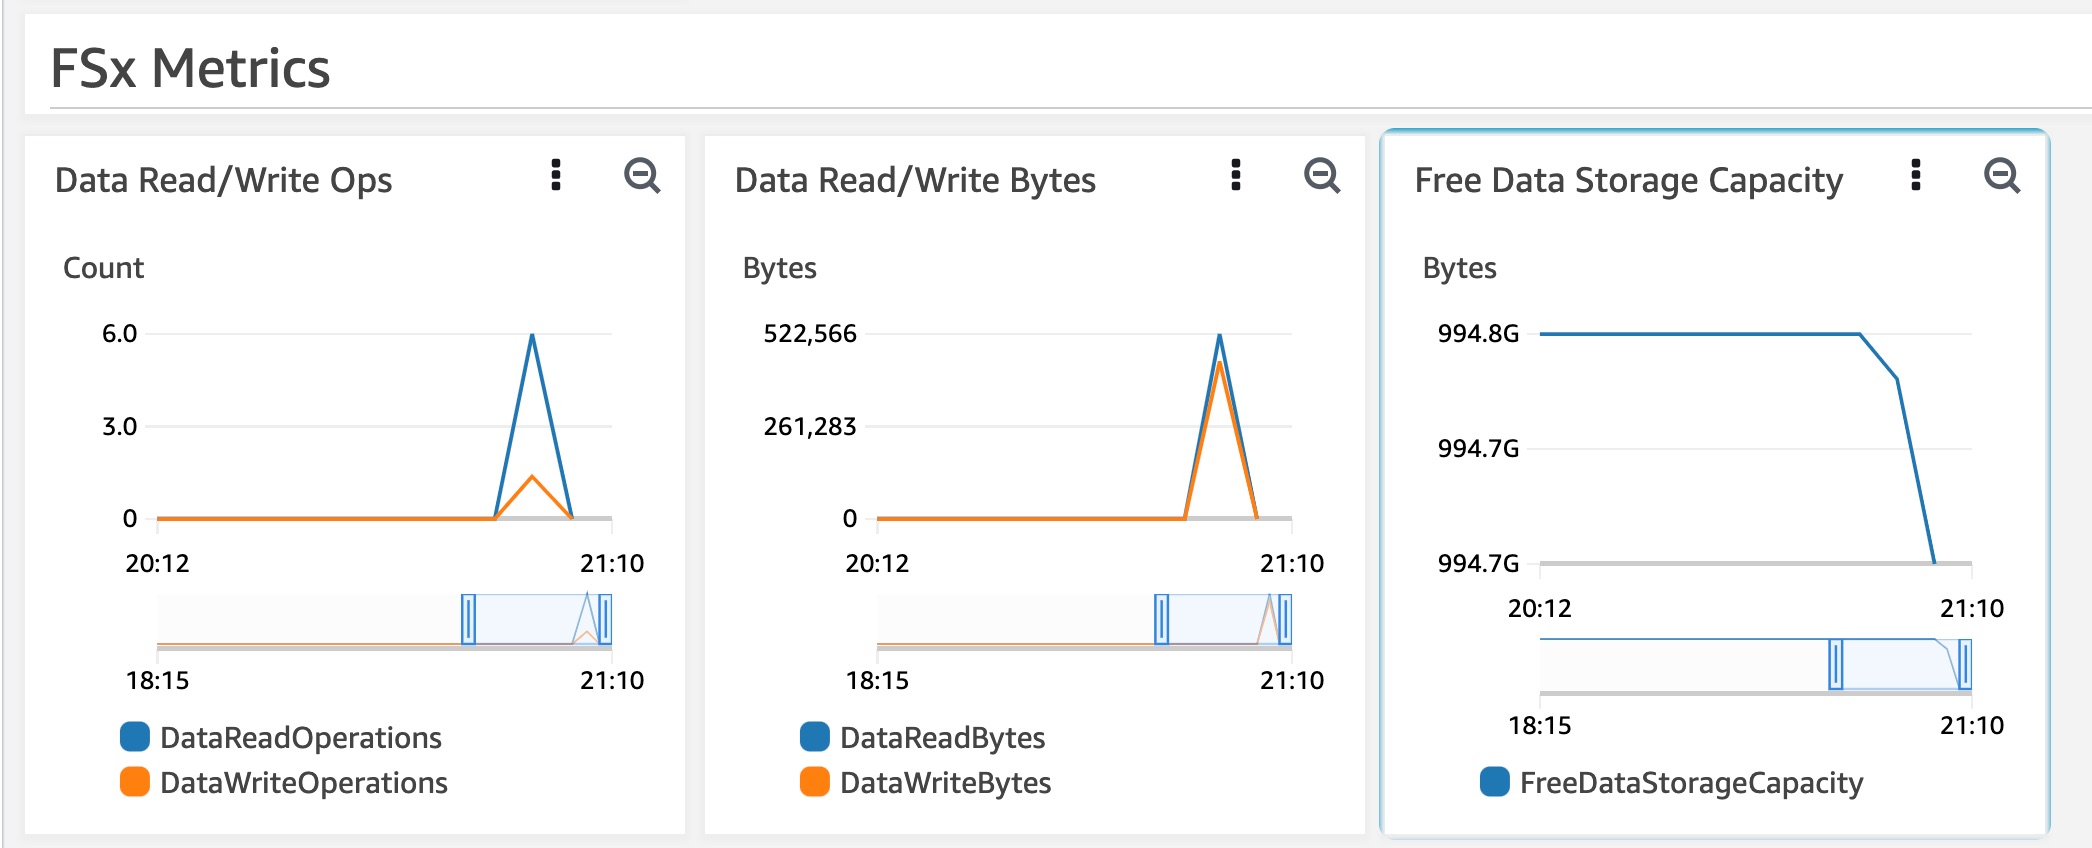
In addition, you can monitor the size of your filesystem on the AWS ParallelCluster Metrics Dashboard.
Testing
To test this we’ll create a bunch of dummy data using ior, a filesystem testing tool. We’ll then run the cache eviction script and use CloudWatch Metrics to observe the decrease in filesystem size.
-
Install
ior:cd /shared wget https://github.com/hpc/ior/releases/download/3.3.0/ior-3.3.0.tar.gz tar -xzf ior-3.3.0.tar.gz cd ior-3.3.0/ ./configure make make install -
Run IOR to fill up the filesystem. In this example we write a total of
1.25TBof data. You can adjust the-sflag based on your filesystem size.threads=$(($(nproc --all) * 4)) mpirun --npernode ${threads} --oversubscribe ior -b 1m -c -k -o /shared/ior-data -s 81920 -t 1m -v -w -z -
Check the filesystem size. You’ll see we just filled up 90% of the filesystem and now need to evict some files:
$ df -h /shared 172.31.21.102@tcp:/ybajnbmv 1.1T 1.0T 1.1T 90% /shared -
Run the export script, you can change the
-minageto0so it evicts the large file we just created withior:/opt/parallelcluster/shared/cache-eviction.sh -mountpath /shared -mountpoint /shared -minage 0 -minsize 2000 -bucket bucket -
Check the filesystem size after the log file
/tmp/FSx-Cache-Eviction-log-[date].txtshows export complete.$ df -h /shared 172.31.21.102@tcp:/ybajnbmv 1.1T 200GB 1.1T 20% /shared