Static Websites with Hugo and Amplify ♥️

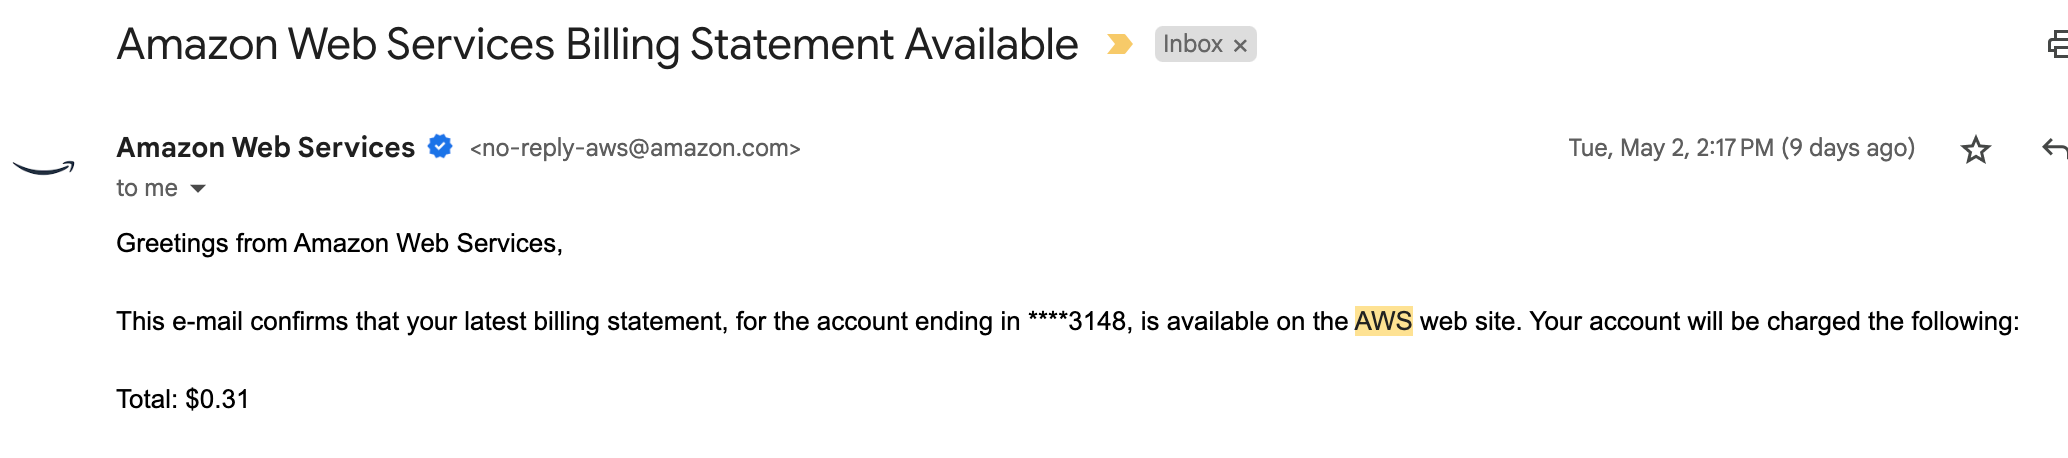
It should be no secret that I ♥️ Hugo and Amplify. Combined I’ve built out nearly a dozen websites using these tools, including hpcworkshops.com, pcluster.cloud, thefiftyproject.com and of course this website. These websites are hosted on AWS Amplify for a grand total of $.30/month with no server maintenance ever needed. Deployments are done using Github actions and new changes are automatically built and published when new commits are pushed to Github. Oh and all of this takes about 30 mins to setup, including TLS (https) certificates and Github integration. Need I say more? Proof of how cheap it is:
There’s three parts to the setup:
- Setup Hugo - this includes selecting the theme and making sure the site builds locally.
- Setup Amplify and Github - this hosts the website publicly and pulls any changes from Github
- Setup Custom Domain - this ensures your website is hosted with your own domain including TLS (https)
Ok! let’s get started.
Hugo Setup
-
First install hugo, on a mac you can do:
brew install hugo -
Next create a new hugo project and name it with the domain you plan to use, i.e.
example.com:hugo new site example.com cd example.com -
Next create a git repository and add a theme. You can browse themes here. The theme I use for this website is Archie Theme and in the past I’ve used Hugo Learn and hugo story. I highly recommend looking for a theme that’s popular (lots of github stars) as it’ll be easier to customize and better supported going forward.
git init
git submodule add https://github.com/athul/archie themes/archie
echo "theme = 'archie'" >> config.toml
We use Git Submodules to add the theme. This is really important to get right, git submodules allow you to include one git repo inside another but without including all the files individually. Think of this like a symlink to another directory, you can easily update the theme when a new version comes out by pulling the latest version. On Github this will show up like
name @ commitlike so: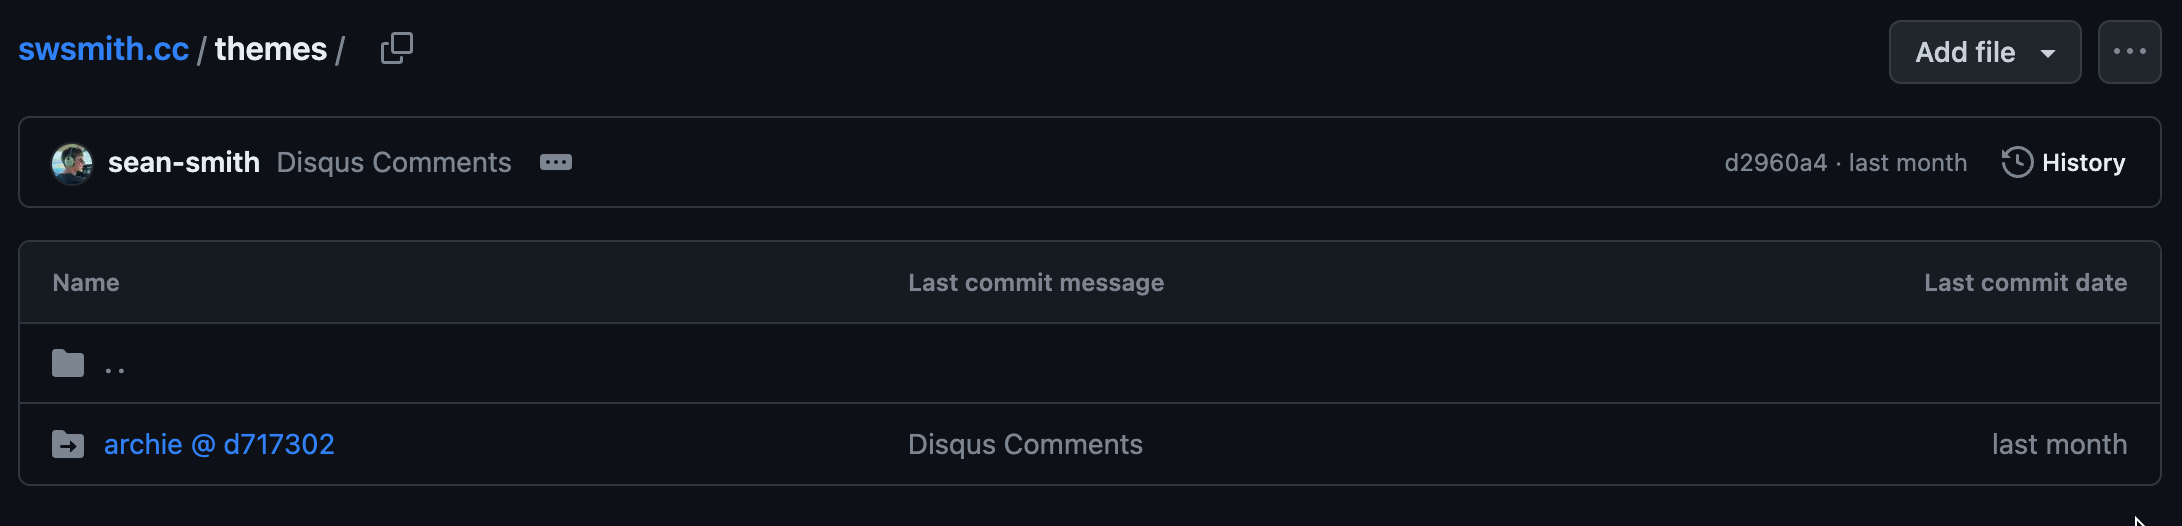
Since this is a bit tricky, I recommend reading about submodules to make sure you get it right. When done properly, the entire directory will show up in
git statusas a single file. -
Now that you’ve added the theme you can preview changes locally with:
hugo server -DYour content can now be viewed at http://localhost:1313. The page live-reloads when you make changes.
In the next section we’ll show you how to host your website with AWS Amplify so it can be viewed from anywhere.
Amplify Setup
-
First navigate to AWS Amplify console. If you don’t have an account you’ll need to create one.
-
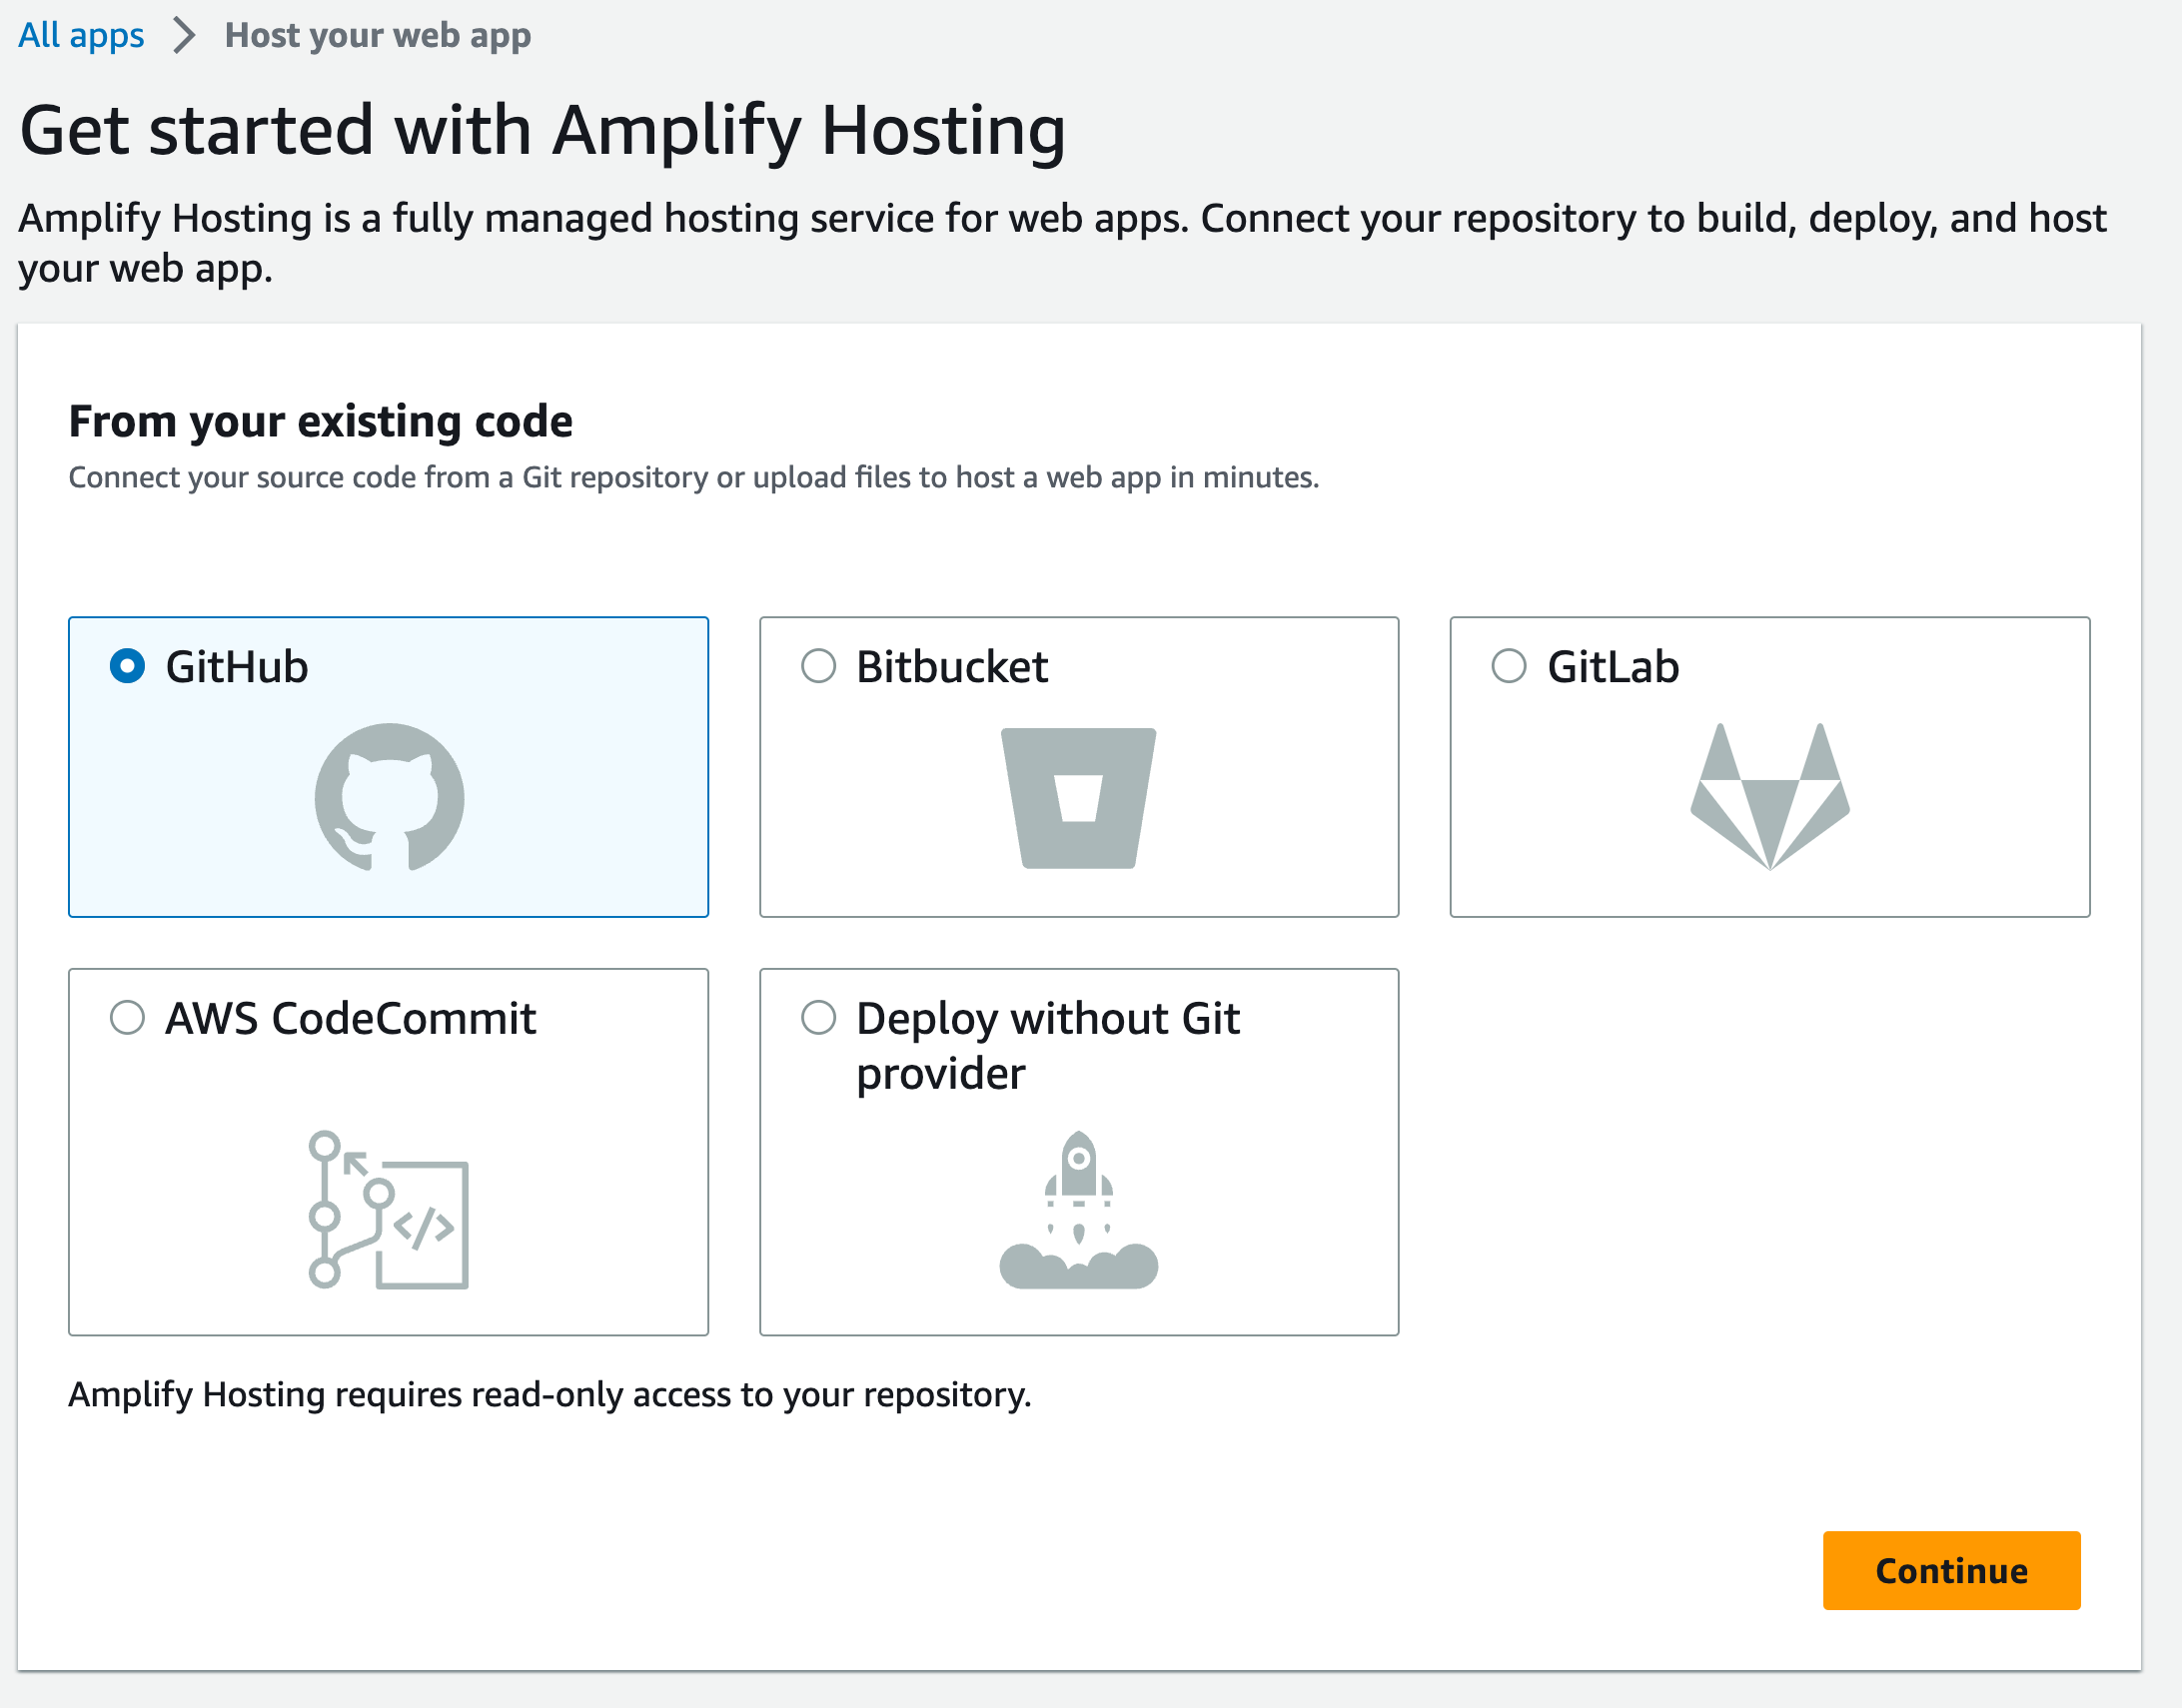
Select New app > Host a web app. Select Github as the source:
-
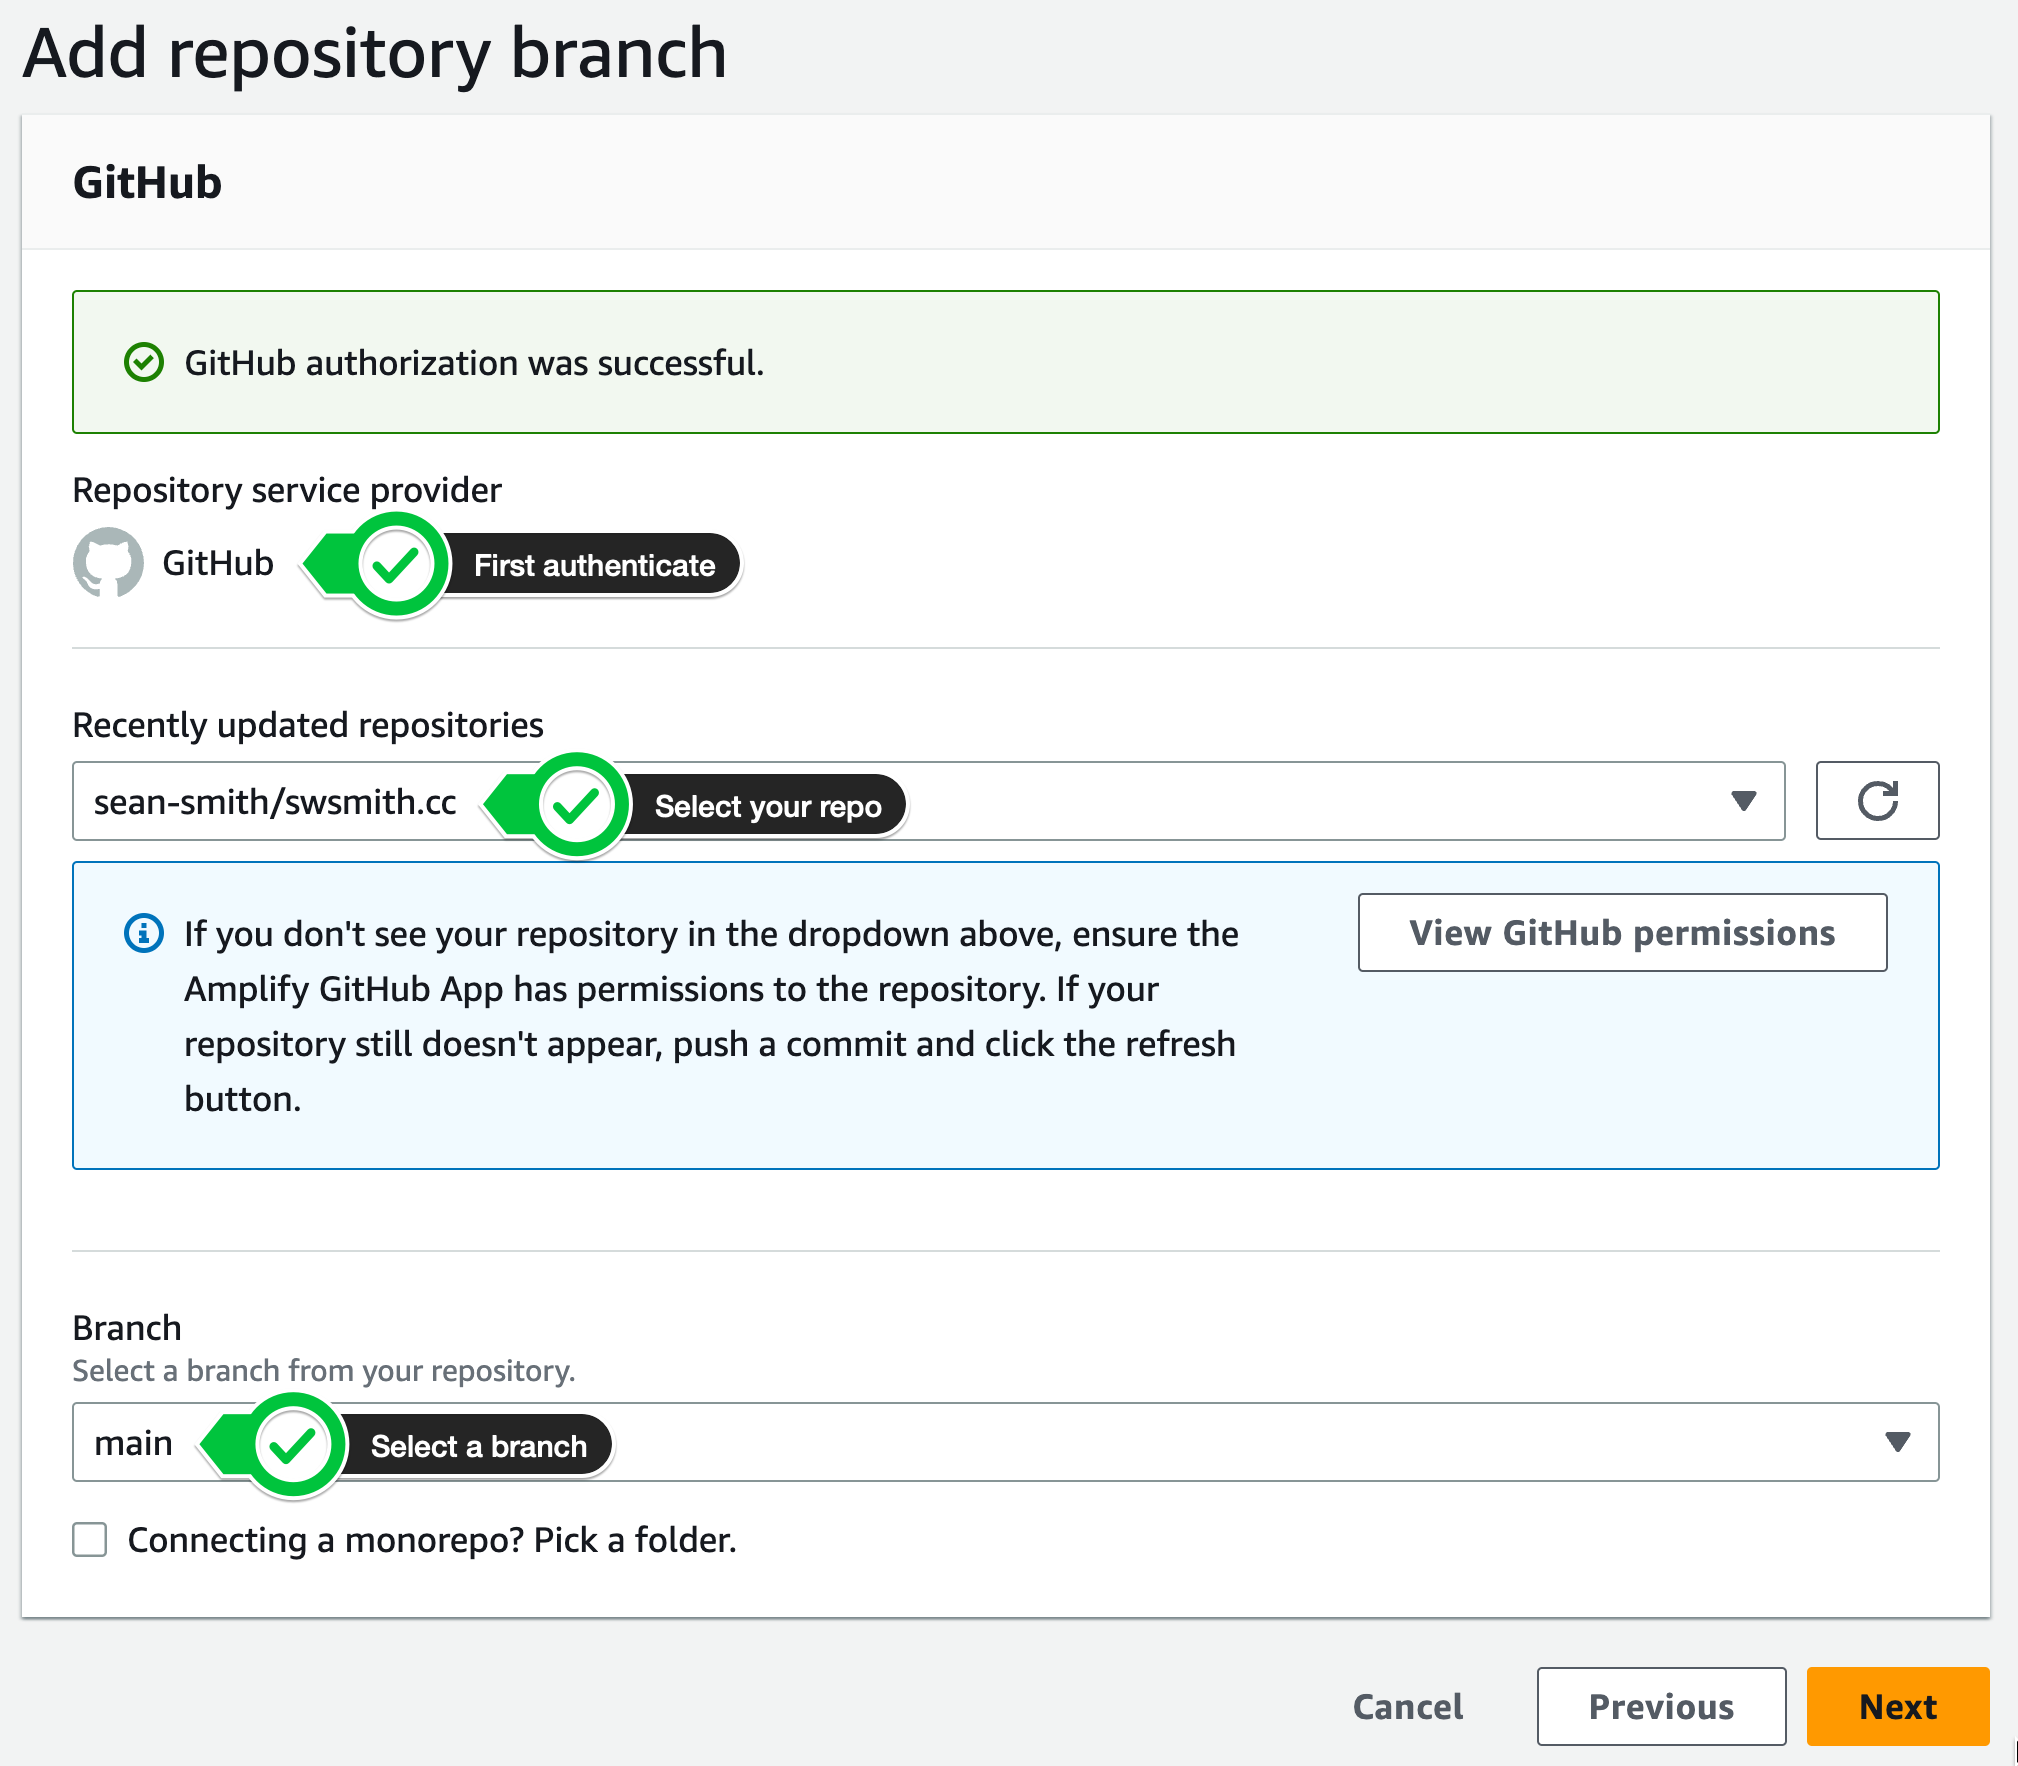
Next you’ll need to authenticate with Github, you’ll then be prompted to select a source repo. If you don’t have a Github repo already, go ahead and create one, it can start out empty. See Github Best Practices 🦸♂️ for tips on pushing to Github. I like naming the repos with the same domain as they publish too, i.e. the repo for this website is https://github.com/sean-smith/swsmith.cc.
-
Next amplify will attempt to auto-detect your build-settings. If you already have a hugo site setup, it’ll correctly populate the build settings. If not you can use the following snippet to correctly setup the build.
version: 1
frontend:
  phases:
    build:
      commands:
        - hugo
  artifacts:
    baseDirectory: public
    files:
      - '**/*'
  cache:
    paths: []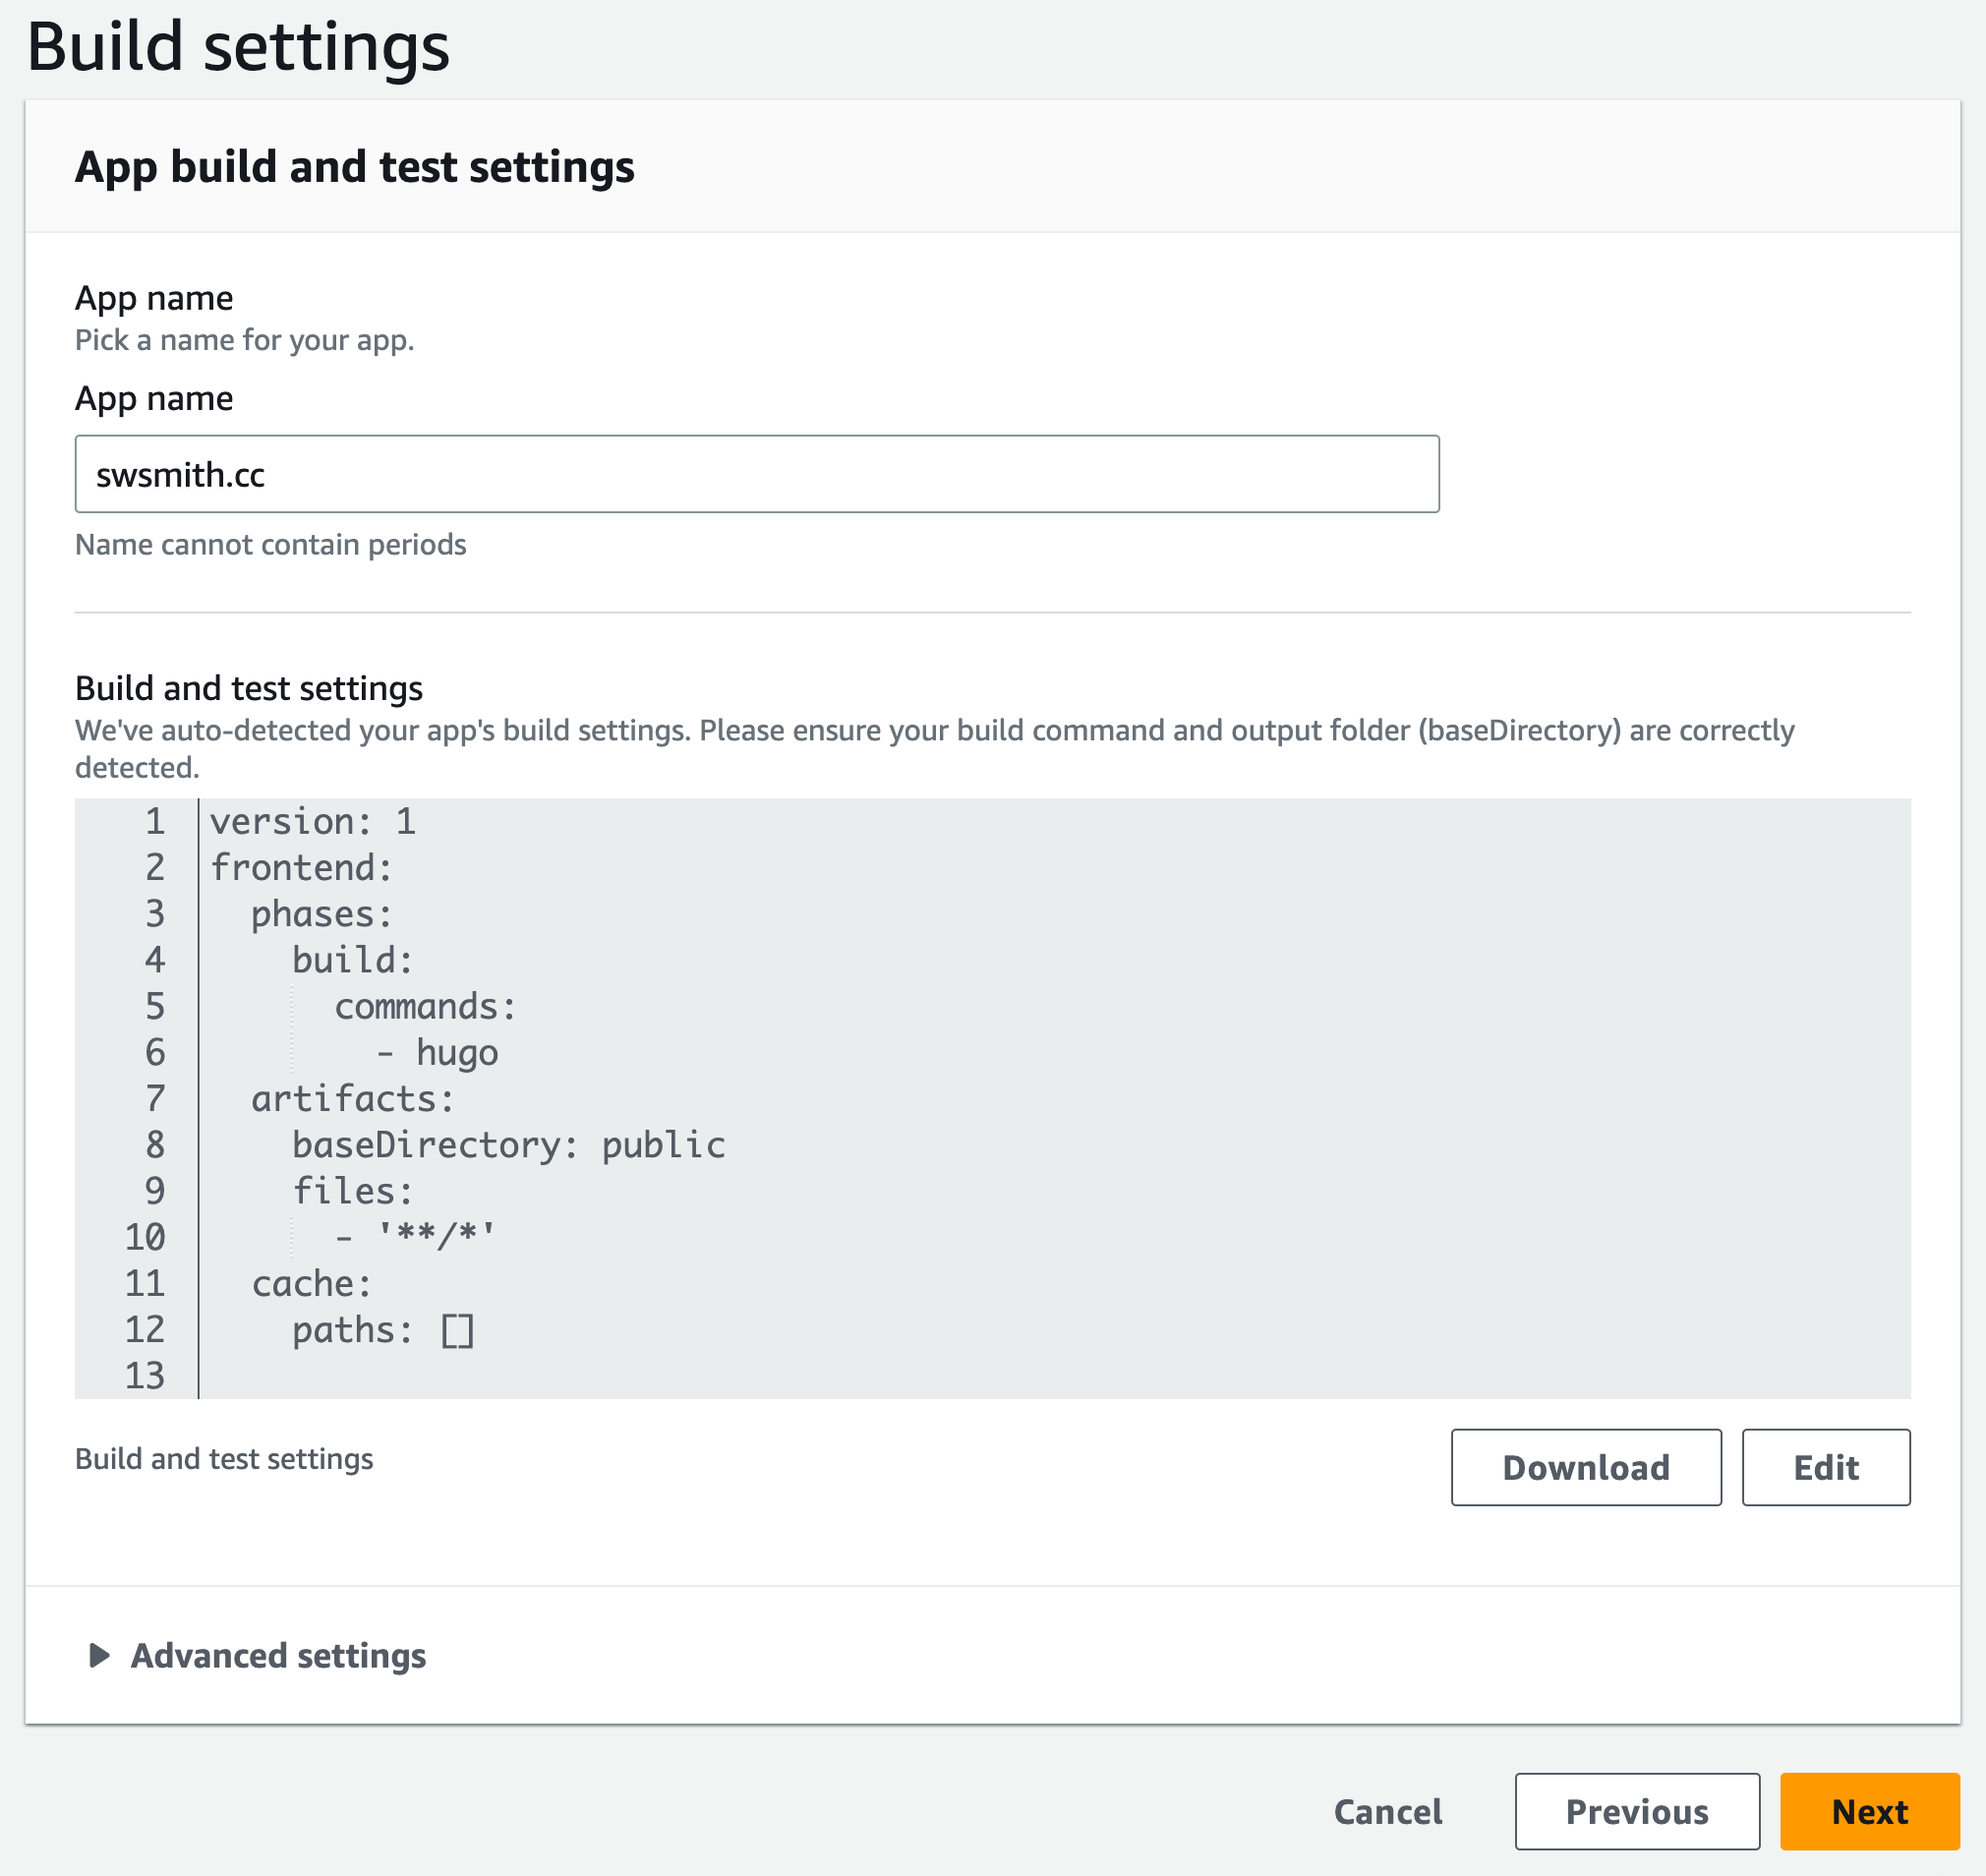
-
Next click Review and then Save and deploy
-
After a little bit your website will be available at a url like:
https://main.d1m7bkiki6tdw1.amplifyapp.comIn the next section we’ll show you how to setup a custom domain and TLS (https) certificate.
Setup Custom Domain
-
Go to Domain management > Add domain on the left hand side of Amplify.
-
Type the domain you own, if you need to register a domain, I suggest using Namecheap. I’ve been using them for 8 years and have had no problems. Click Configure domain, then save.
-
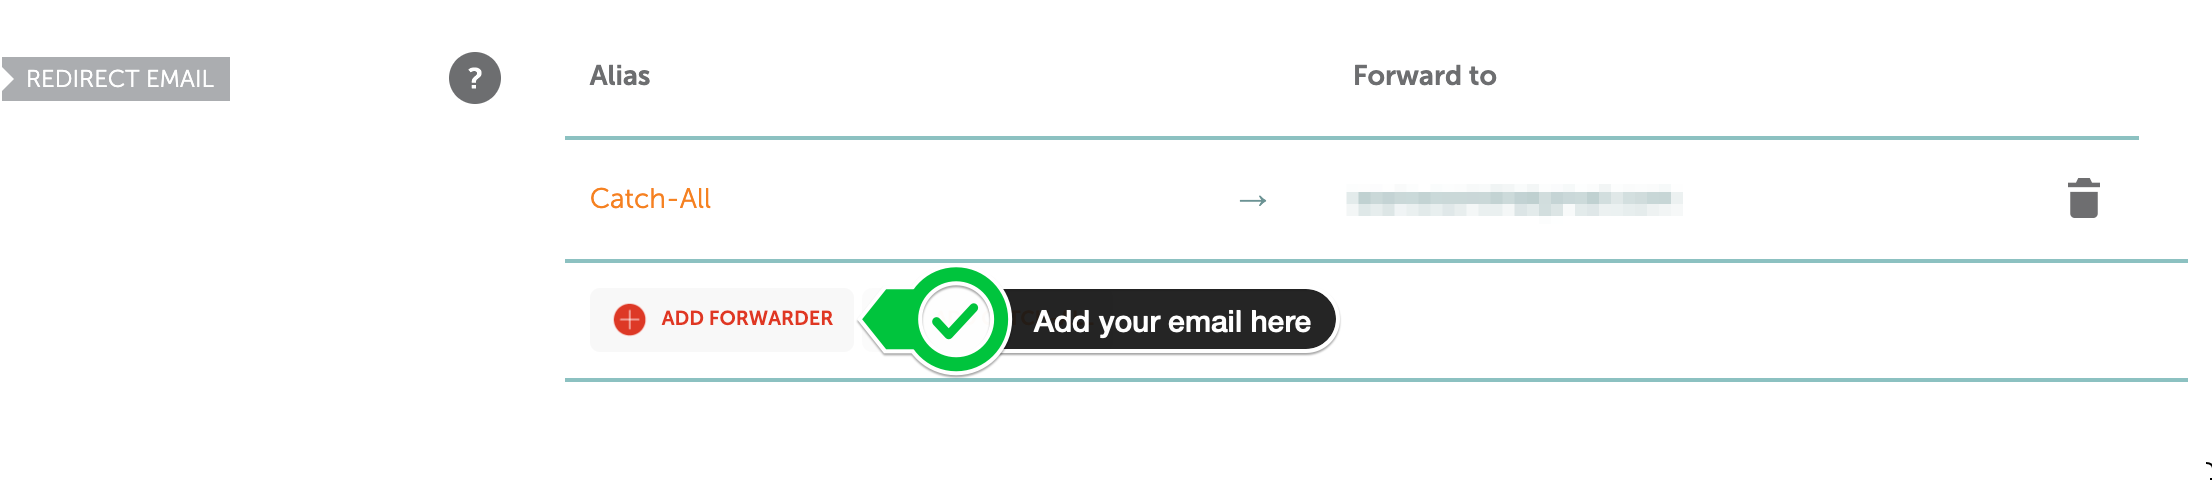
Next you’ll need to verify the domain in order to get a TLS certificate. To do this you can either use email verification or DNS verification. I usually use email verification and have found it to be a bit simpler. Make sure you have email forwarding setup with your domain registrar, for namecheap I set this up like so:
You’ll then receive an email from
no-reply@certificates.amazon.comthat looks like: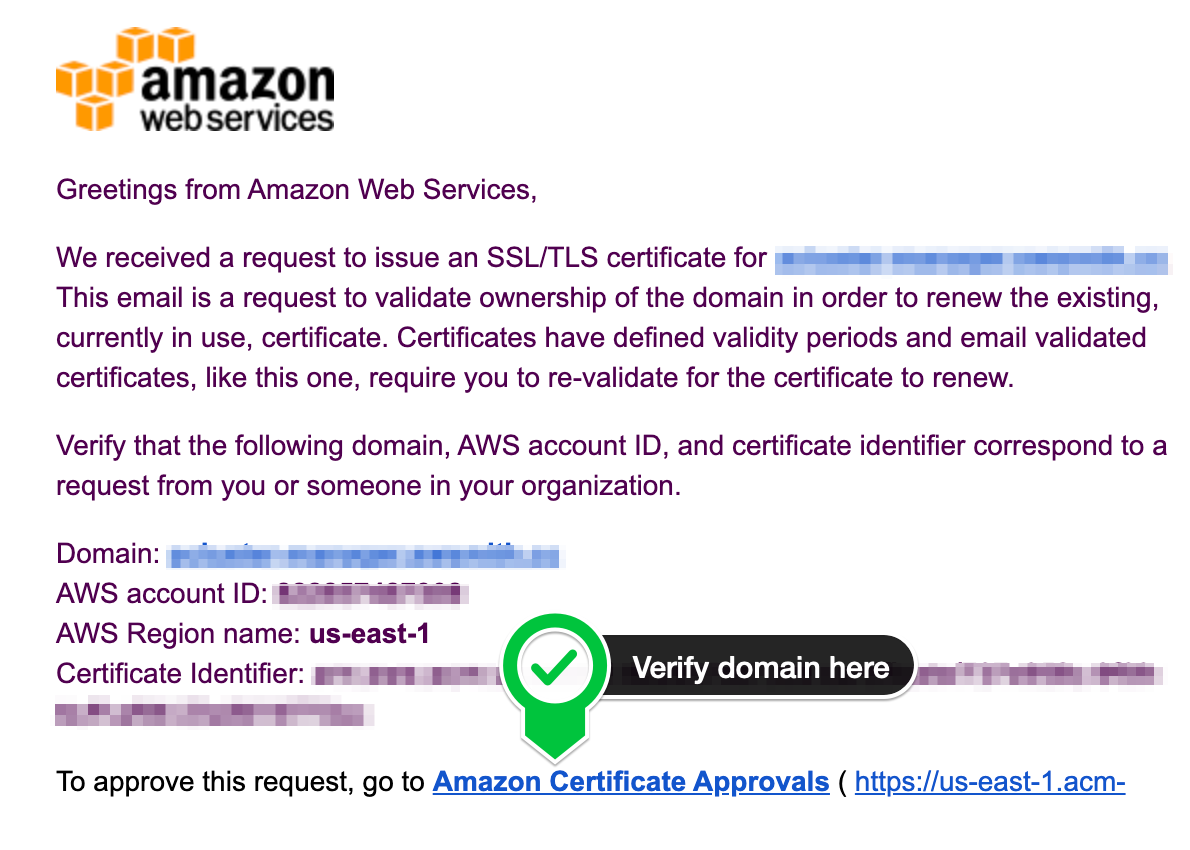
Click on the link at the bottom to verify you own that domain.
-
After that you’ll need to setup the DNS records. The first record (CNAME) is if you wanted to use DNS verification instead of email verification, the second record is what sets up the domain to point to your amplify distribution. ANAME is just fancy way of specifying a CNAME record that points to the root (i.e.
@) domain. If you don’t have ANAME as a option, just use CNAME. You’ll get the exact records for your domain from Amplify, the following are just examples:DNS Record Type Value _5137353d51f71ff95b58784d3e90db9a CNAME _1b13cb0a6a0d9e116eb58afe63b86aea.rdnyqppgxp.acm-validations.aws. @ ANAME d2m437qjvig5d8.cloudfront.net After about 5 minutes you should be able to visit your domain using https and see the same content you saw on the ugly amplify url, i.e.
https://example.comis the same ashttps://main.d1m7bkiki6tdw1.amplifyapp.com.